How to deploy the SmartFabric OMNI plugin in VMware vSphere Step 3

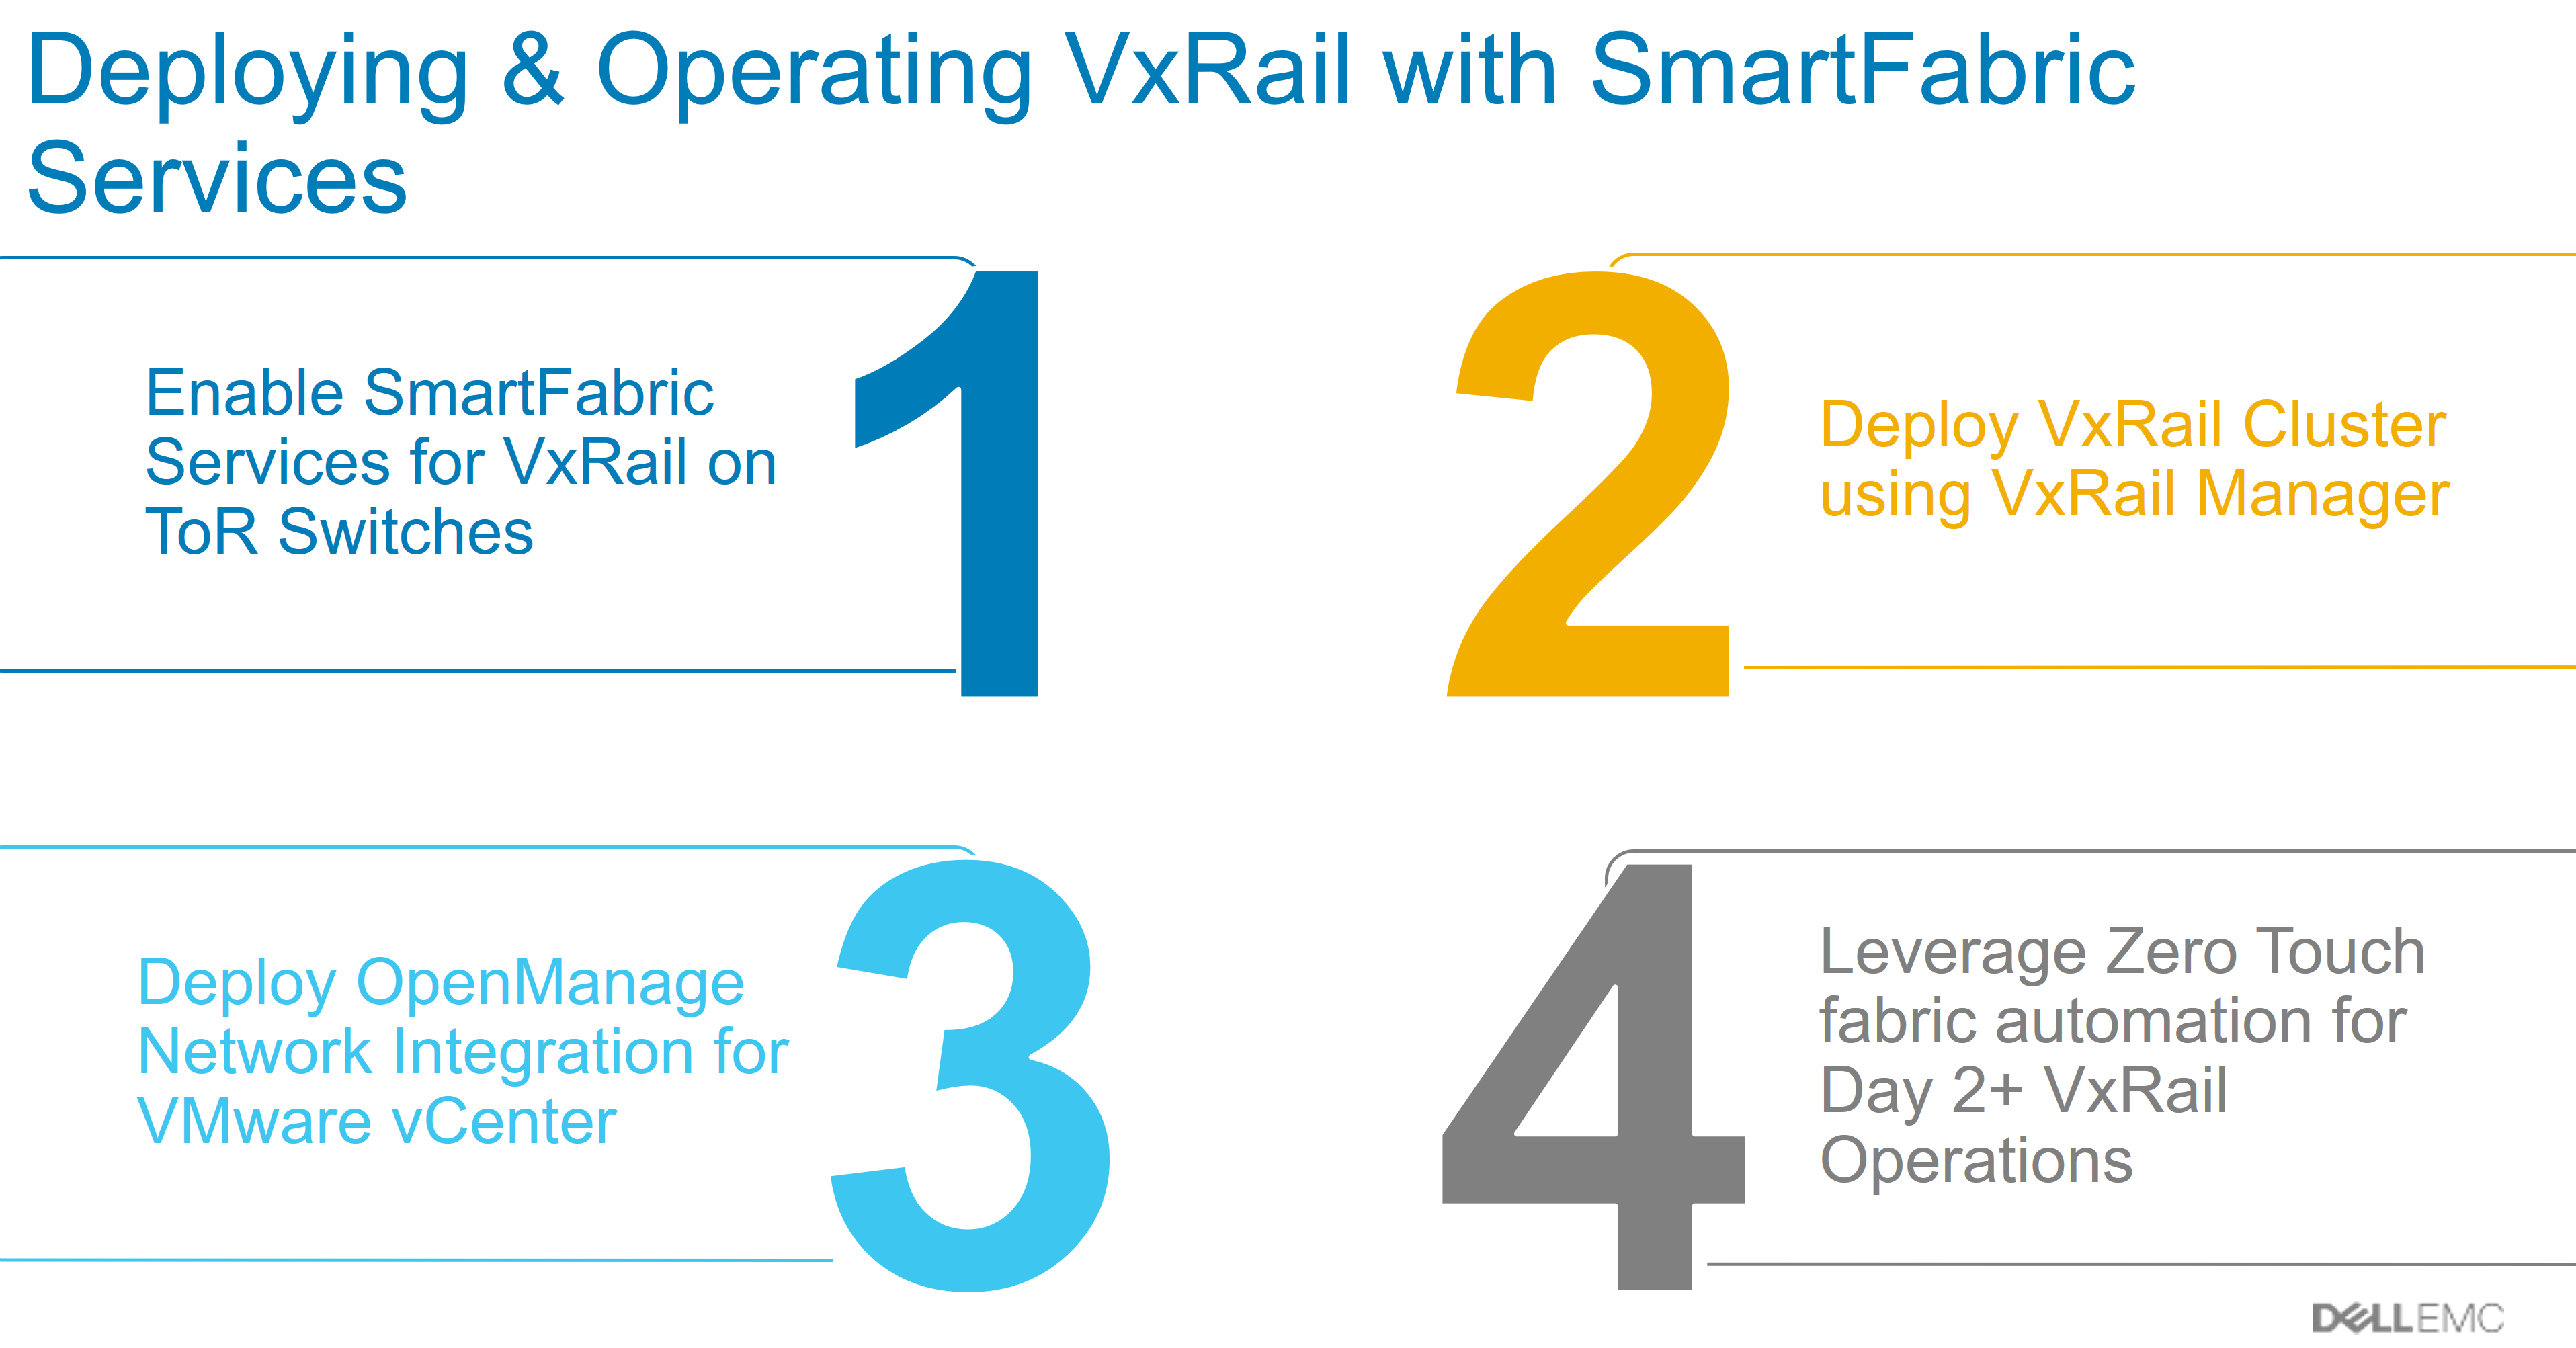
Step 1: Enable SmartFabric Services on the ToR Switch

Step 2: Deploy VxRail Cluster incl. ToR with VxRail Manager

Step 3: Deploy the SmartFabric OMNI plugin in VMware vSphere

EXTRA STEP Added Feb. 2020. See Below in yellow.

Next Blog : Step 4: Virtualization engineer controls Day 2 Ops for the Full Stack

Installing the SmartFabric OMNI plugin

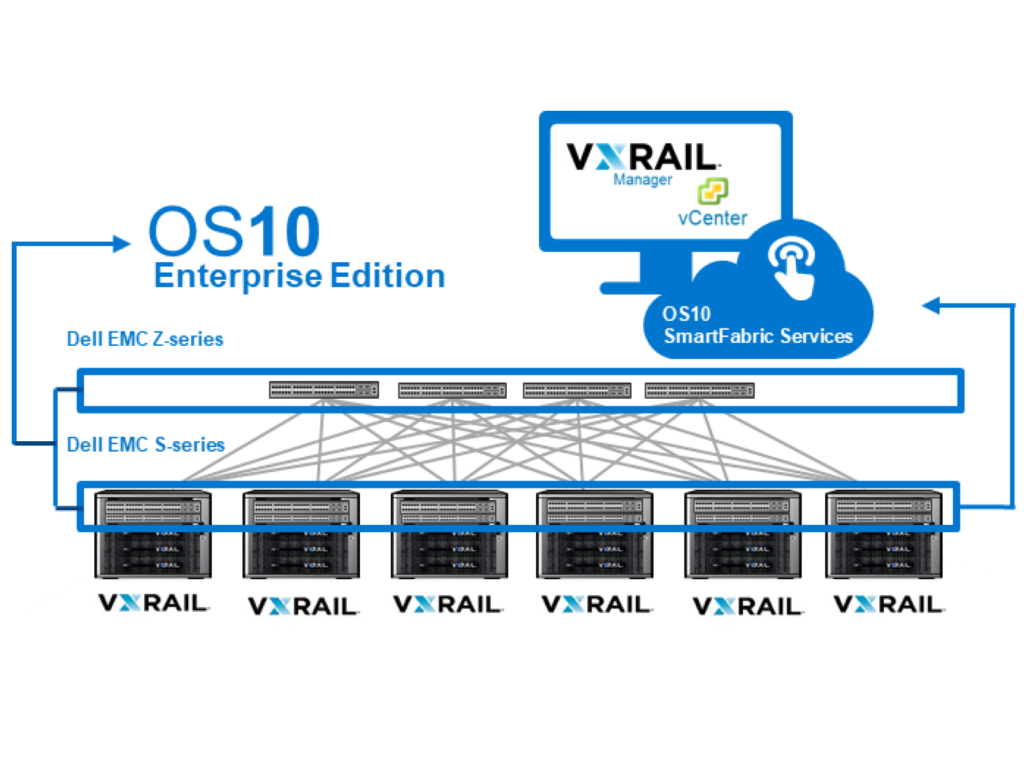
At this point we have already run the first two steps to get SmartFabric installed, our Switches have SmartFabric services enabled and the VxRail Manager Gui deployment has automatically configured the switch and disabled the CLI. Now we will add the Open Manage Network Integration or SmartFabric OMNI plugin to vSphere, giving the virtualization engineer full visibility and control of the dedicated HCI switch fabric.

Download the OMNI plugin VM

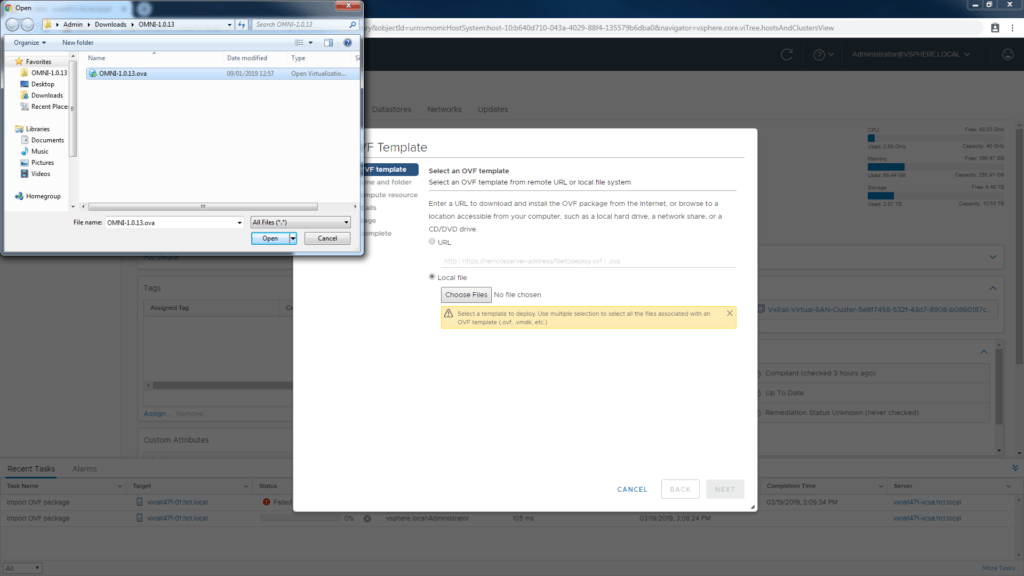
We begin by deploying the OMNI VM ova, which is available from VMware Solution Exchange here. It seems to bounce you now to the Dell Support site where you can get the latest version here. As of June 2019 the latest version is 1.1.18.
Deploy the OVA

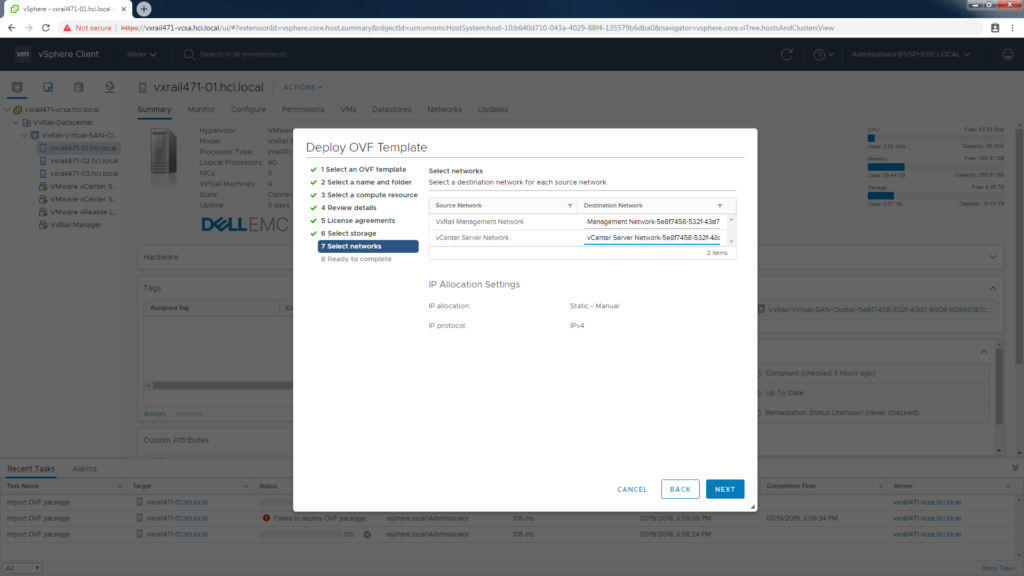
These steps are straightforward. Isn’t great that we can do the OVA deployment thru the HTML5 interface? Be sure to match up the source and destination networks correctly at Step 7 in the process. Later on we will configure an ipv4 address on vCenter network and enable ipv6 on the MGMT network.
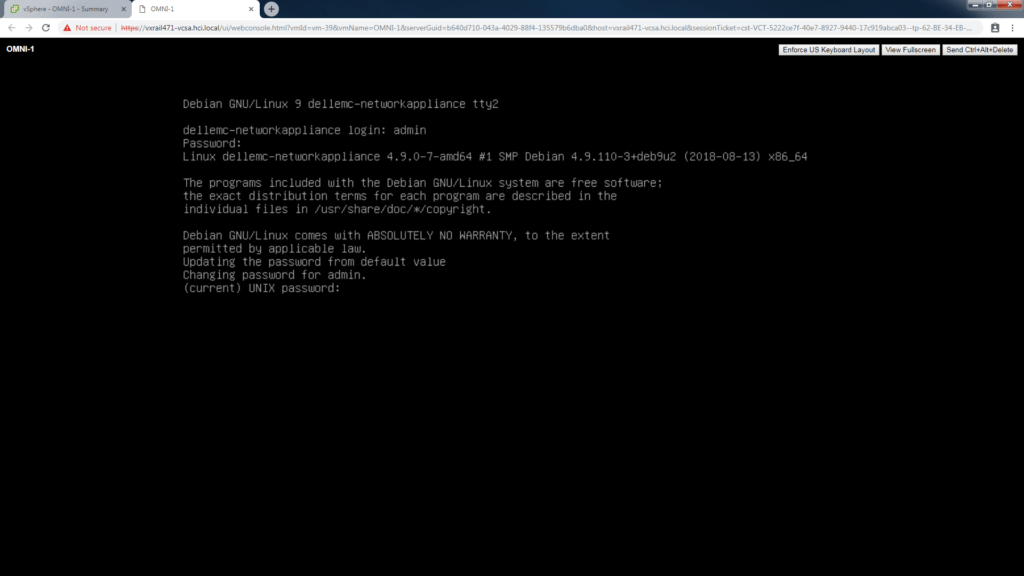
Power on the VM and connect to a console on the OMNI vm. You need to establish a password here for the admin user. The default username and default password is setup as admin / admin.
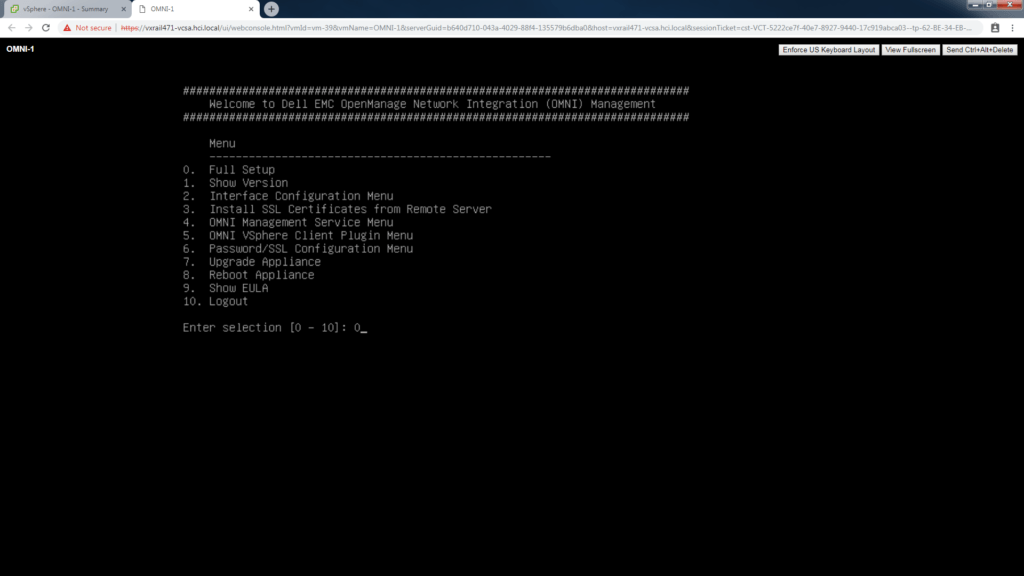
Configure the OMNI appliance

Since this is a first run deployment, we are going to select option “0. Full Setup” at the Menu. As you can see you can re-run and do other admin tasks later if required from this interface.
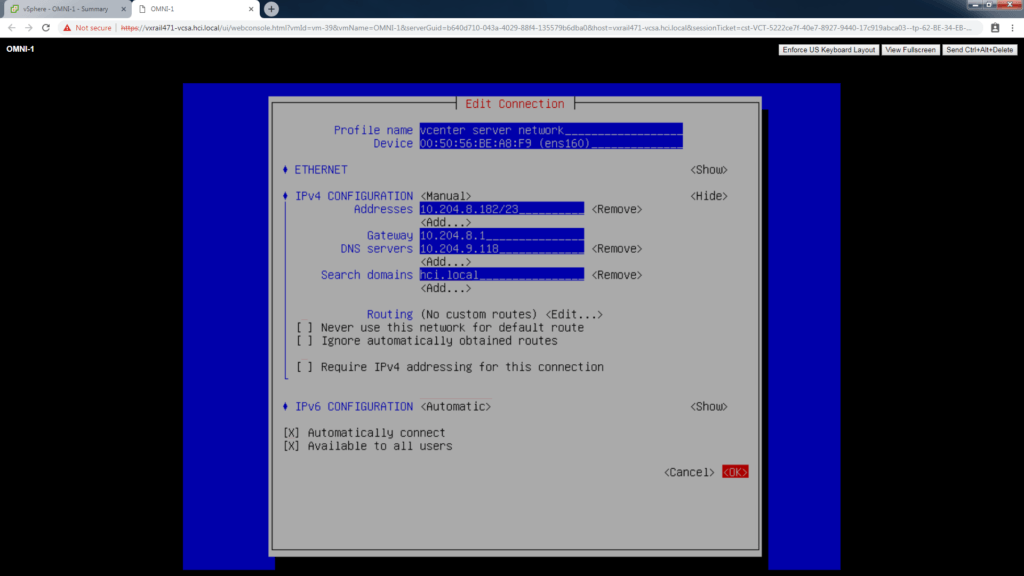
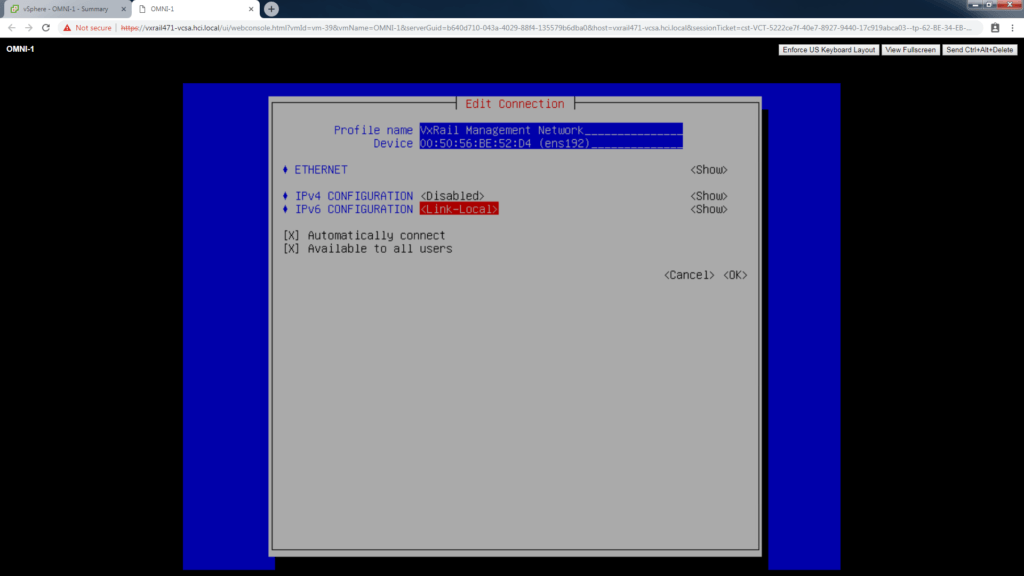
Before we active the first connection, we will setup the Profile name “vCenter Server Network” and assign a valid ipv4 address for the OMNI VM here.
The second connection is for ipv6 discovery on the VxRail Management network, no ipv4 address needed here, set to disabled.

Set IPv6 Config to “Link-Local”.
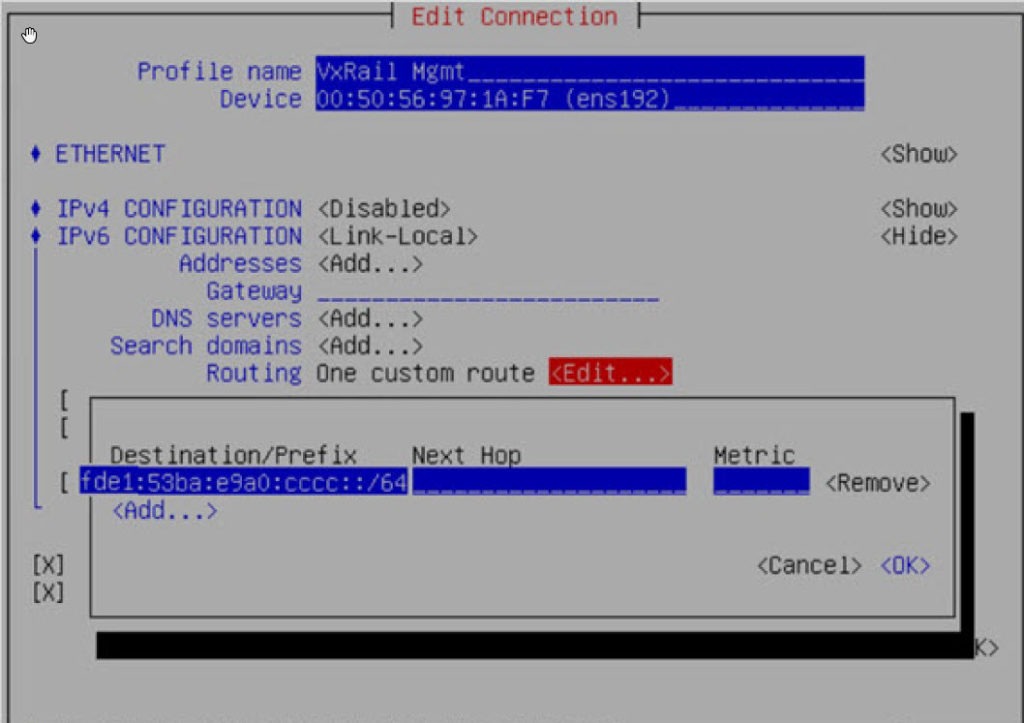
EXTRA STEP Added Feb. 2020.

Navigate to Routing and select Edit. Select Add.

For “Destination/Prefix” enter “fde1:53ba:e9a0:cccc::/64”.

Leave “Next Hop” empty, Leave”Metric” default of 0. Click OK
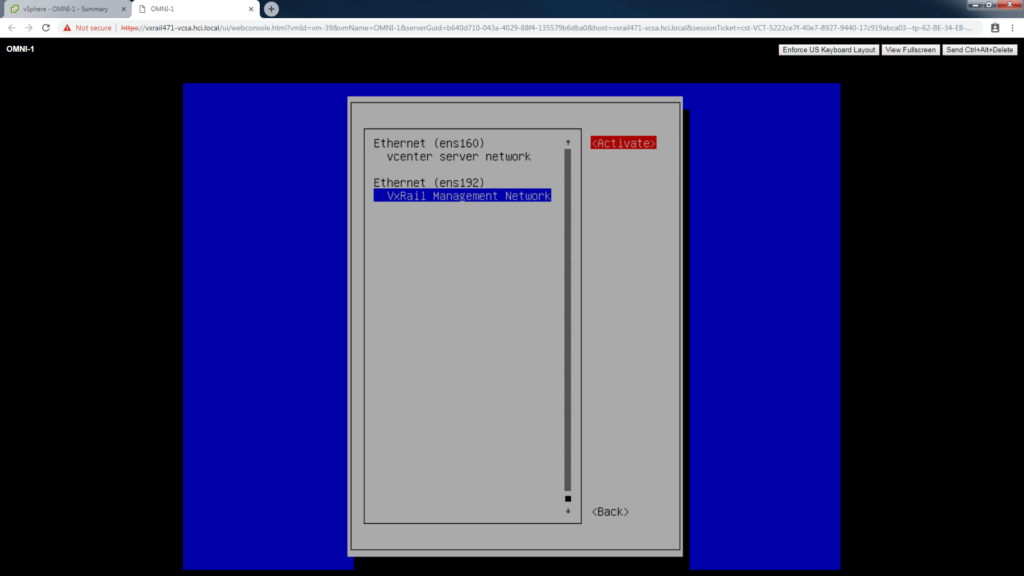
Be sure to activate both networks on the last screen.
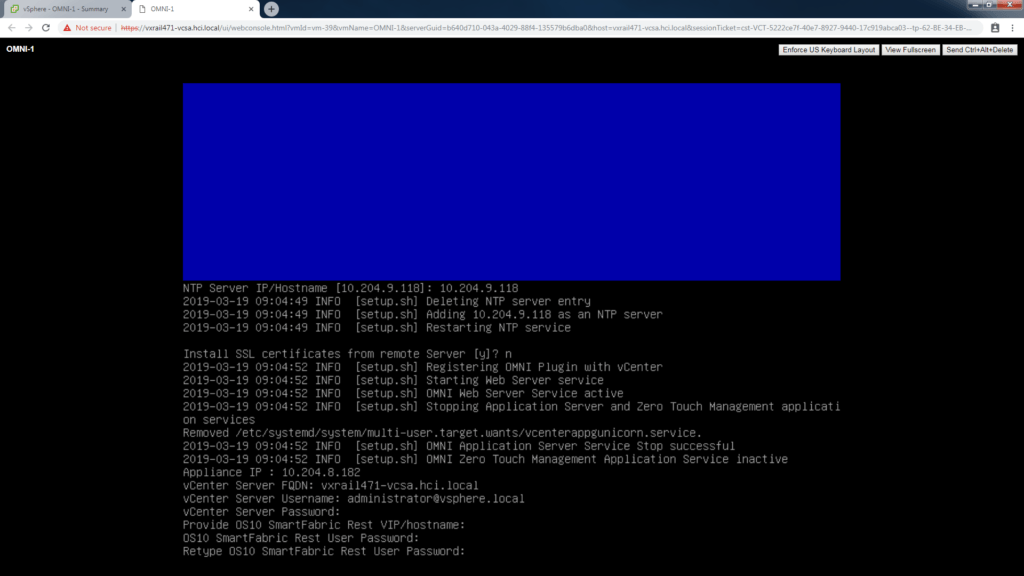
You will be prompted at the CLI again for NTP, SSL Cert, the appliance ip address, FQDN for VCSA, VC Username and Password, and finally the OMNI ip for REST and REST username and password.
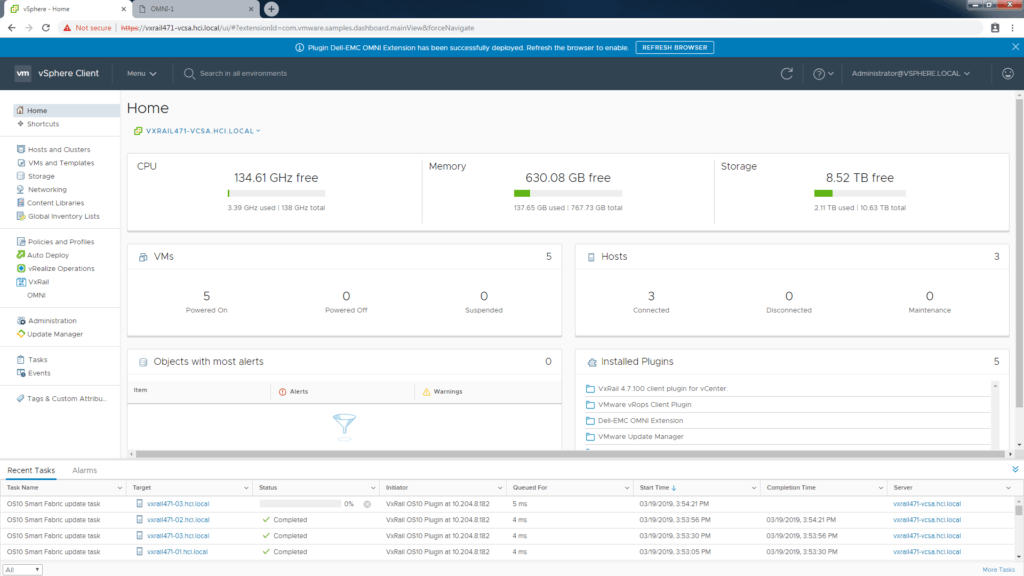
Log in and out of vSphere and the OMNI plugin will appear.
How to deploy SmartFabric for VxRail Step 2

Step 1: Enable SmartFabric Services on the ToR Switch

Step 2: Deploy SmartFabric VxRail Cluster incl. ToR with VxRail Manager

      • Connect VxRail nodes to deploy SmartFabric enabled Switches
      • Power on first 4 VxRail nodes
      • Deploy SmartFabric VxRail thru the VxRail Manager GUI
      • Sit Back and Relax while VxRail Manager fully automates Bring Up of the entire Hyperconverged Stack (Compute, Storage AND the Network!)

Next Blog: Step 3: Deploy the OMNI plugin in VMware vSphere

Step 4: Virtualization engineer controls Day 2 Ops for the Full Stack

Beginning the VxRail GUI deployment

Connect the VxRail nodes to deploy SmartFabric enabled switches. Power on the nodes. Connect the laptop to the first port (port 1 only!) in the SFS switch. This is the “jump port” and will allow access to the default ip address [https://192.168.10.200] of the VxRail Manager VM. The VxRail Manager VM is already deployed in the appliances in factory.

VxRail Manager GUI install
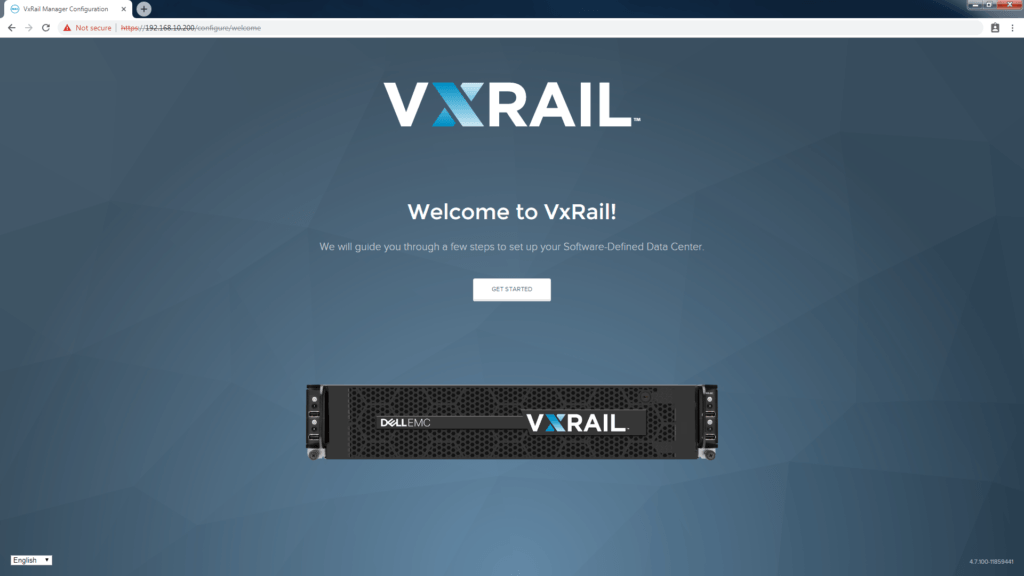
The Vxrail Manager GUI interface used to deploy a new cluster.

VxRail will deploy SmartFabric now

Since VxRail version 4.7.100 there is now the ability for the GUI driven VxRail Manager install to detect Dell EMC SmartFabric enabled switches. This automates configuration of the switches during the full stack deployment.

deploy SmartFabric
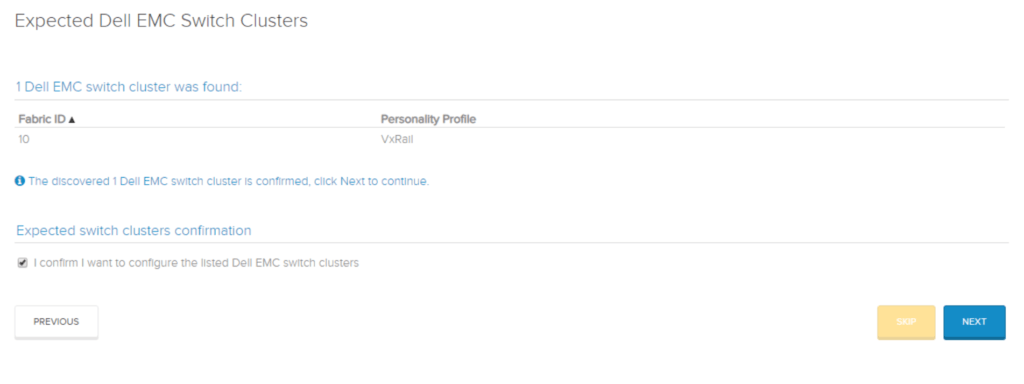
Here we can see that VxRail Manager has detected a Smart Fabric is available to configure thru VLAN 3939 the discovery VLAN for nodes and switches.

Setup the REST user to deploy SmartFabric

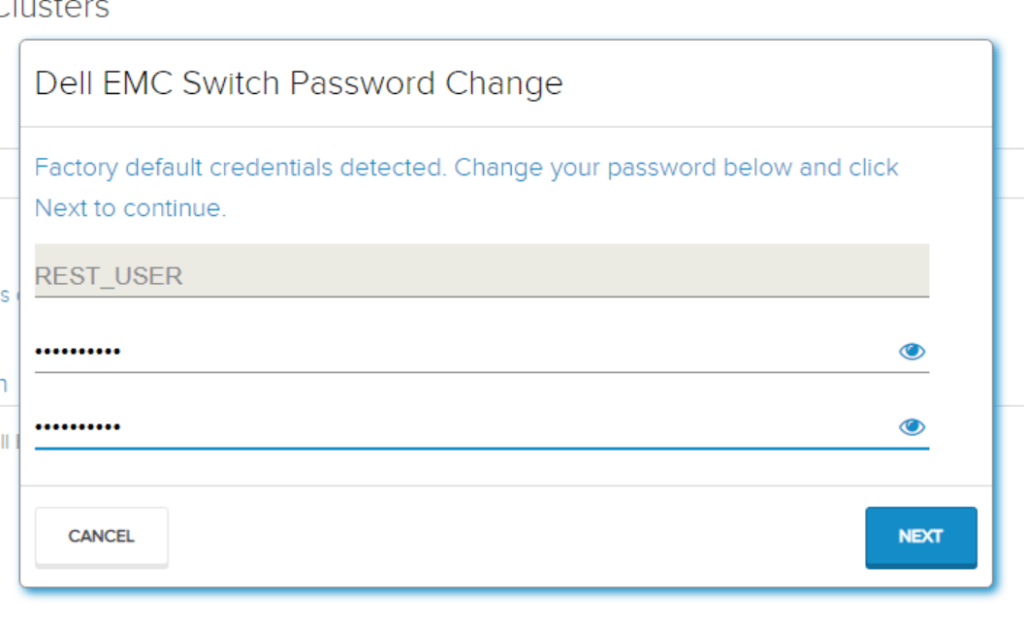
When the installer selects to deploy SmartFabric switches the next step will be to configure the Rest User account on the SFS enabled switch. If its a first run, a new password will be created. If you are setting up a second VxRail cluster into an existing SmartFabric, then the current password will be requested. The Rest User account will be documented in the Pre-Install Checklist by the installer.

Setting REST User password
The REST user account needs a password set.

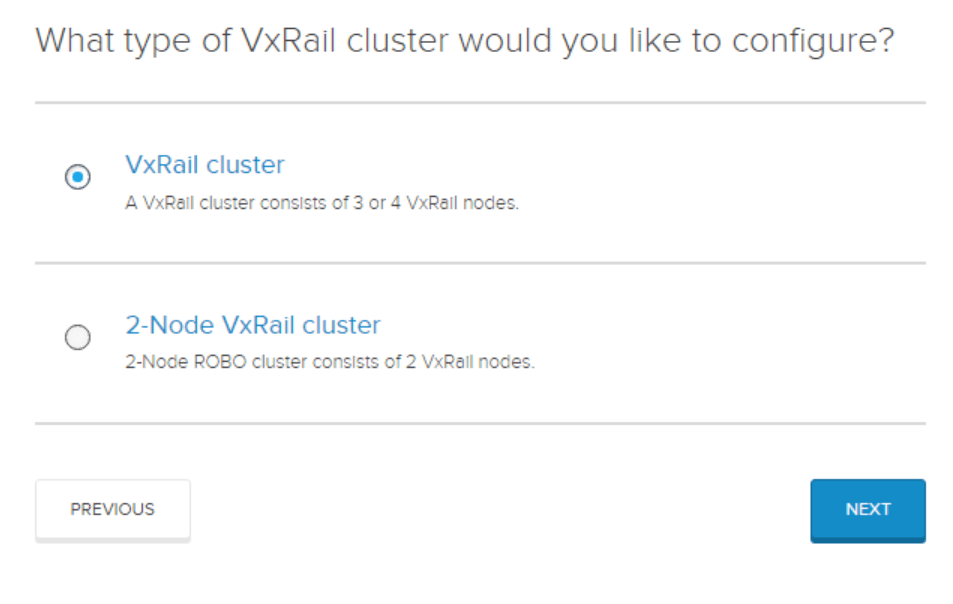
New option to choose 2-Node cluster

The ability to deploy 2-node clusters is now an option with VxRail 4.7 versions. The GUI install gives you a choice for 2-Node here. For all other VxRail deployments the default option is selected.

New 2 node VxRail option during GUI install
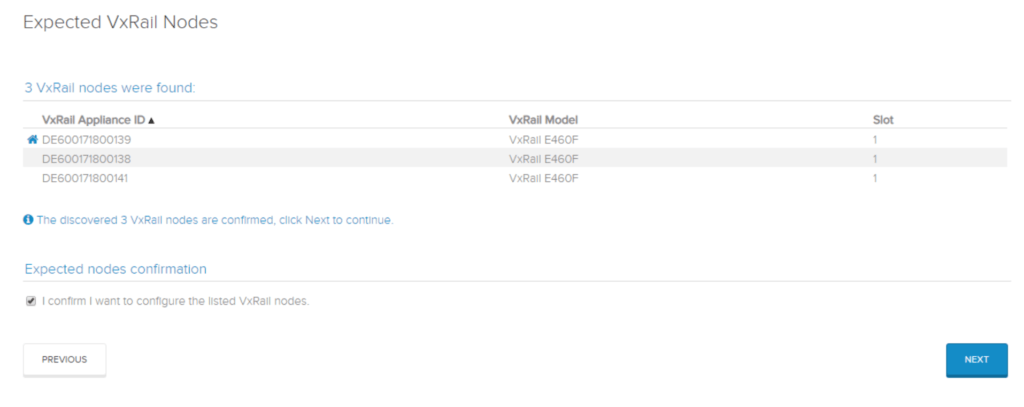
You need at least 3 or 4 nodes to start the Smart Fabric node setup.

The initial cluster deployment needs to be 3 or 4 nodes. Normally the node with lowest serial number wins the VxRail Manager election process. This is signified by the small “house” icon. If you don’t see all the powered on nodes, try a reboot of the missing node and wait. It should be detected by ipv6 multicast using the loudmouth service on the discovery VLAN 3939.

VxRail node discovery

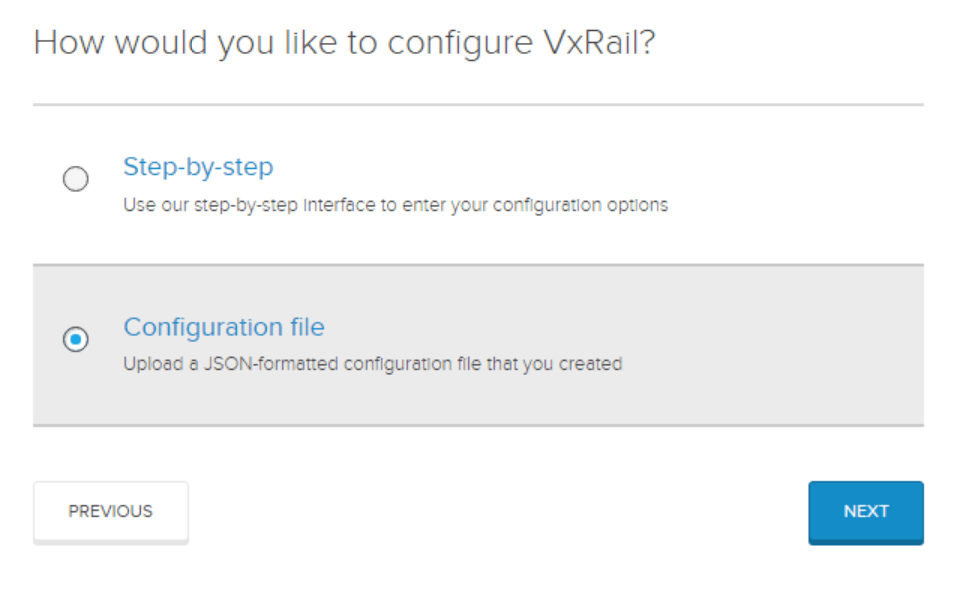
Automate the build with JSON

Remember we use the Pre-Install checklist is used to capture all the required information to make a VxRail deployment in a customer Datacenter go perfectly. It can also be used to generate a JSON file to help eliminate human error during the GUI setup.

using JSON file
Use the JSON file – its way quicker!

Here we have used the JSON file to populate all the fields in the GUI install of VxRail. You only need to verify that everything is correct and provide the passwords.

New external MGMT VLAN option

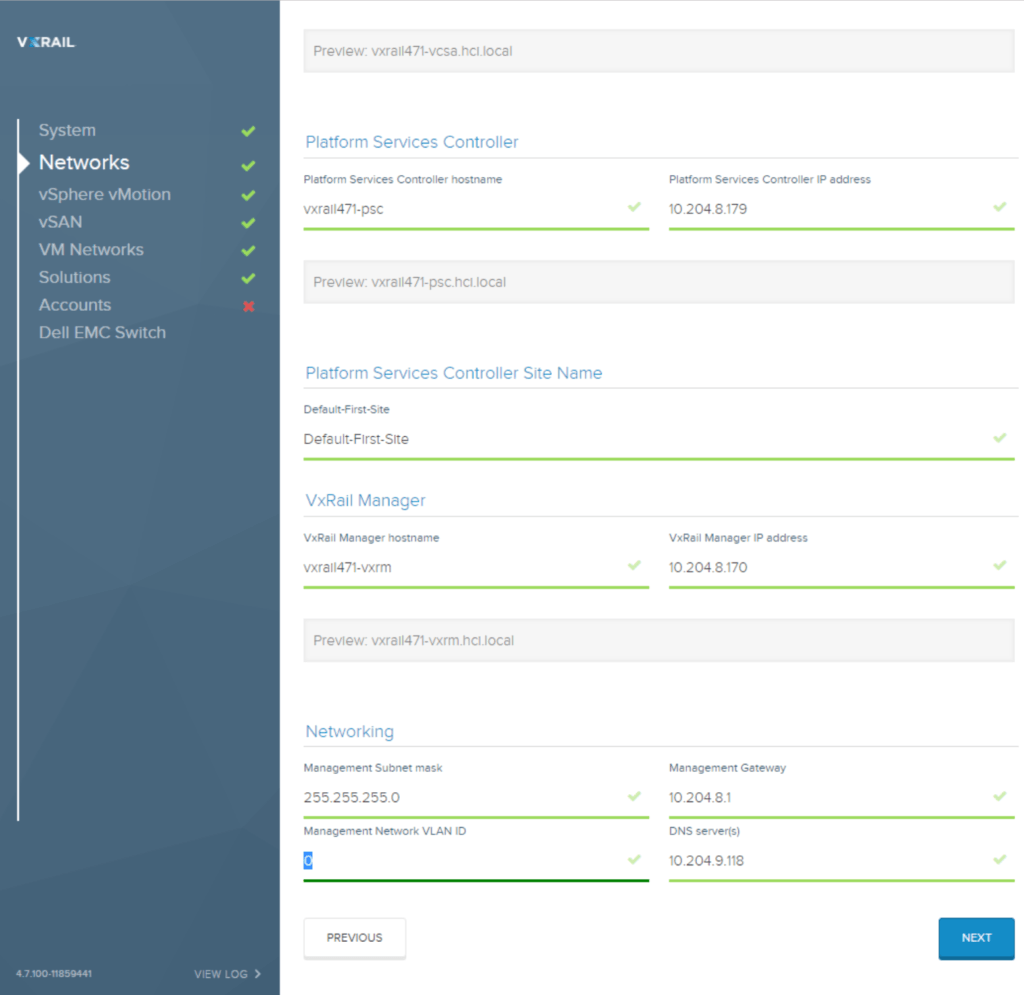
There is a new option during the VxRail 4.7 version of the install that asks for a Management VLAN ID. The default is 0 to allow for Native VLAN to be used, or you can specify a different public management VLAN here. It should be different to the internal management VLAN used to separate the cluster build. The Internal Management VLAN was the -m option set in Step 1. This is very easy with SmartFabric now, as the VxRail Manager will make the necessary port configuration changes on the SFS enabled switches.

Now you can specify a external Management VLAN during GUI install rather than Native VLAN.

VxRail Manager automates the Switch configuration

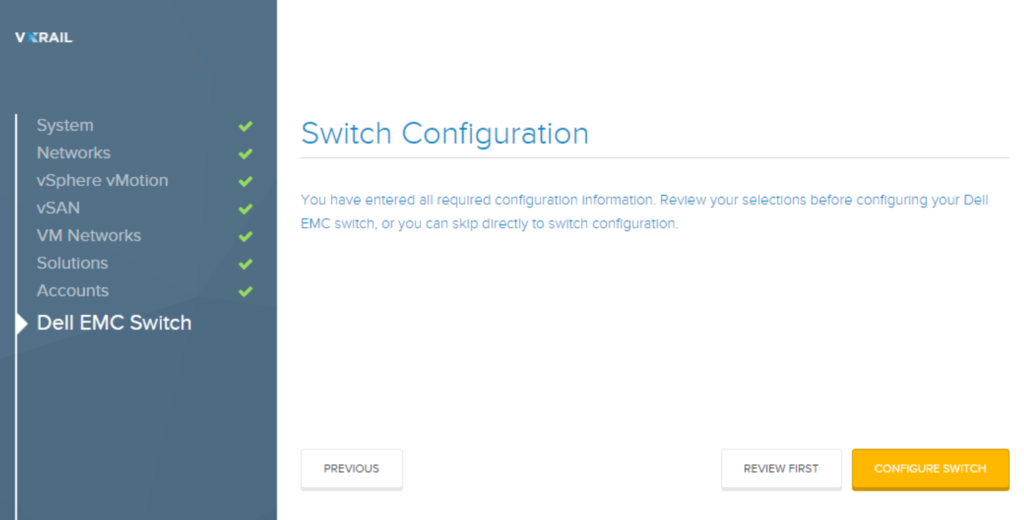
There is a new task at the end of the GUI install and just before validation. SmartFabric services will now configure all the required VLANS that were specified, including Management, vMotion, vSAN and VM traffic.

SmartFabric switch automation
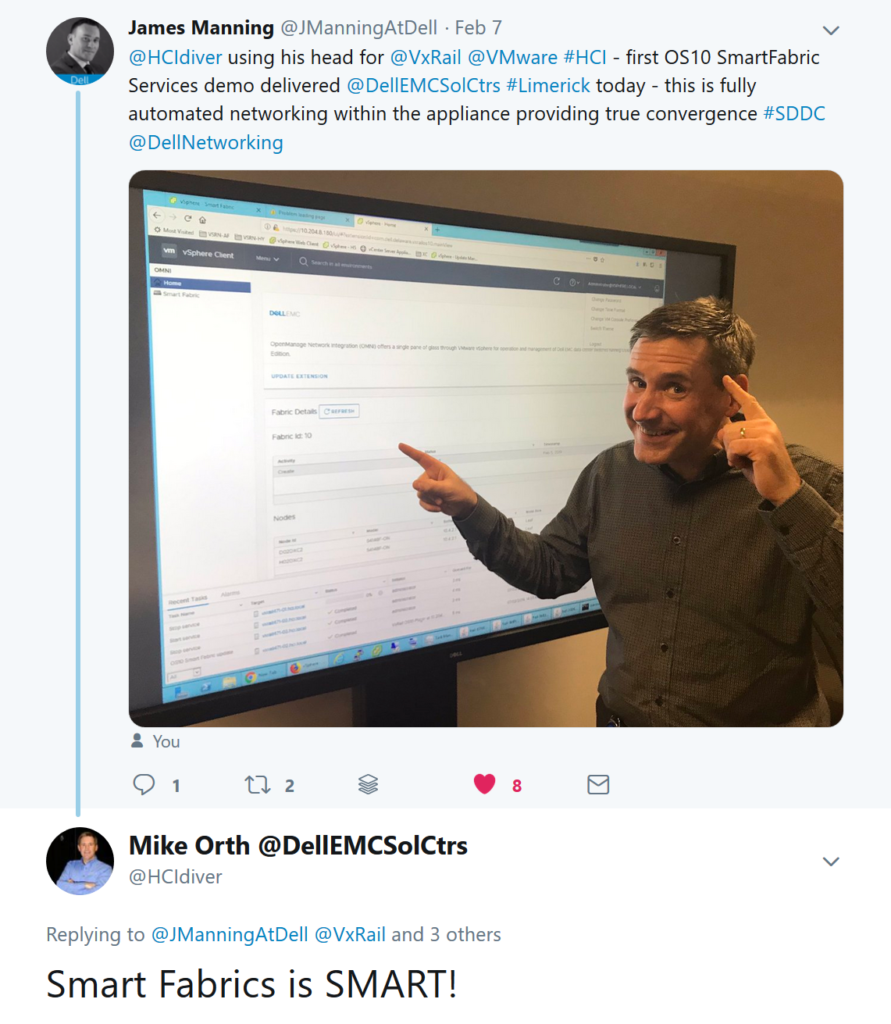
SmartFabric is smart! See it does the Network Admin tasks now!
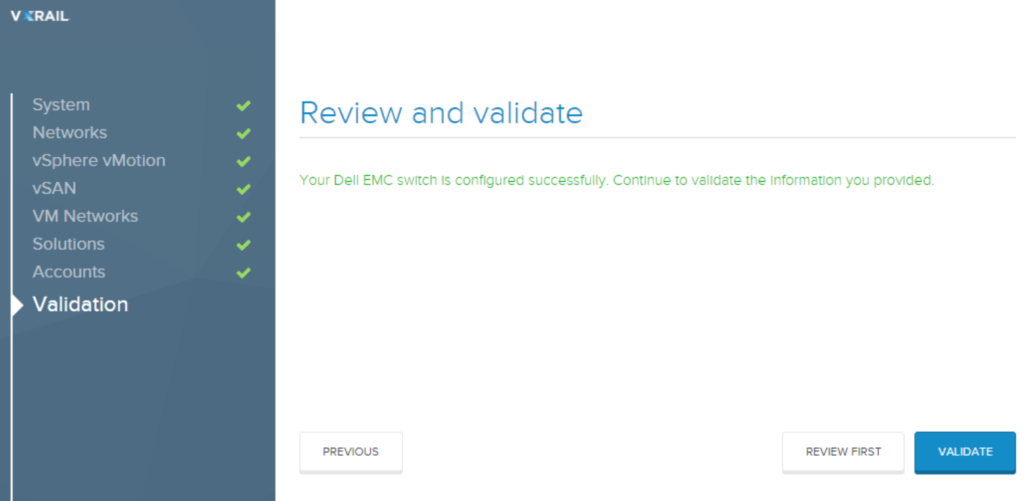
switch fully configured.
Switch fully configured.

Validation eliminates human error

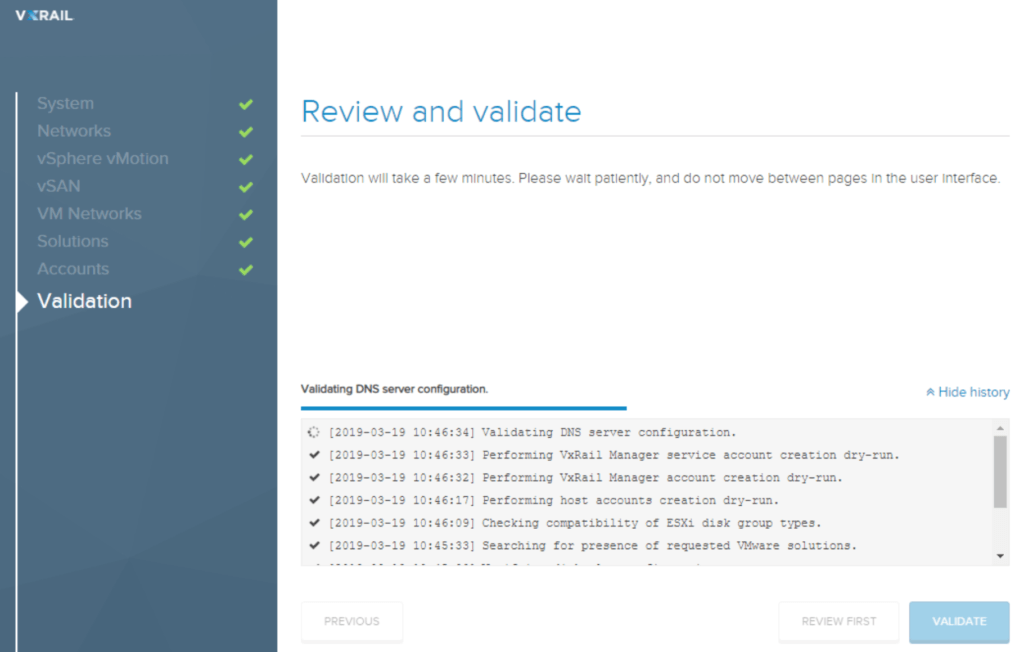
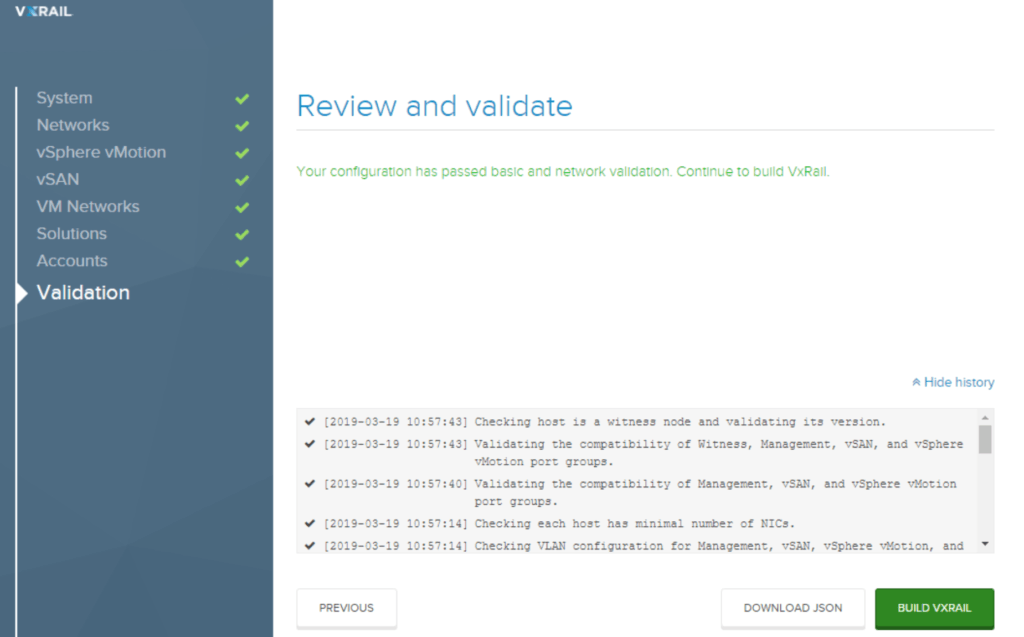
Trust but verify. Even with the SmartFabric automation, VxRail Manager still performs the important task of validating the install. Validation must pass before the actual deployment begins. This will capture anything amiss such as missing DNS entries, IP address conflicts , missing NTP. Basically anything that could prevent the build from completing successfully.

Validation
Trust but Verify = Validate!

Once validation has passed there is an opportunity to download a copy of the JSON file (useful if Step-By-Step was selected).

validation passed
Validation successful.

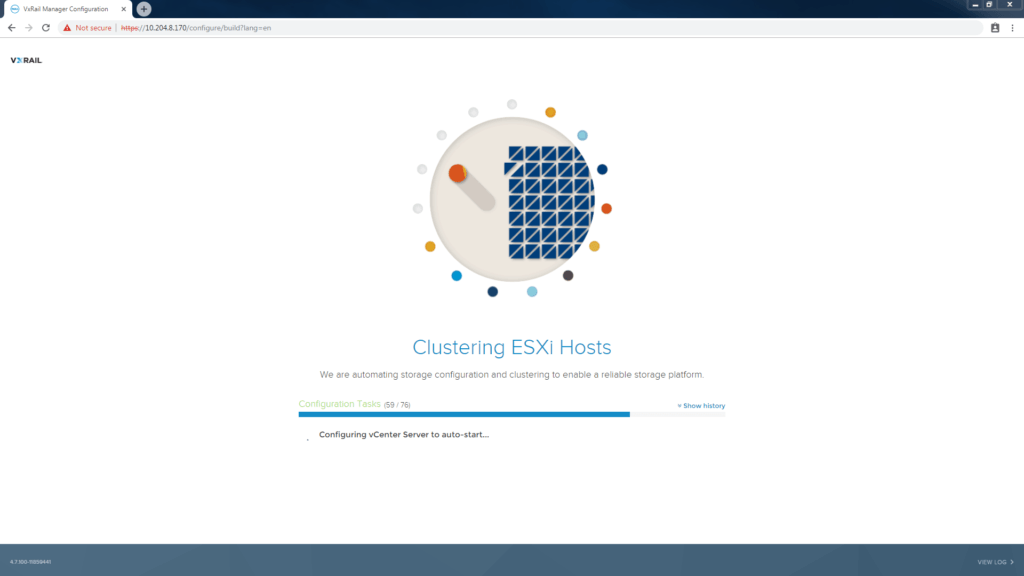
It is now time to kick-off the build. This is a fully automated process. There is zero value in manually setting up VSAN. By automating the process Dell EMC can be certain that every customer install of VxRail clusters are fully aligned to best practice. No snowflakes!

fully automated vSAN deployment
Go get a coffee – VxRail Manager will take care of the rest!
deploy SmartFabric
Hooray! The VxRail vSAN cluster is complete. Time to setup the OMNI plugin for day 2 operations of the SmartFabric.

How to enable SmartFabric for VxRail Step 1

I decided to document the steps I used to enable SmartFabric Services on VxRail.  These are partly notes for myself and Customer Solution Centre engineers that will likely need to showcase this capability very soon.  The demand for this solution is very high and the customers I have met are impressed by what is now possible (wait until you see the roadmap!). 

Note: This is not a guide for end user customers because a lot of what I write about is handled thru our automated deployment appliance; VxRail. A note of thanks to Allan Scott from New York CSC that helped with the first SFS deployment and documentation.

Step 1: Enable SmartFabric Services on the ToR Switch

  • Cabling the ToR Switches
  • Installing/Upgrading OS10 on Dell EMC Switch
  • Enable the VxRail Personality on OS10
  • Ready for Part2 – Deploying VxRail with Smart Fabric Services

Next Blog: Step 2: Deploy VxRail Cluster incl. ToR with VxRail Manager

Step 3: Deploy the SmartFabric OMNI plugin in VMware vSphere

Step 4: Virtualization engineer controls Day 2 Ops for the Full Stack


Getting Started :


How to enable SmartFabric Services on the ToRs

SmartFabric is supported on the 4100 series from Dell EMC. Current models are 10G – S4112 F/T, S4128 F/T or S4148 F/T  (25G coming soon). Sales can order these switches to be delivered from factory with OS10 and licenses already applied.

If you need the latest version of OS10 – get it here: force10networks.com , request login thru support page and download 10.4.1.x. Put OS10 .bin file and licence .xml file in a USB drive – insert USB drive into switch.

Cabling the TORs

First cable up ports 29 and 30 – 100GB cables for ISL (VLT).

Next cable up ports 25 and 26 – 100GB cables for Uplink.

Plug laptop into port 1 on switch.

Connect new VxRail appliances in any other port starting at port 2.

Installing or Upgrading OS10 on switch:

This is an optional step. The switches can be ordered and configured in factory, and so should arrive ready to begin at Step 2.

Connect the laptop to the serial port on one of the switches and start putty. Putty settings are 115200, 8, stop, none, none. I used a USB serial port so my COM port was COM3.

Powerup the serial connected switch – and break into ONIE mode by hitting ESC during bootup.

Choose “onie-discovery-stop” from the menu.

At prompt type: fdisk -l

USB Thumbdrive should be /dev/sdb1

mkdir /mnt/usb

mount -t vfat /dev/sdb1 /mnt/usb

Install OS10:

cd /mnt/usb

onie-nos-install /mnt/usb/XXXXXXXXXX.bin

Check IOS10 Version & Install License:

show version

show license status (skip next step if already installed)

license install usb://xxxxxxxx-NOSEnterprise-License.xml

Configure mgmt interface if required:

conf

int mgmt 1/1/1

no ip address dhcp

ip address 10.204.86.250/24

no shut

exit

management route 10.204.86.0/24 managementethernet

exit

Repeat these steps for the second ToR switch.

Optional step. Configure 40GB uplinks:

My showcase lab is using 40GB uplinks rather than 100GB so I needed to change the profile of the uplinks before applying the VxRail SFS personality. You can skip this step if you are using 100GB links.

OS10(config)# switch-port-profile 1/1 profile-2

Warning: Switch port profile will be applied only after a save and reload. All management port configurations will be retained but all other configurations will be wiped out after the reload.

OS10(config)# exit

OS10# write memory

OS10# reload

Enable the VxRail personality:

The SFS personality script is included in OS10. Once applied to each ToR switch, the switches will reboot with SmartFabric Mode enabled and you are now ready to perform a VxRail deployment from the VxRail Manager.

system bash

sudo sfs_enable_vxrail_personality.py -d 20 -a-m 2002

‘-d 20’ is a unique Domain ID that you assign to each cluster

‘-m 2002’ is a non-routed vlan used to do the initial build, local to the ToR switches only (Internal management network)

‘-a’ indicates that the port-channel on the upstream switches is configured with LACP

VxRail personality profile script options :


Domain -d <id> Required numeric value unique to data center (1 to 254) applied to ToR switch configuration settings Default: 1
Uplink -u <port,port> Override default 100Gb uplink ports Default: ports 25& 26
ISL -I <port,port> Override default 100Gb ISL ports Default: ports 29 & 30
Uplink tagging -t Whether external management VLAN is tagged or untagged when passed through uplinks. Default: untagged
Uplink LACP -a Whether LACP is active on uplink port channel (dynamic) or not (static). Default: static
Uplink breakout -b <2X50GE, 4X25GE, 4X10GE> Breakout 100Gb uplinks. Used to support connectivity to upstream switches without 100Gb ports
Management VLAN -m <VLAN> VxRail Cluster Build Network VLAN.
Default: 1

Validate Personality:

system bash

sudo sfs_validate_vxrail_personality.py

Links to useful guides that helped us document this build:

VxRail Fabric Automation SmartFabric Services User Guide

Dell EMC OpenManage Network Integration for VMware vCenter

How to Install Dell Networking FTOS on Dell Open Networking (ON) Switches


SmartFabric is Smart for VxRail HCI

My guide to enable SmartFabric on Dell EMC switches is here.

No time to read? Listen to an interview with Barry Coombs from ComputerWorld UK on SmartFabric.

Now with SmartFabric for @VxRail, Ned can still own the core, and leave the #HCI network problems to the Virtualization team. Click To Tweet

Is networking in HCI complex?

Back in October I asked the question, is HCI networking easy? I stand by my assertion that it is already pretty simple once you understand the converged design for HCI does not require separate physical fabrics. Once you setup your required VLANS and appropriate MTU and multicast for IPv6 you are 90% of the way done.  So if it’s so easy already, then why am I so excited about SmartFabric for VxRail appliances? Start up a conversation with Ned the network engineer about the automated deployment and simplified life-cycle management capabilities of SmartFabrics and you will get back a blank dull stare. “That’s just a python script” Ned the Network Admin will say, “Take your fancy sales patter down to the Virtualization guys, we don’t want your kind round here!”

Ned the NetAdmin says “You’ll never take my switches!”

It’s not easy to impress a NetAdmin

Ned has a point I suppose. The Network Admins job is to move packets reliably from one part of the network to the other, monitor the network for any problems, and to design and build future networks.  The last thing Ned needs is dealing with end users complaining about network problems caused by poorly designed applications (its never the networks fault!). This is actually the main selling point FOR the use of Smart Fabrics. Let me explain why.

Before you understand why SmartFabric for VxRail, you have to first understand the reason for choosing VxRail appliances in the first place.  I have written a few Blogs on this already here and here . In short it’s an engineered solution for vSAN that comes from Dell EMC fully validated and tested and automatically deployed and updated throughout its life-cycle.

VxRail appliances don’t require a Storage expert or Server guru and it even saves the Virtualization admin from having to spend countless hours reading design and deploy documentation. After deployment is done, day 2 simplified operations begins. As a result maintenance and updates and upgrades are made easy through a single bundle file that covers the entire stack (not just the software on top of somebody else’ hypervisor – and includes the hardware too.

Can SmartFabric simplify HCI?

The last part of the HCI architecture that needed simplification was the network, so Dell EMC has had its sites on Ned’s cubicle for a while now. If we are going to provide a fully automated deployment experience for our customers, it only makes sense to include the Top of Rack switches that are being used by VxRail appliances.  After all why would the network admin want to be responsible for those HCI host ports anyways? If something goes wrong in the vSAN stack, Ned doesn’t want to be dragged in to a War Room to defend last weekend’s network changes. Ned knows the changes the network team made at the weekend were to the core only.

Now with Smart Fabric for VxRail, Ned can still own the core, and leave the HCI network problems to the Virtualization team.  SmartFabric will fully configure a redundant TOR fabric for VxRail, and continue to maintain the network for the life-cycle of the HCI solution. When it’s time to patch the HCI network, SmartFabric will provide a bundle file, and perform a non-disruptive rolling upgrade to the network TORs leaving Ned free to watch old episodes of Futurama. If the HCI team needs to expand their existing VxRail cluster by adding a new node, then SmartFabric will fully automate the changes to the TOR switch, no need for Ned to ever get involved.

Is BYO Networking still an Option?

One of the advantages for VxRail customers has been the fact that it is BYON (Bring Your Own Networking). This means that Dell EMC does not force you to take a switch from their portfolio into your datacenter. For some customers, this would be non-negotiable.  They may have standardized on a specific brand and prefer to stay that way, no matter what they run at the Storage or Virtualization layer.  VxRail networking is compatible with any modern low latent switch and the introduction of VxRail SmartFabric does NOT mean that the BYON option is no longer a choice. Hopefully the automation that comes with SmartFabric for VxRail will entice some customers to converge the entire HCI stack and give Ned some peace of mind.

Here is a great Blog on vSAN and Network Switch choices from @LostSignal on this Blog: https://blogs.vmware.com/virtualblocks/2019/03/21/designing-vsan-networks-2019-update/

Update! This week I will be meeting Hasan Mansur at the Limerick Customer Solution Center who writes a great Dell EMC networking blog at https://hasanmansur.com/ . Hasan has written two great articles there about SmartFabric Services. Please check it out Part 1 here and Part 2 here.

VxRail as a building block for VxRack SDDC

I have been interested in the evolution of software defined solutions for the last few years especially anything that makes it easier for customers to quickly deploy hardware, hypervisor, storage,  and virtualization. Post Dell Technologies merger I was quick to raise my hand and volunteer to learn about the VxRail appliance.  It makes sense to me to have an appliance form factor for the Data Center – where the engineering , testing and validation effort is done by the Dell EMC side, rather than by customers – this is about Time-to-Value for sure.  The beauty of the VxRail appliance is the small starting point, ability to scale and the BYONetwork flexibility.  Although I wasn’t ever involved in the VxRack turnkey offerings from EMC pre-merger, this also interested me for larger customers who were interested in rack-scale solutions. I was always curious how Dell EMC would evolve these two use cases aimed at similar customers. Both are looking for a quicker outcome, simplified deployment, scale out and always key is how day 2 operations can be made simple, risk free and still happen fast – helping customers to keep up with the pace of change!
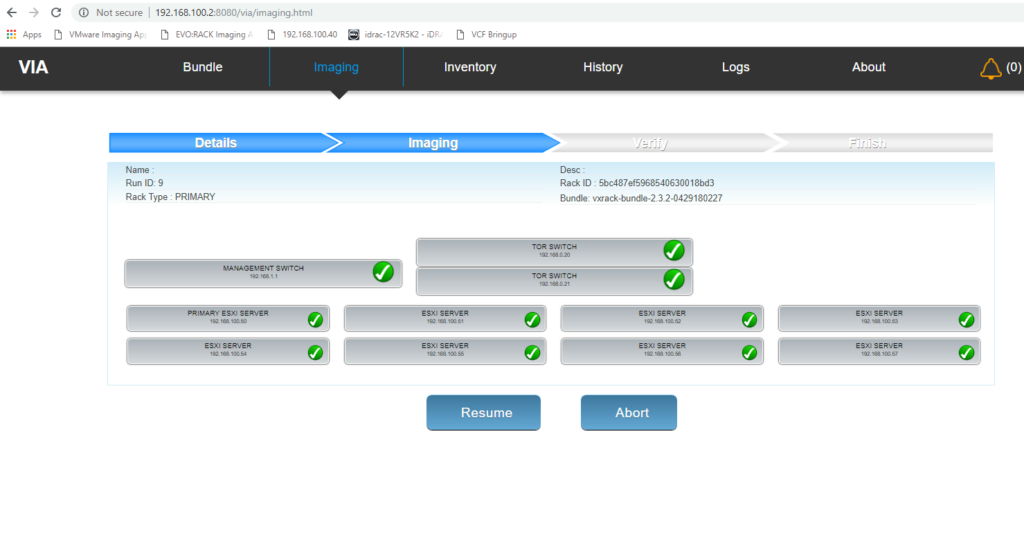
I decided to try and deploy the turnkey stack for the software defined data center; VxRack SDDC which is based on VMware technology. It has vSphere, vSAN and NSX built in with a simplified (automated) deployment and a validated and tested configuration with validated, tested bundles for LifeCycle management covering the entire (hardware & software) stack.

I have a small lab with different VxRail nodes from our portfolio.  I had heard that as the VxRack solution evolved, they would eventually be supporting Cisco and Dell switches as well as VxRail nodes.  This is a pretty exciting development – and makes sense from a Sales, Support, Services pint of view… one building block that is highly engineered by our Dell, VMware and EMC engineering teams to deliver an excellent turnkey experience for our customers.  Talk about hitting the ground running and not needing to reinvent the wheel.  VxRail has been hugely successful for customers and now this would be the building block for rack scale.

I got a chance in my lab to deploy VxRack using VxRail nodes – and I wanted to capture my notes and experience.  The first thing I should caveat is that this not a DIY solution. VxRack is fully engineered in factory. So my notes are more about my experience, not a guide to follow!  In order to get the latest code and a step by step deployment procedure for a VxRack install, only certified services teams, partners and employees have access to download from the support portal. Each new version has a very detailed step by step guide so that there are no snowflakes. Since I was using my lab hardware I need to first check that the hardware I used had the correct Bios, Firmware and software versions to meet the minimum supported standard.  I cheated a little here if I’m honest.  I used VxRail nodes that were imaged with the latest version of software.  I figured that way I didn’t need to manually update each node – I could use the proven VxRail engineering method to automate the update.  I was right and this saved me a lot of time at the start. The only manual task I needed was to assign iDRAC ip addresses that match the guides OOB deployment network.

So now I had the nodes ready (I used 8 E series VxRail nodes). I needed to configure the networking layer.  I had a Dell S3048 for the Management layer and a pair of Cisco 9372s for TOR. I needed to ensure the OS on these matched the guidelines, but that was easy to upgrade. Once I had that ready I needed to follow the wiring diagram.  This was pretty straightforward and yet the only place where I made a simple mistake. Double and triple check your cables is my advice, especially if you are dyslexic when it comes to reading port labels.  Once the cabling is in place, you can wipe the TOR switch config and put the Dell MGMT switch in ONIE mode.  This allows the automated imaging process to image the switch layer as the first task of the deployment.  The deployment network is actually setup on a private network on a simple flat switch, here you will connect the laptop that hosts the imaging appliance, port 48 on the S3048 and the management port of the S3048.

Using VMware workstation and the Dell EMC VxRack imaging appliance OVA that I downloaded, it’s very straightforward to load up the latest VxRack bundle, and specify the number of nodes you plan to image.  The laptop that you use should also have a few tools like putty, Winscp and some Dell software like racadm and OpenManage BMC Utilities. This is used to run some health check scripts and to automate the PXE boot process. I kicked off the imaging from the appliance and it started by first imaging the S3048 management switch.  A short time later it built the two TOR switches and then signaled it was ready to image the first node. Using a racadm script I put the nodes in PXE mode and powered them on one at a time, about 100 seconds apart. The VxRack imaging appliance provided the PXE server environment, recognized the nodes and began imaging them one by one. Once again I can’t highlight enough that the wiring is critical here, every port should match exactly according to the wiring diagram as the TOR and Management switch is strictly defined. When you power on the first node it becomes the first management node and the imaging appliance expects the iDRAC and Nics to match as it records the MAC addresses.  I had a few cables that I had reused at this stage that really I should have replaced, and once I had done that everything went perfectly smoothly.  Next up is the Bring-Up phase of the deployment.  The first node that is imaged now has the SDDC manager VM and a Utility VM deployed, and that is what we will use to access the GUI for configuring the rest of the deployment (part 2 coming soon).

VxRail and RP4VMs : Better Together

It is always great to host customers at the CSC when they are exploring new Data Center designs or considering new technology they haven’t used before.  It’s even better when we can help them on one successful purchase to  host them again on a new project.  We recently helped a customer that was interested in looking at HCI for a new project.  They were interested in replacing a legacy design with Software defined and that included an active-active capability across multiple Data Centers.
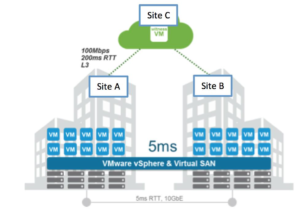
They had been evaluating several vendors for HCI and we actually helped them test both XC (on ESXi) in a synchronous config and VxRail in a stretched config.  The customer had a set of test criteria that meant they wanted to evaluate everything from deployment, through configuration, and failure scenarios plus ease of management and lifecycle updates. The interesting part of this testing was that we hosted the environment built to an agreed design, and then handed it over for their testing – which was all carried out remotely.  When they needed to run some functional testing and to simulate node and site failures I jumped on a Skype session and assisted.  This sped up drastically the amount of time required by the customer to complete all the testing they required.  The timeline was quite tight as the customer needed to draft a comprehensive report on the results to share with their executive board in order to make the purchase decision.

In the end they went with a VxRail vSAN stretched cluster for the first phase of this project.  We would later learn from their Partner (and my running buddy @VictorForde) that the second phase of the project was going to involve another VxRail stretch Cluster and Recoverpoint for Virtual machines.  Once again they asked could we assist and build out a design that could test Recoverpoint running between VxRail Stretch clusters.   This design would allow them to tolerate site failures and also protect against data corruption – giving them the ability to roll back to any point in time copies of their protected VMs.  Victor said, “We configured the environment to remote replicate across two Stretch Clusters within a site with PiT rollback to protect across clusters within a site as well as rollback from logical corruption. vSAN does the protection across each side of the cluster so no RP4VM replication traffic between sites.”

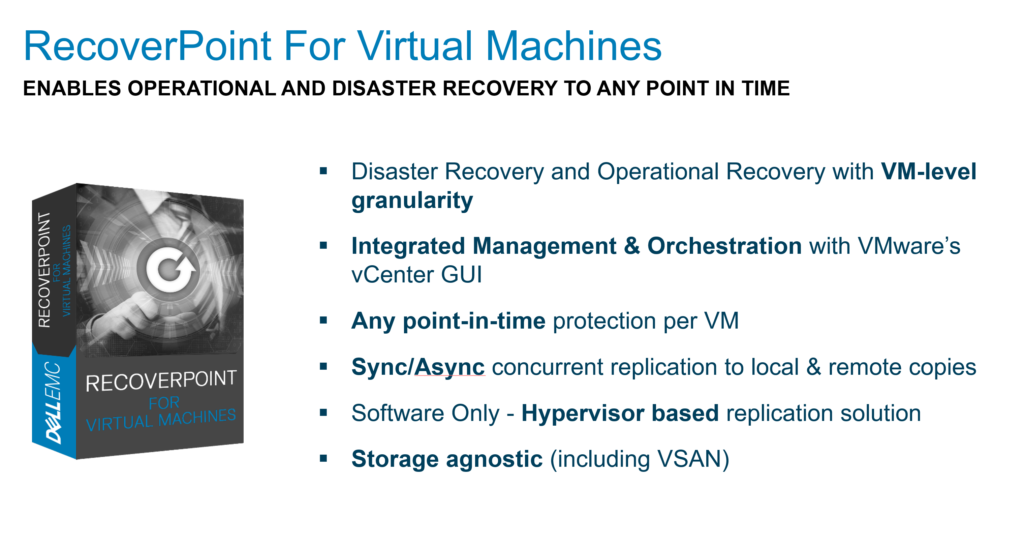
Recoverpoint for VMs (RP4VMs) and VxRail with VMware vSAN are better together for several reasons.  Firstly VxRail is the simplest starting point for a vSAN cluster.  They are easy to size, simple to deploy and make the day to day management a breeze. RP4VMs is really easy to deploy (just drop the latest ova) in a VMware environment.  Although RP4VMs is actually storage agnostic – vSAN is an excellent choice for operational simplicity and ease of….well just about everything storage related! RP4VMs uses a vCenter plug-in that tightly integrates management into vSphere and allows customers a simple interface with orchestration and automation capabilities. It only takes 7 clicks to protect a VM!  Failing back is fast as well, no need extra step needed to copy the data, just roll through the journal to find the point in time needed.  It also rolls from the latest copy back, rather than requires you to roll from the oldest first.

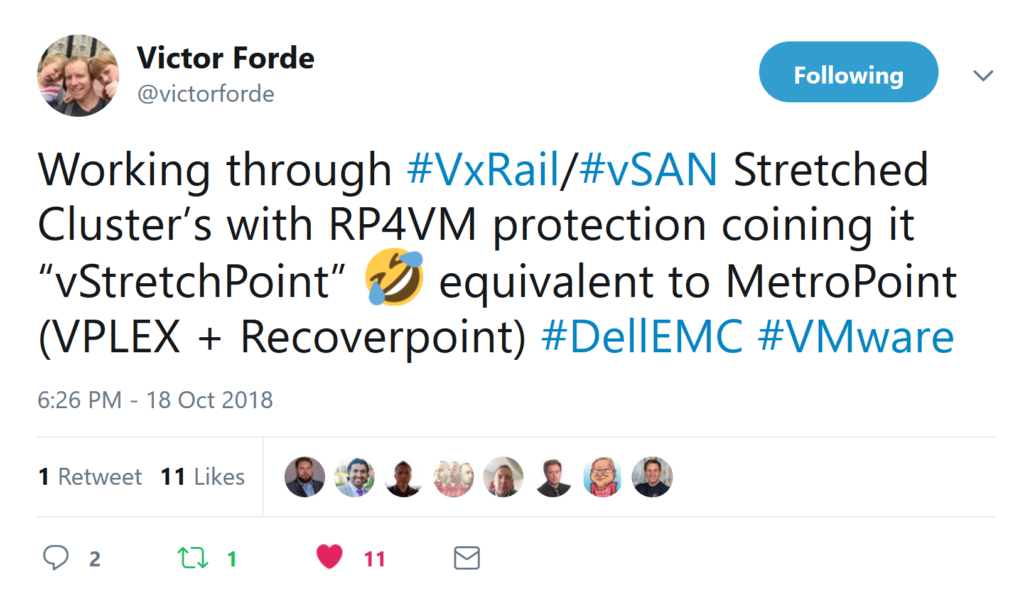
When the customer was finished with their testing they were confident in deployment, configuration, ease of use and disaster testing.  The partner was also happy as they were able to be involved in the entire process from beginning and provide input while also documenting the steps and process involved.  In fact the partner saw a future for this project that other customers might also like, they even gave the solution a new name vStretchPoint – not sure if marketing will run with it, but you never know!

Big thanks to the team involved in the testing for this POC they deserve most of the credit too; @rw4shaw

Is HCI networking easy?

Even though hyper-converged solutions have been  one of the hottest trends in the Datacenter since virtualization, you will still meet traditional architects that are seeing this technology for the first time.  Many times the customer will come to the conversation with just the virtualization lead,  sometimes they will bring the Storage or Compute team, but often they will forget to tell the Networking team any of their plans (no wonder the network engineer can be so grumpy).  This can prove problematic for a networking team that is not familiar with a few of the basic HCI requirements. Continue reading “Is HCI networking easy?”

Hardware is not invisible – VxRail HCI appliance

One of the biggest pain points customers have when managing their current traditional architectures is patching and upgrades. They want a so

Upgrading the full stack

lution that helps them to keep updated but does not introduce risk or take a lot of work to validate and test. Pressures on headcount reductions don’t balance with demands from the business to do more at lower costs.  Often preventative maintenance is the first to suffer, and that means existing infrastructure is left to fall further and further behind patching schedules. Continue reading “Hardware is not invisible – VxRail HCI appliance”

Does the H in HCI matter?

If twitter is where the conversation is then you might be following the debate about what exactly is HCI? and does it matter? Does it matter if the H in HCI is for Hypervisor or Hybrid if the outcome is the same? If the H is still really all about the hypervisor, then does it matter which one is used? What about the infrastructure, is it important or invisible in a software defined world? Continue reading “Does the H in HCI matter?”

error

Enjoy this blog? Please spread the word :)