Step 1: Enable SmartFabric Services on the ToR Switch
Step 2: Deploy SmartFabric VxRail Cluster incl. ToR with VxRail Manager
-
-
- Connect VxRail nodes to deploy SmartFabric enabled Switches
- Power on first 4 VxRail nodes
- Deploy SmartFabric VxRail thru the VxRail Manager GUI
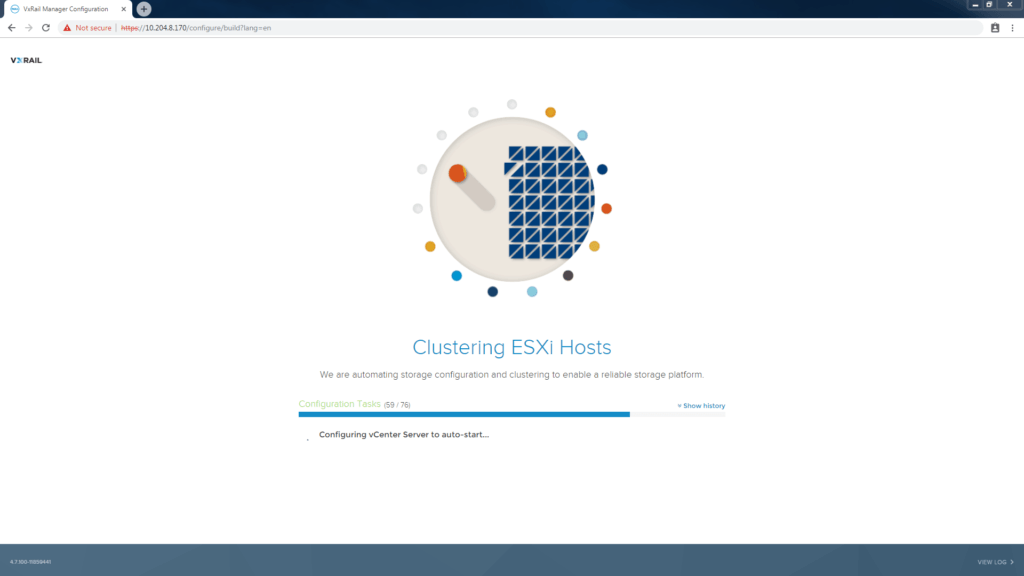
- Sit Back and Relax while VxRail Manager fully automates Bring Up of the entire Hyperconverged Stack (Compute, Storage AND the Network!)
-
Next Blog: Step 3: Deploy the OMNI plugin in VMware vSphere
Step 4: Virtualization engineer controls Day 2 Ops for the Full Stack
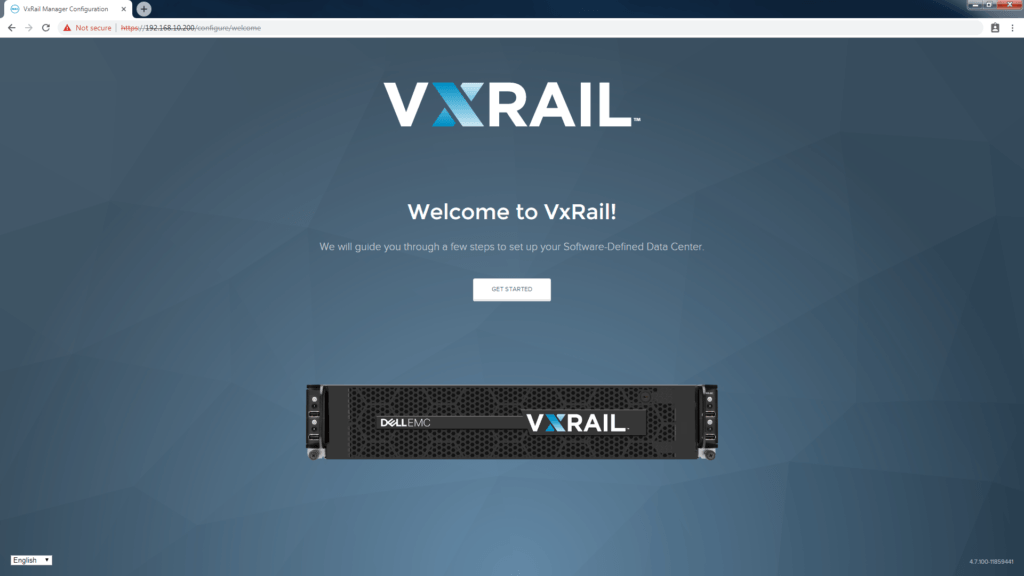
Beginning the VxRail GUI deployment
Connect the VxRail nodes to deploy SmartFabric enabled switches. Power on the nodes. Connect the laptop to the first port (port 1 only!) in the SFS switch. This is the “jump port” and will allow access to the default ip address [https://192.168.10.200] of the VxRail Manager VM. The VxRail Manager VM is already deployed in the appliances in factory.
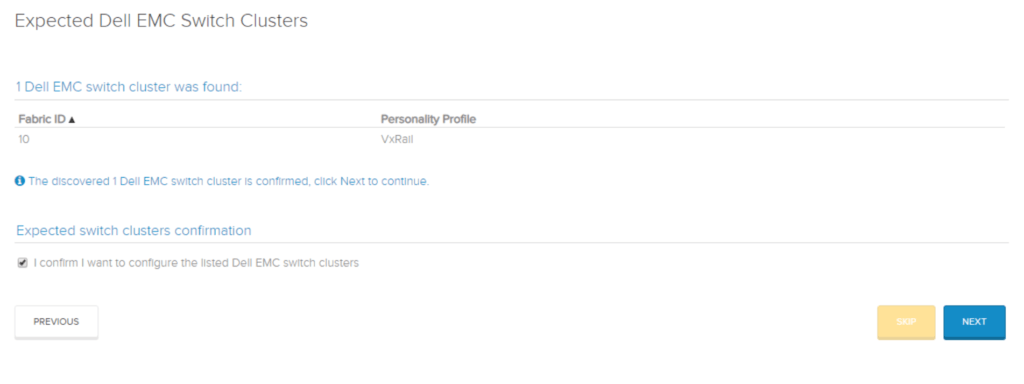
VxRail will deploy SmartFabric now
Since VxRail version 4.7.100 there is now the ability for the GUI driven VxRail Manager install to detect Dell EMC SmartFabric enabled switches. This automates configuration of the switches during the full stack deployment.
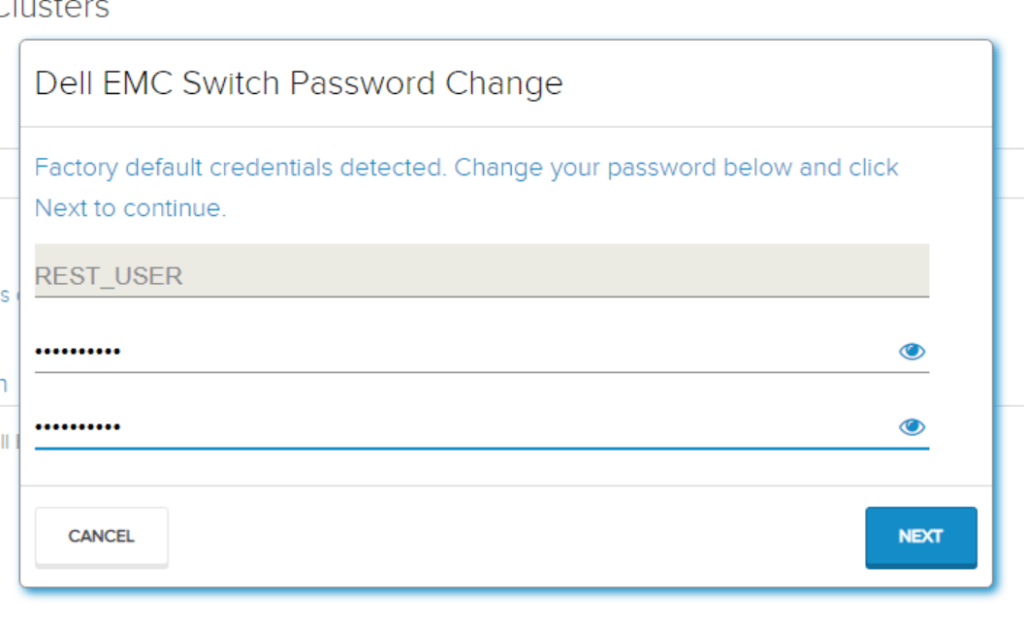
Setup the REST user to deploy SmartFabric
When the installer selects to deploy SmartFabric switches the next step will be to configure the Rest User account on the SFS enabled switch. If its a first run, a new password will be created. If you are setting up a second VxRail cluster into an existing SmartFabric, then the current password will be requested. The Rest User account will be documented in the Pre-Install Checklist by the installer.
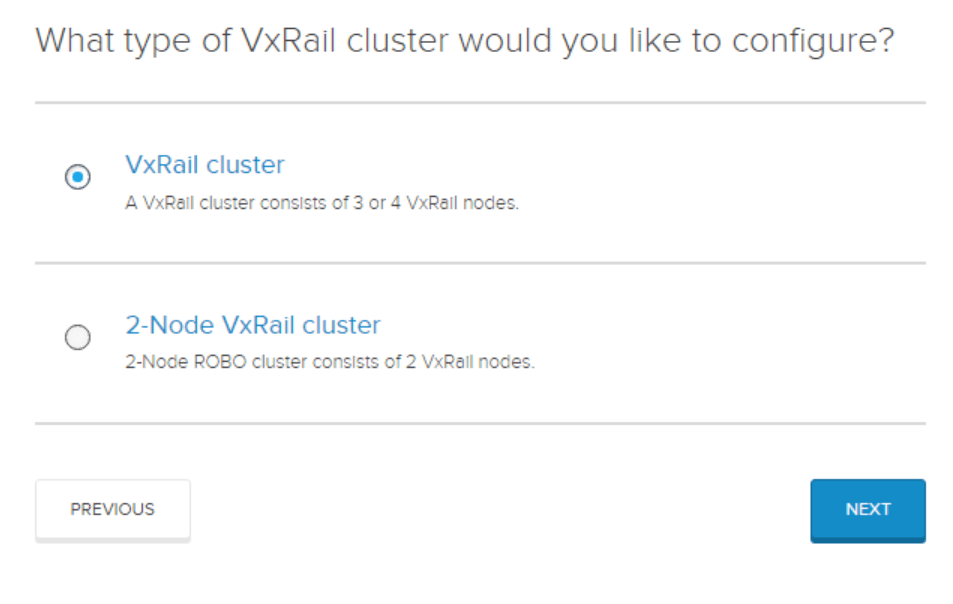
New option to choose 2-Node cluster
The ability to deploy 2-node clusters is now an option with VxRail 4.7 versions. The GUI install gives you a choice for 2-Node here. For all other VxRail deployments the default option is selected.
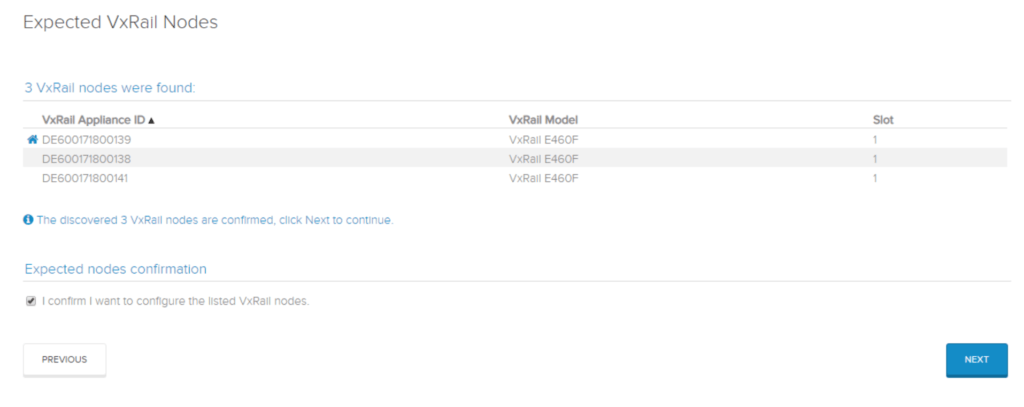
The initial cluster deployment needs to be 3 or 4 nodes. Normally the node with lowest serial number wins the VxRail Manager election process. This is signified by the small “house” icon. If you don’t see all the powered on nodes, try a reboot of the missing node and wait. It should be detected by ipv6 multicast using the loudmouth service on the discovery VLAN 3939.
Automate the build with JSON
Remember we use the Pre-Install checklist is used to capture all the required information to make a VxRail deployment in a customer Datacenter go perfectly. It can also be used to generate a JSON file to help eliminate human error during the GUI setup.
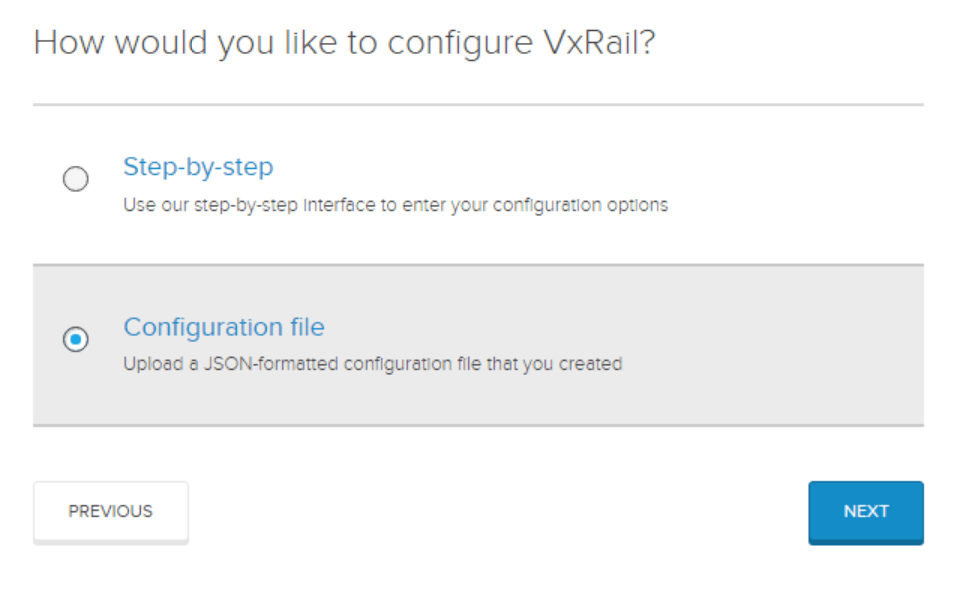
Here we have used the JSON file to populate all the fields in the GUI install of VxRail. You only need to verify that everything is correct and provide the passwords.
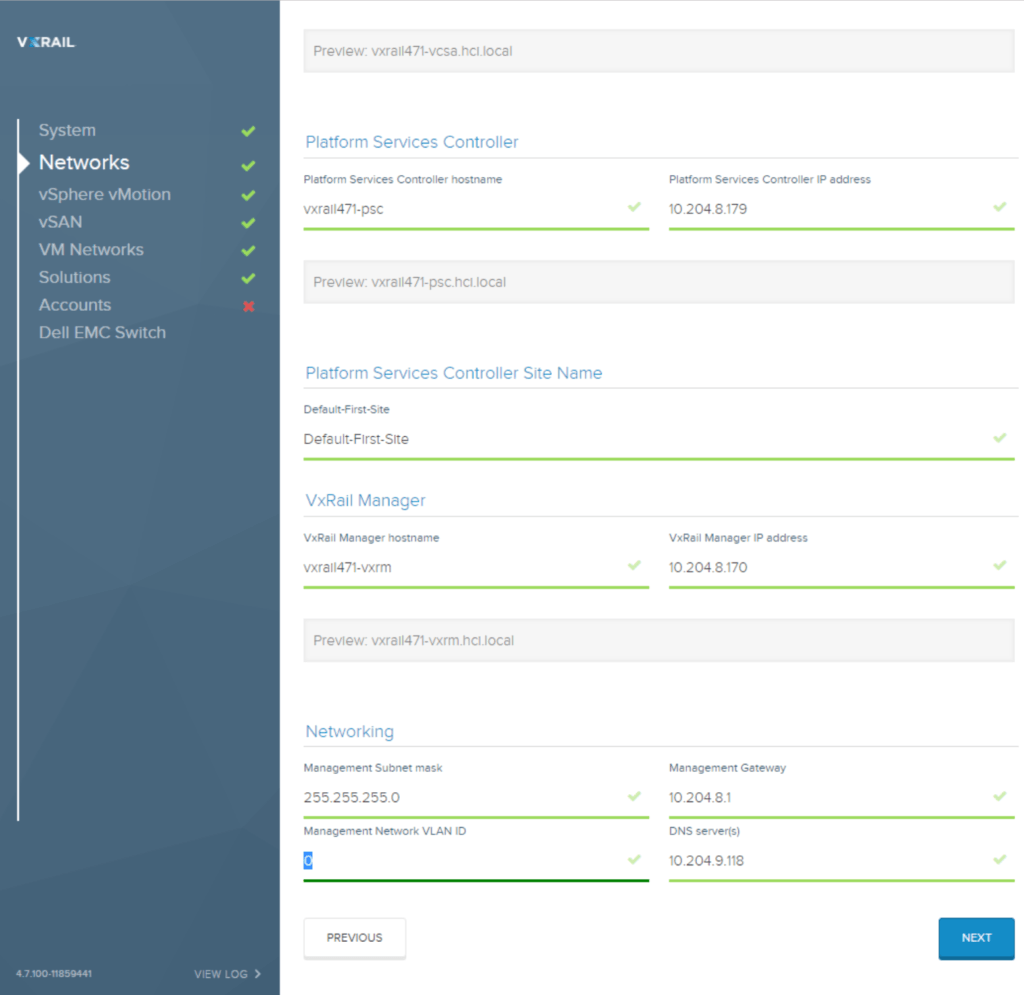
New external MGMT VLAN option
There is a new option during the VxRail 4.7 version of the install that asks for a Management VLAN ID. The default is 0 to allow for Native VLAN to be used, or you can specify a different public management VLAN here. It should be different to the internal management VLAN used to separate the cluster build. The Internal Management VLAN was the -m option set in Step 1. This is very easy with SmartFabric now, as the VxRail Manager will make the necessary port configuration changes on the SFS enabled switches.
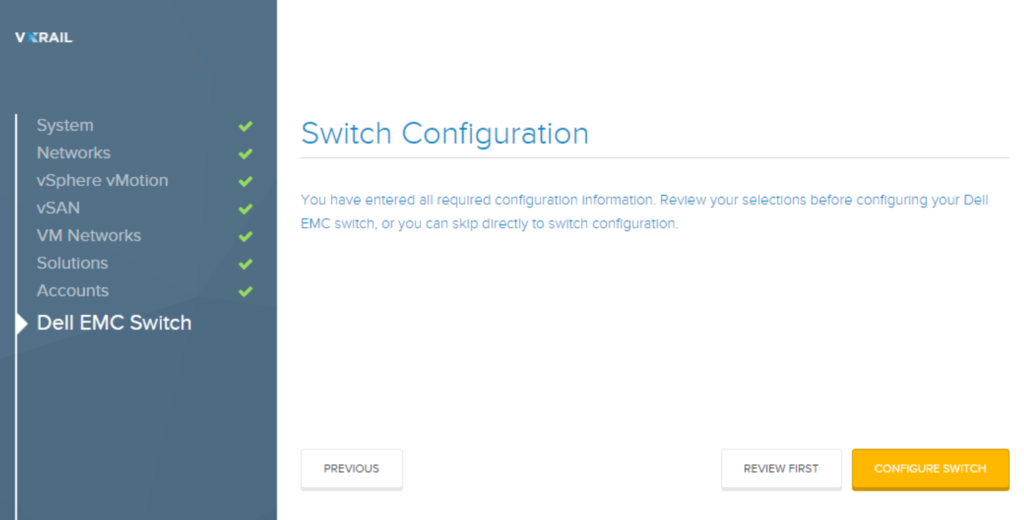
VxRail Manager automates the Switch configuration
There is a new task at the end of the GUI install and just before validation. SmartFabric services will now configure all the required VLANS that were specified, including Management, vMotion, vSAN and VM traffic.
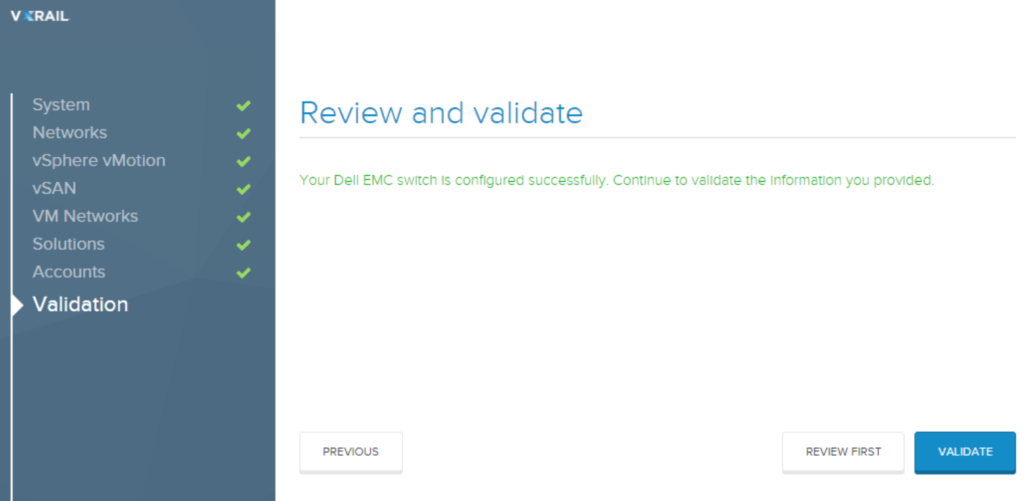
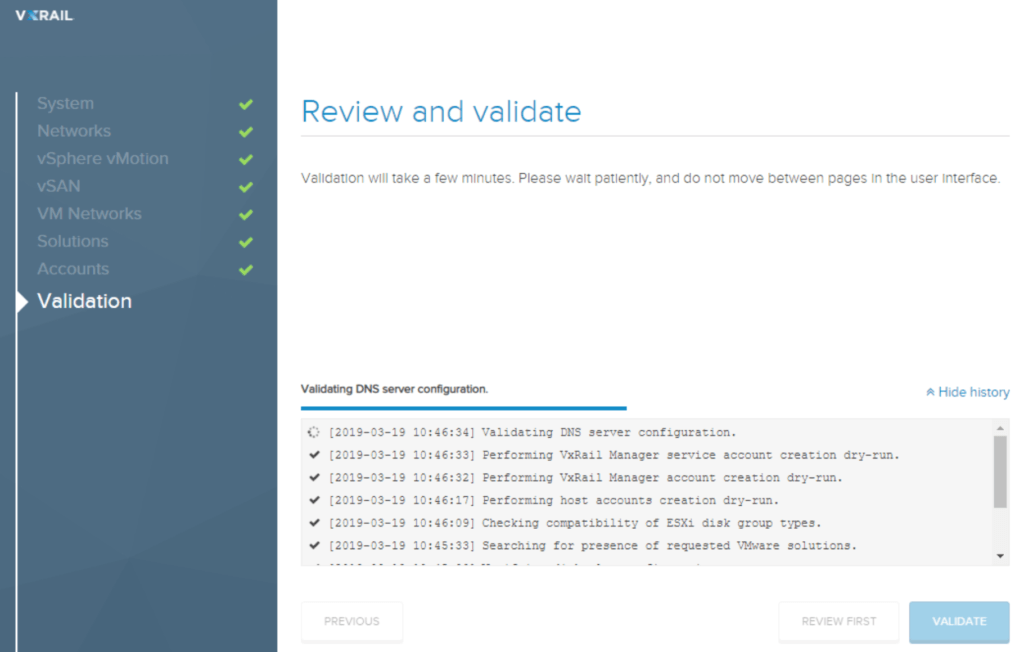
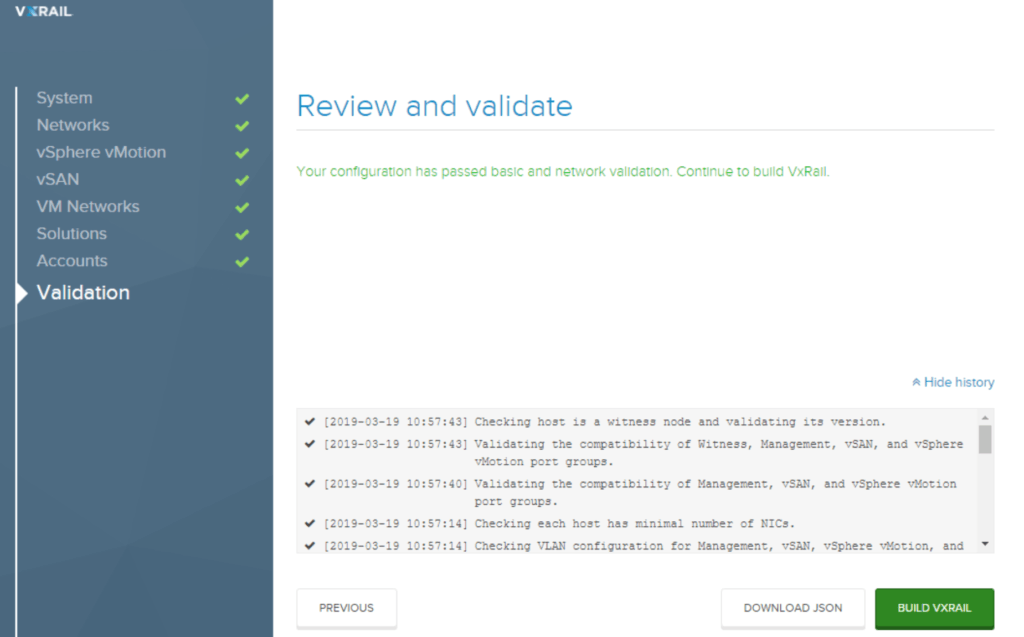
Validation eliminates human error
Trust but verify. Even with the SmartFabric automation, VxRail Manager still performs the important task of validating the install. Validation must pass before the actual deployment begins. This will capture anything amiss such as missing DNS entries, IP address conflicts , missing NTP. Basically anything that could prevent the build from completing successfully.
Once validation has passed there is an opportunity to download a copy of the JSON file (useful if Step-By-Step was selected).
It is now time to kick-off the build. This is a fully automated process. There is zero value in manually setting up VSAN. By automating the process Dell EMC can be certain that every customer install of VxRail clusters are fully aligned to best practice. No snowflakes!