Using the new GUI for SmartFabric VxRail Deployment

In the last SmartFabric blog I covered how to enable SmartFabric on your Dell OS10 switch and to declare the personality. Building out a new SmartFabric VxRail cluster from a greenfield install requires two Top of Rack switches with the Leaf personality. Once this task is done, simply rebooting the ToRs will give you access to the GUI where everything required to setup the new fabric is achieved. This could not be simpler.

Login to SmartFabric VxRail Master

In the last step of the previous blog we setup the ICL ports between the Leafs and triggered an election by rebooting them. Now we need to logon to the Master switch of the new Leaf pair. If you hit the wrong one, you will be presented with the view below and know you are on the secondary. Just click the link on the ip address to reach the Master.
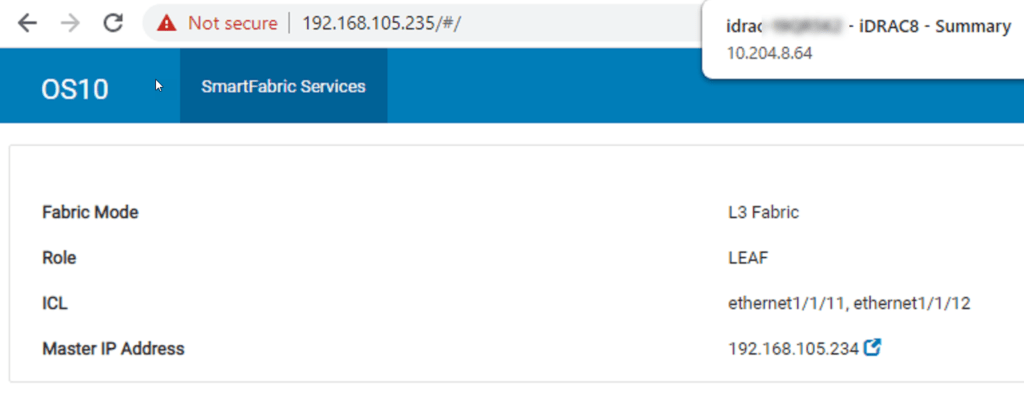
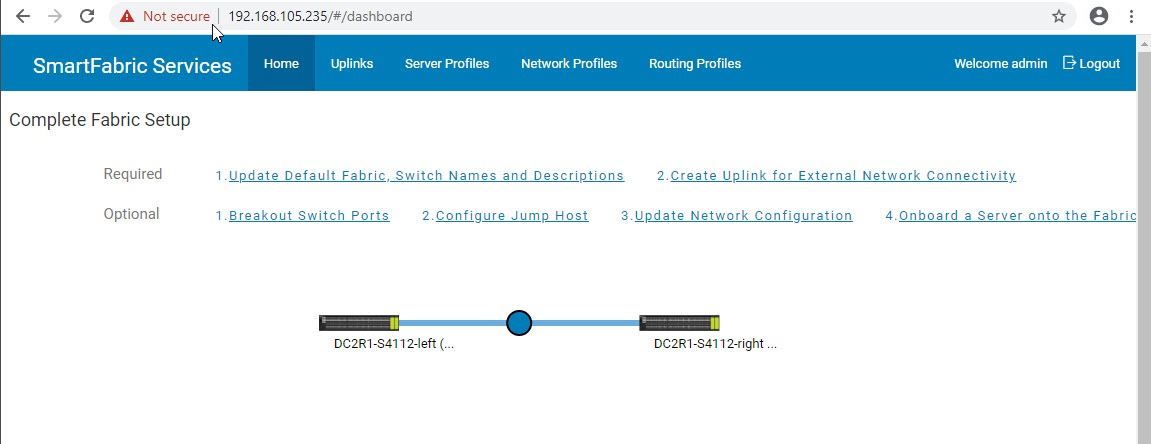
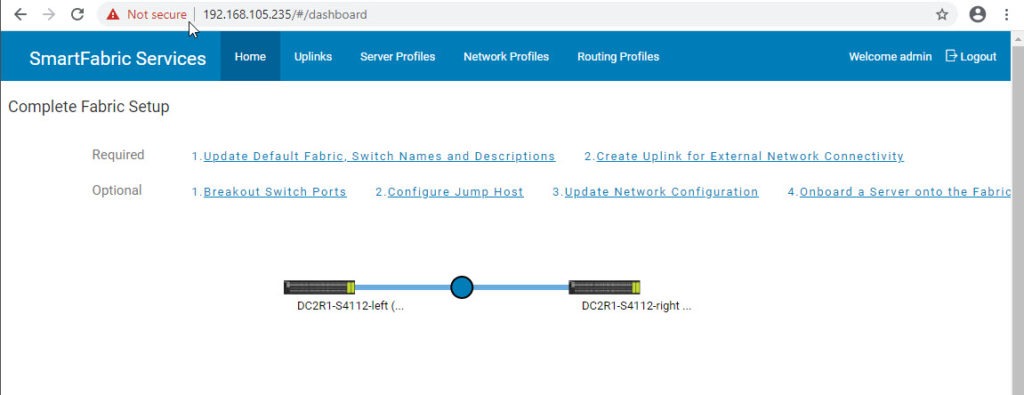
We can logon to the SmartFabric VxRail master by the default username/password of admin/admin. Here we are presented with the dashboard. There are two required steps to perform here.
Complete Fabric Setup

We can already see that the two Leaf switches have begun the initial fabric creation. The new topology shows the ICL connections. The first required step before we deploy SmartFabric VxRail is to Update Default Fabric Switch Names and Descriptions.

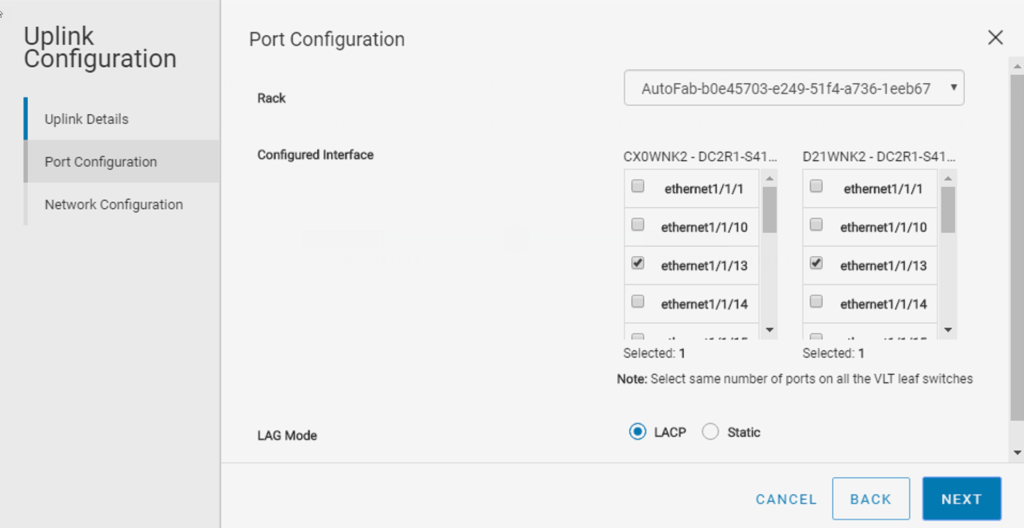
The second required step is to configure Uplinks. You have choice to setup Layer 2 or Layer 3 uplinks here. This can be changed later, but required for the VxRail deployment so you can reach DNS and NTP services normally. Add the Management network on the last step to reach these services outside of the VxRail rack.
Optional Settings

You are ready to deploy VxRail at this stage unless you require a few optional steps. You might need to make a few changes if your setup falls outside the default port speeds for example.

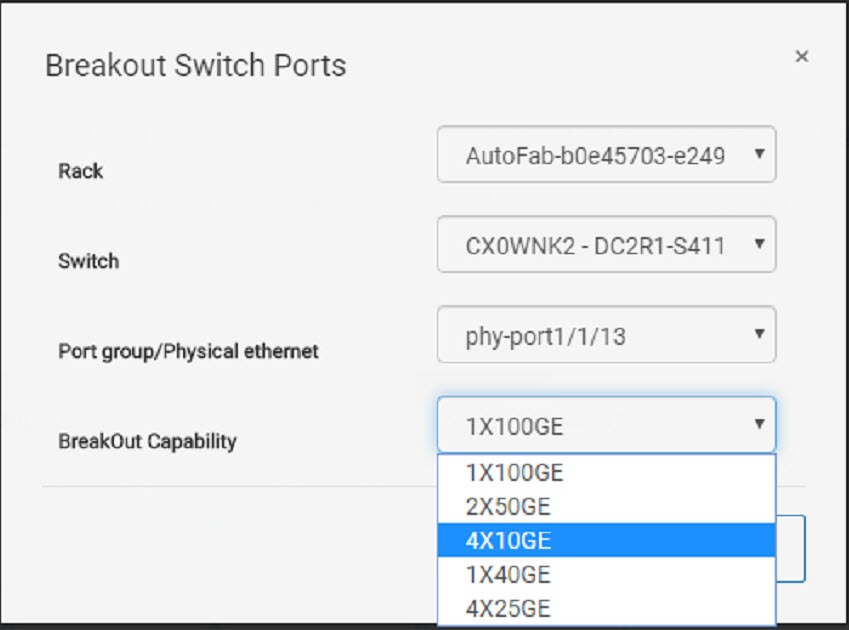
Configure Breakouts

You can change the uplinks speed from the default port speed (100GB). There are several options available depending on the switch you choose and the port you end up using. You might also need to adjust the Jump port speed if you plan to use a 1GB laptop nic in a 25GB switch.
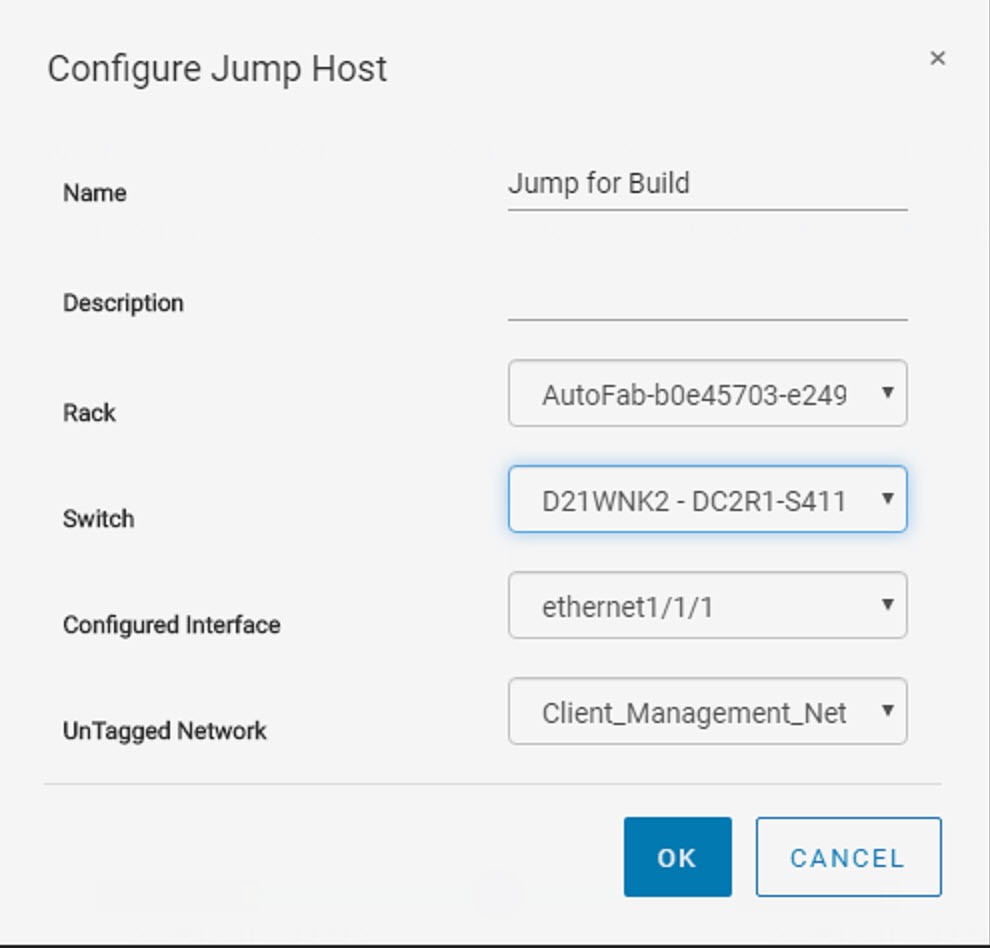
Configure Jump Port

The jump port is used to deploy VxRail by using a laptop to reach the default client control vlan where VxRail Manager is setup initially. The Jump port can now be selected on any port. This is much better than the last version that always selected port 0 as the default jump port.
Deploy VxRail on SmartFabric

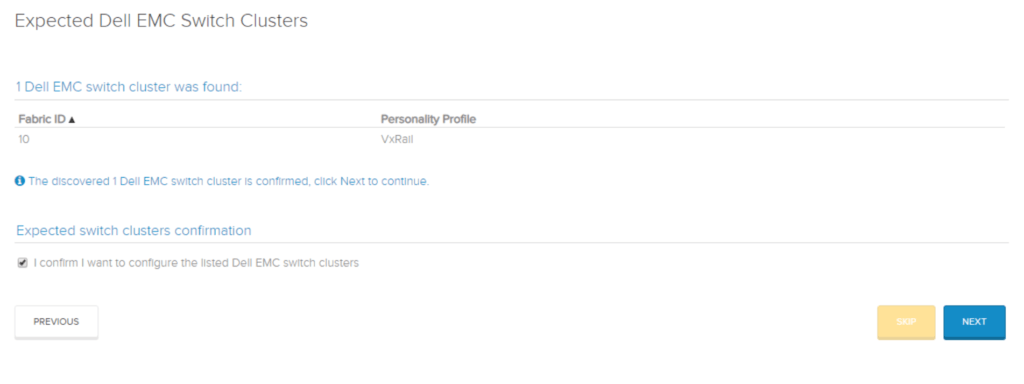
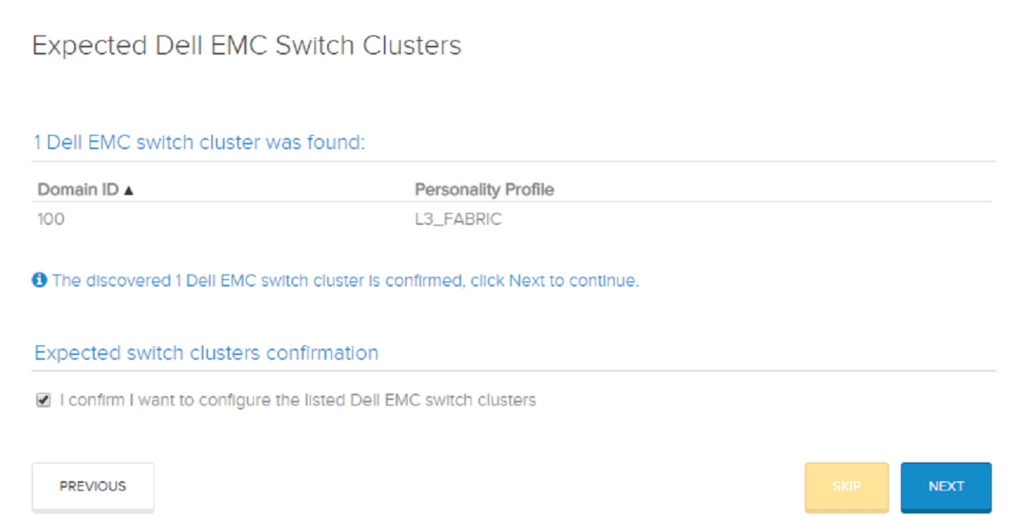
You can now deploy your first VxRail cluster into the SmartFabric enabled fabric. There will be one new step in the VxRail Manager deployment GUI. Once you confirm that you want to allow VxRail Manager to control the switch configuration, the rest of the setup is totally automated!
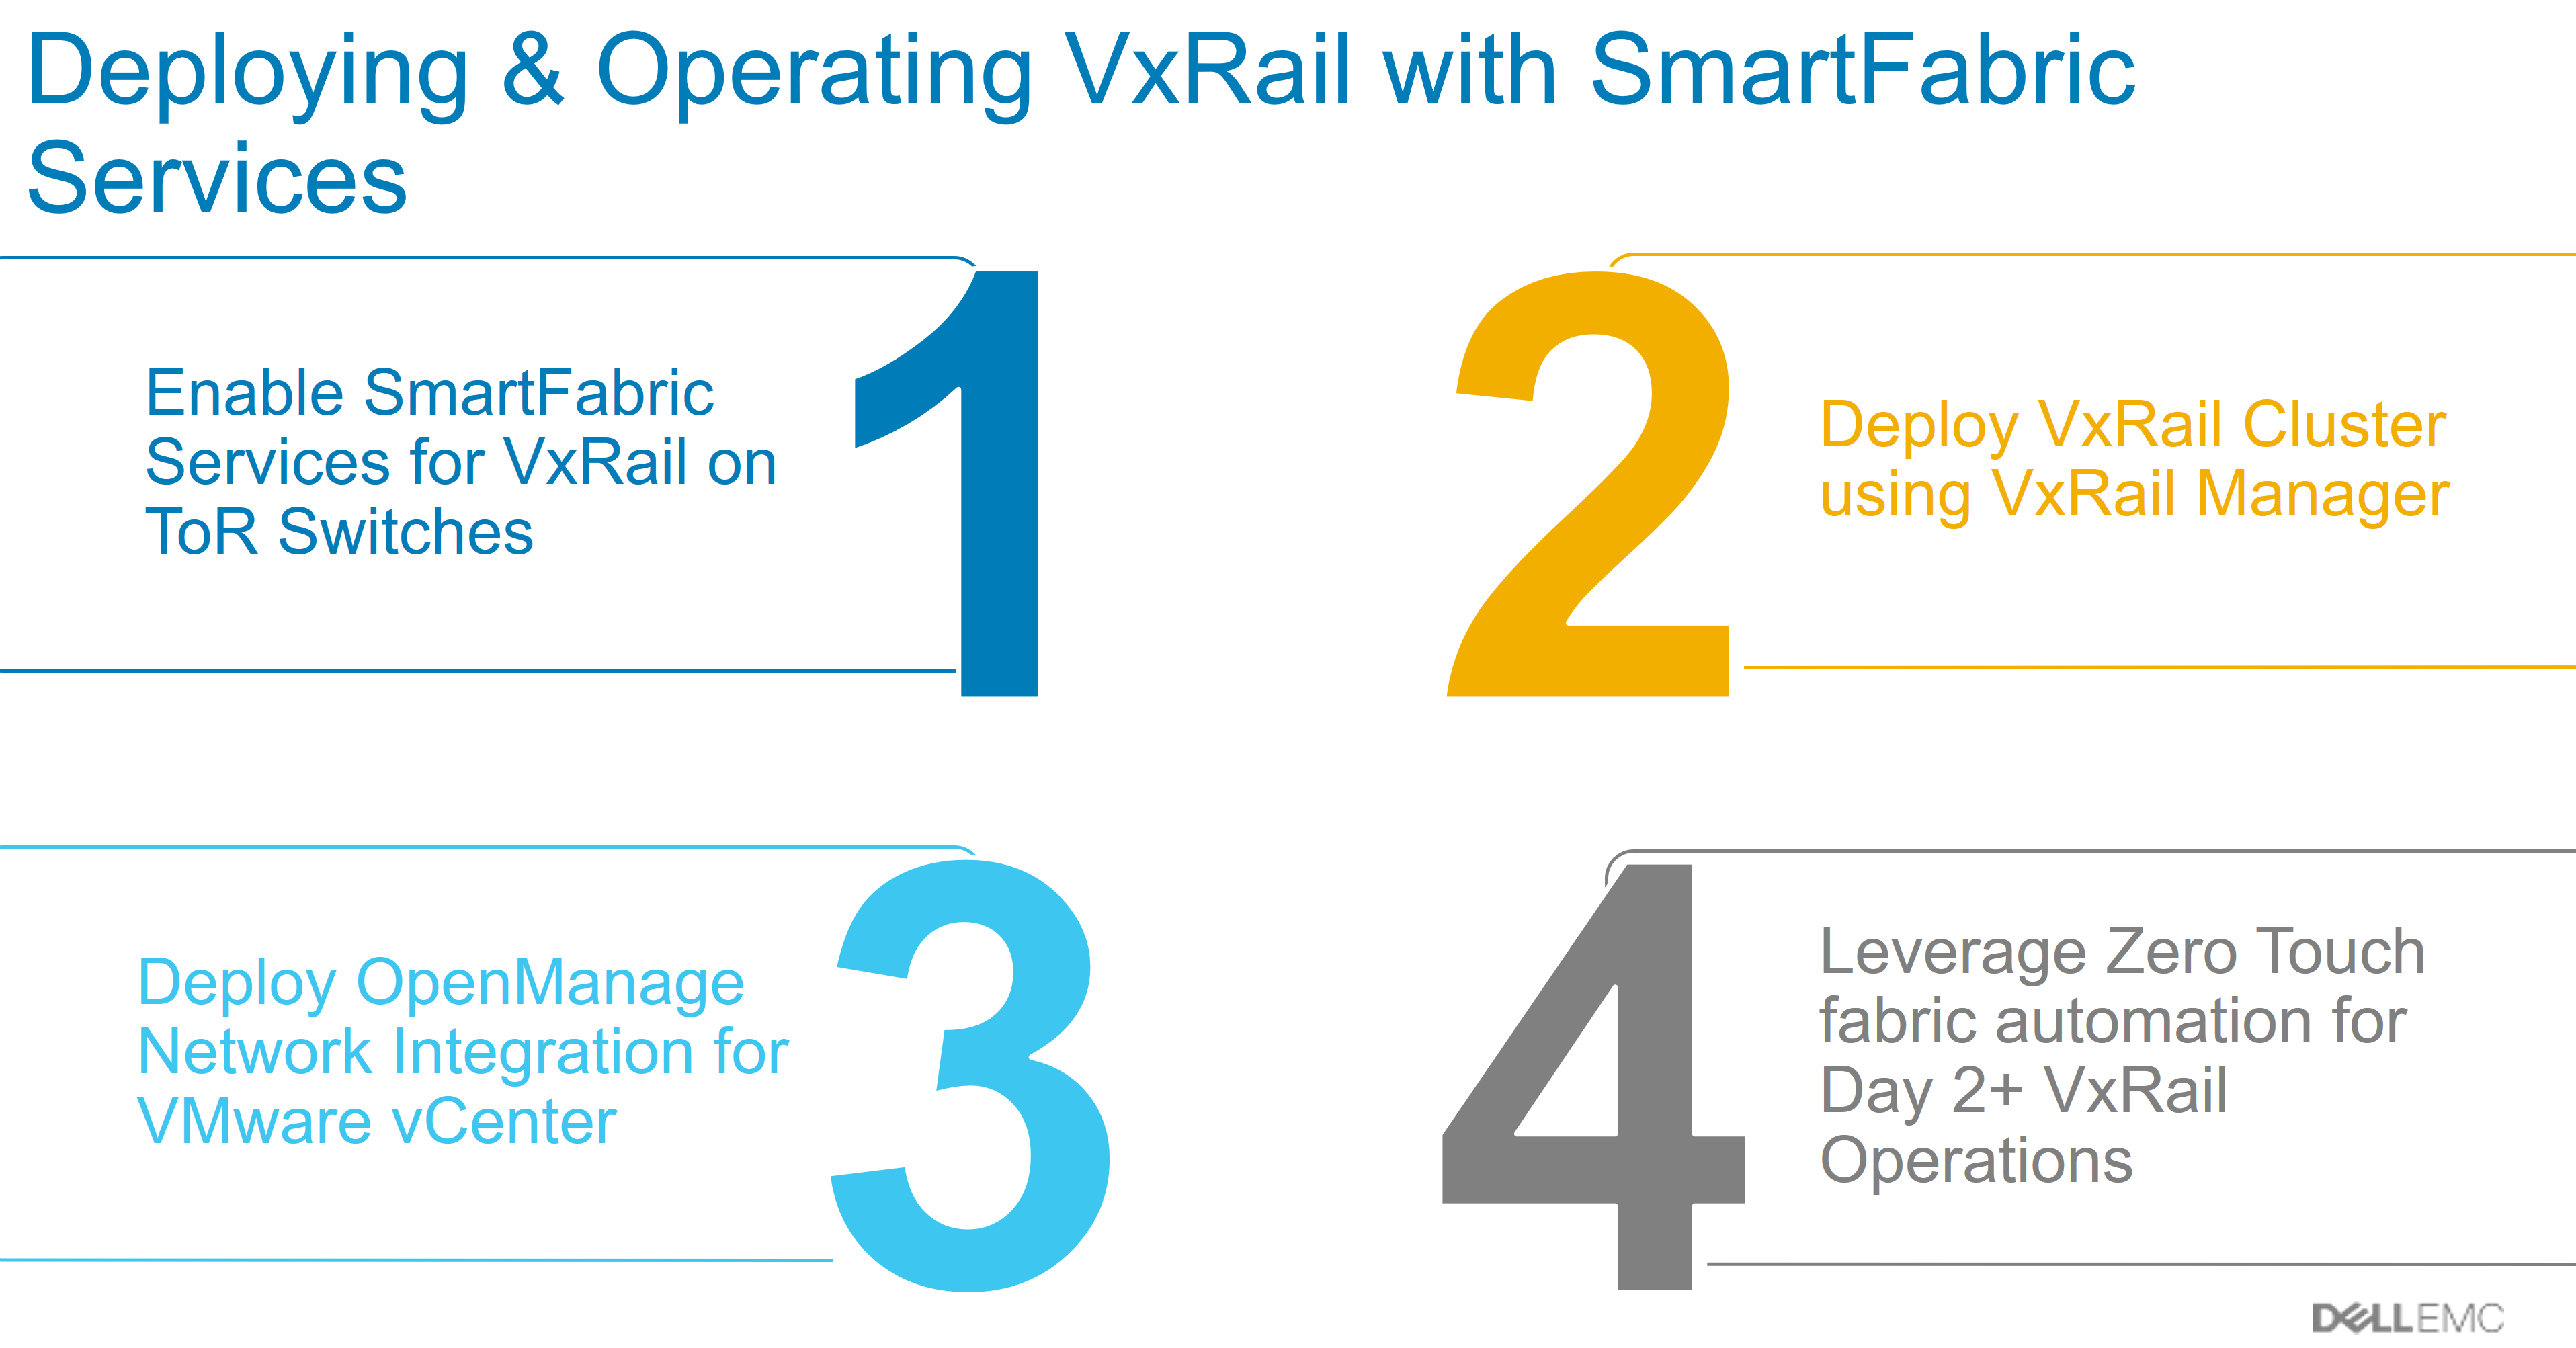
VxRail SmartFabric networking for Day 2 Ops

Step 1: Enable SmartFabric Services on the ToR Switch

Step 2: Deploy VxRail Cluster incl. ToR with VxRail Manager

Step 3: Deploy the SmartFabric OMNI plugin in VMware vSphere

Step 4: Virtualization engineer controls Day 2 Ops for the Full Stack

Network Admins calm down and look here.

The network admins are not usually in favor of anything that replaces their day to day jobs. If you can show them the finished solution, you may be able to sway them in favour. Make sure to give them a demo of the OMNI plugin running inside vSphere using VxRail SmartFabric enabled switches.

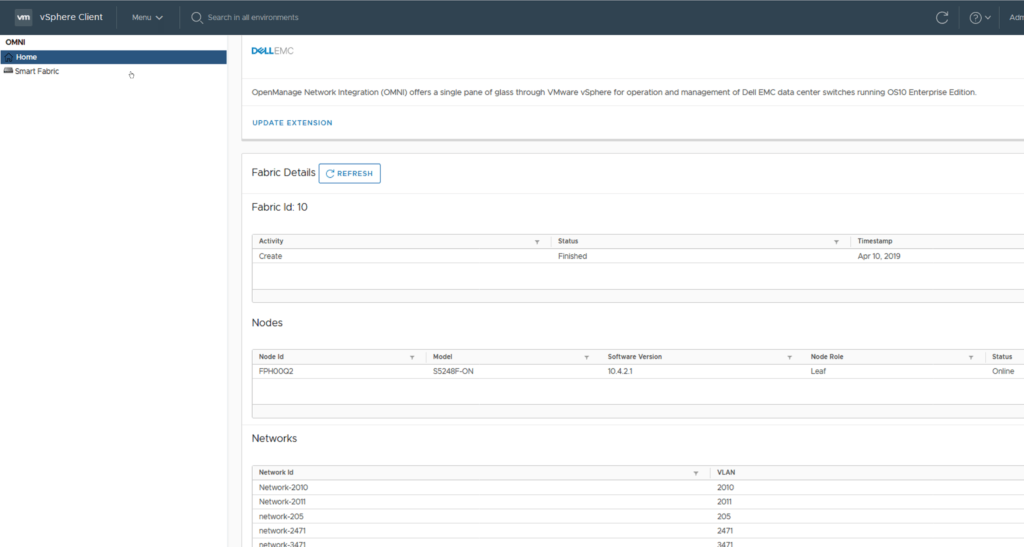
Click into the Omni dashboard.

The OMNI dashboard displays the current information on the VxRail SmartFabric enabled Switches. Here the Virtualization engineer has visibility to the OS10 version and the VLANS currently setup. That’s it? Not sure what NetAdmin Ned was expecting but there is no Network-Chaos-Now button!

Lets give Ned a use-case for SmartFabrics

You can describe a scenario to Ned that is common. It’s time to add a new host to the existing cluster. Normally you would ask Ned to prepare the host network ports. He would label them add all the required VLANS and to make sure the settings match with the existing host ports.

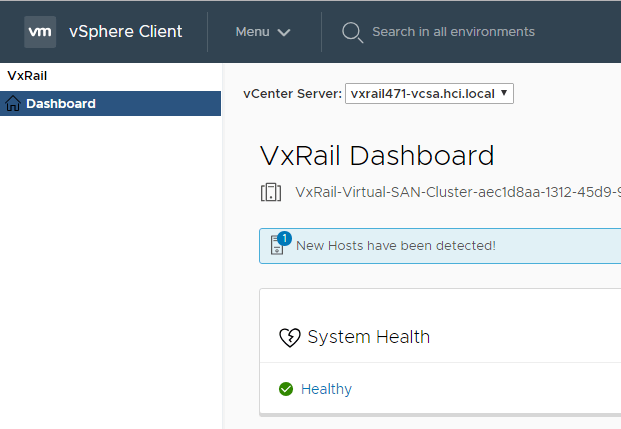
New Hosts detected with VxRail SmartFabric

With SmartFabrics no need to bother Ned

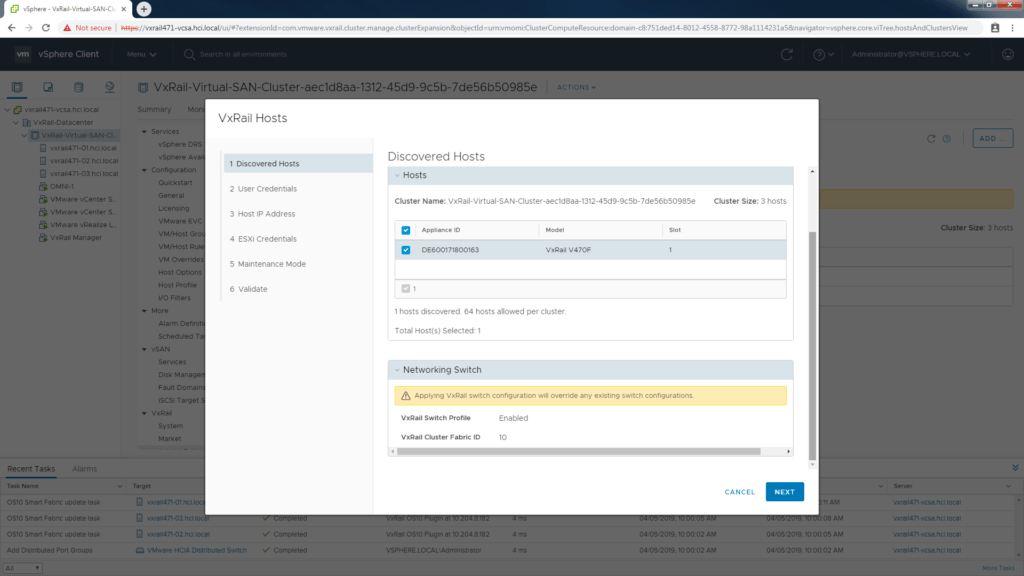
Adding hosts to HCI clusters are now done solely by the Virtualization Admin without any need to ask the NetAdmin to prepare host ports. It is all taken care of automatically by the VxRail SmartFabric services and the OMNI plugin.

Choose the discovered host.

Choose the discovered VxRail host

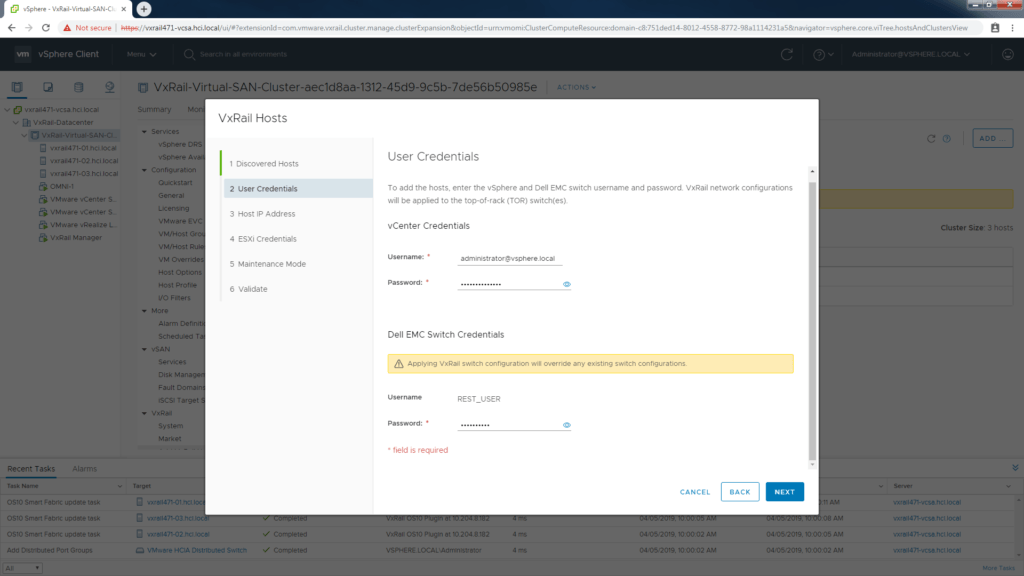
Enter vCenter credentials.

vCenter credentials

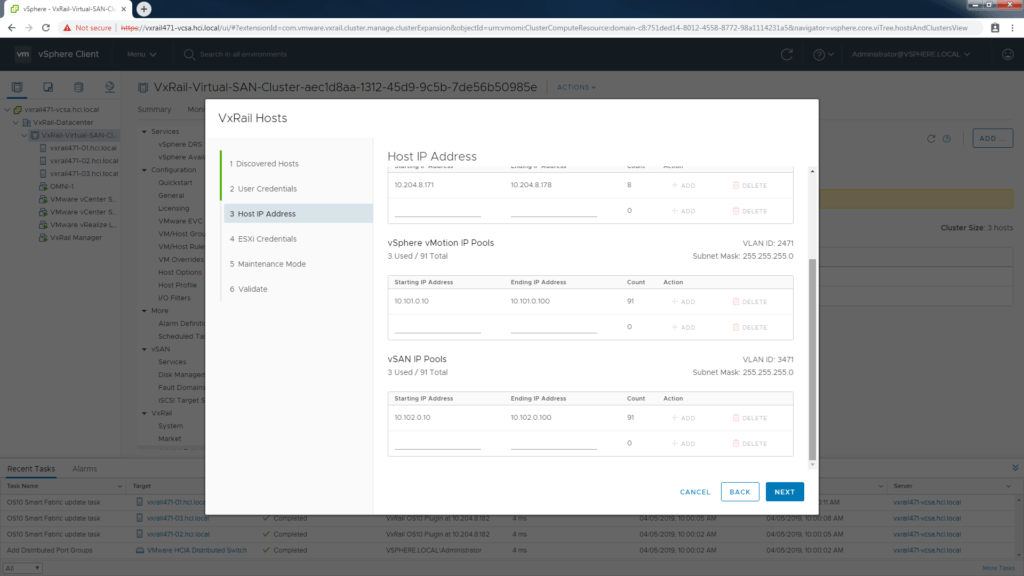
Add the Ip address information.

configure ip address

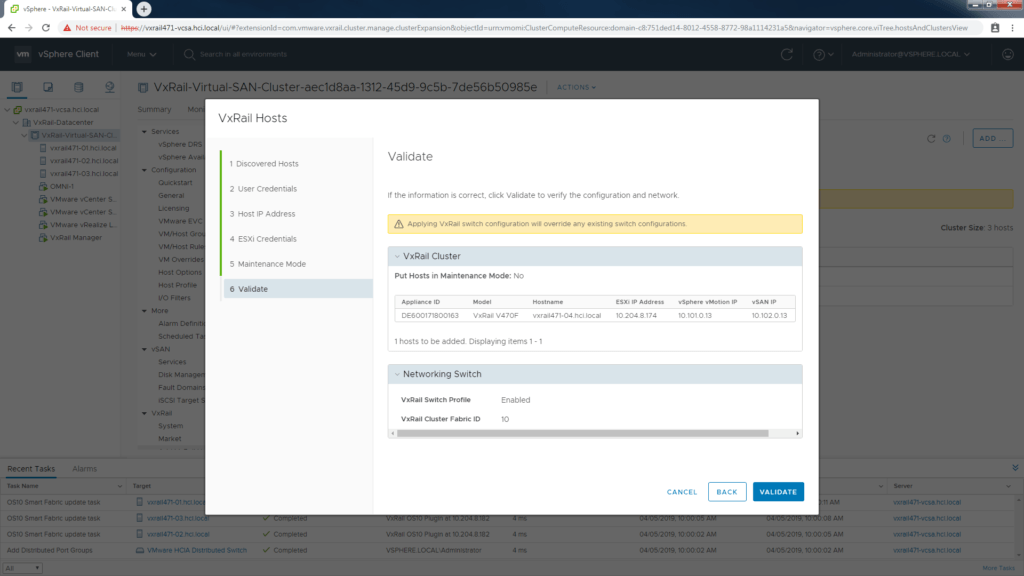
Run validation.

Validate the VxRail SmartFabric hosts

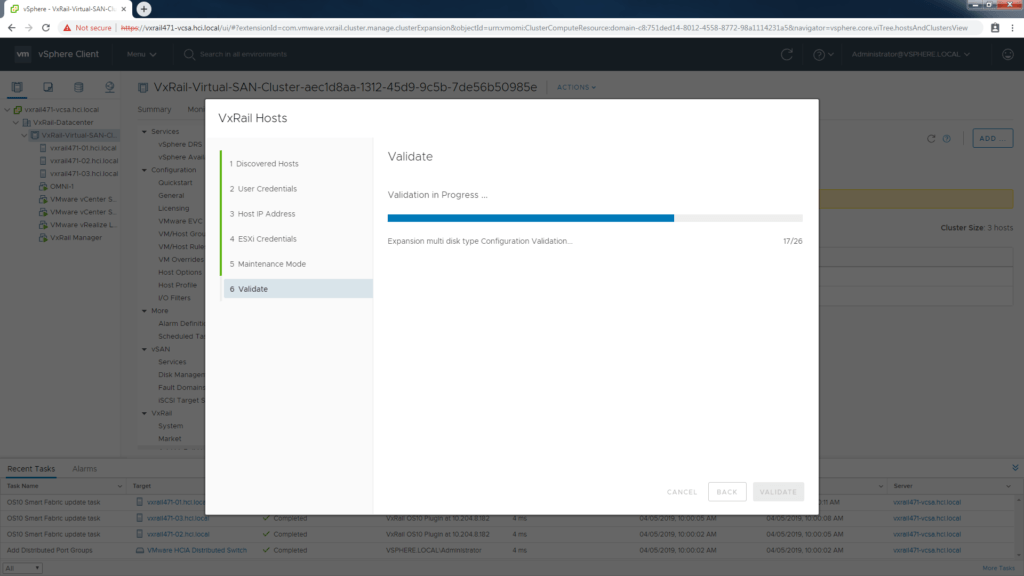
Validation must pass first.

validation can catch human errors

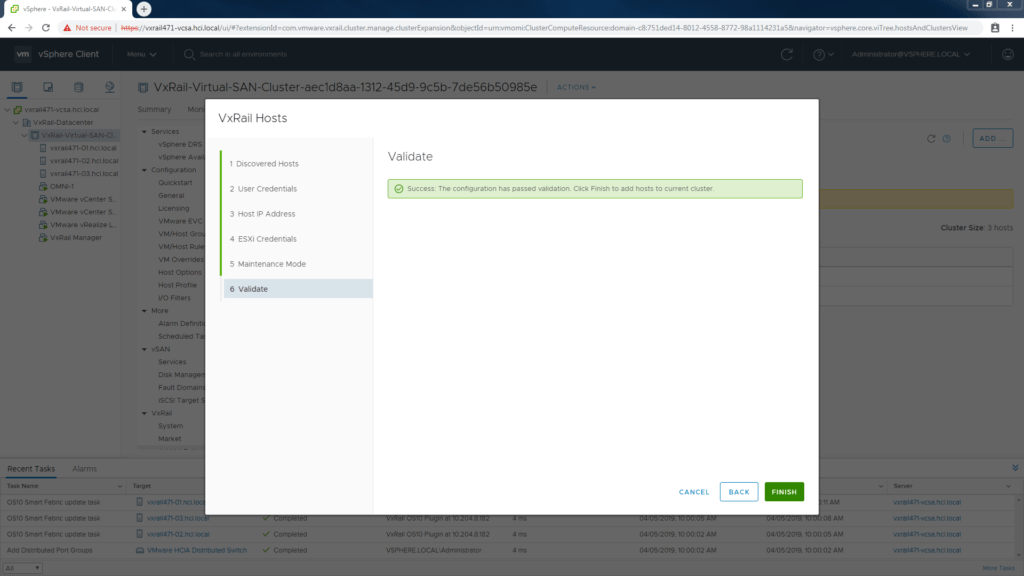
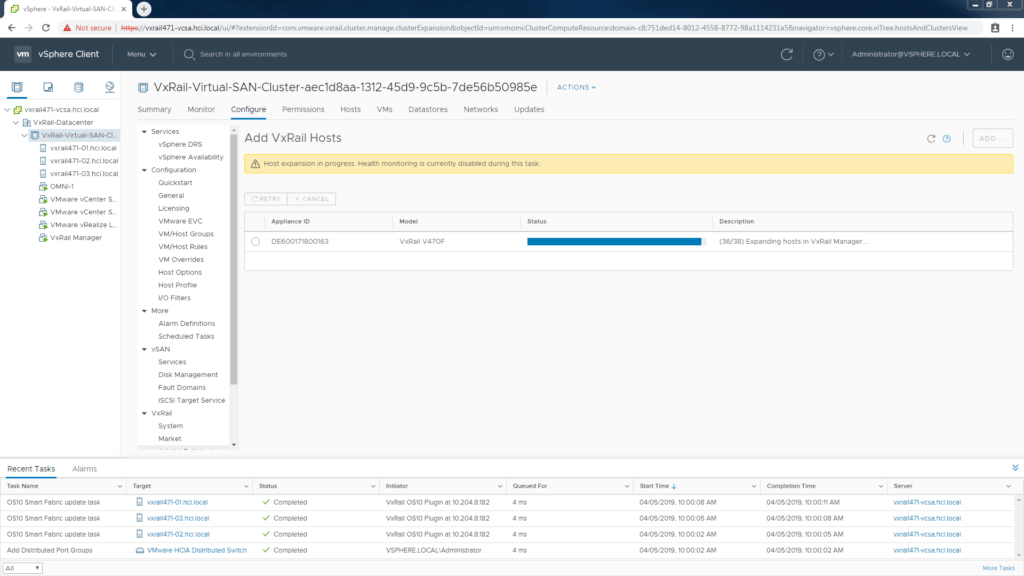
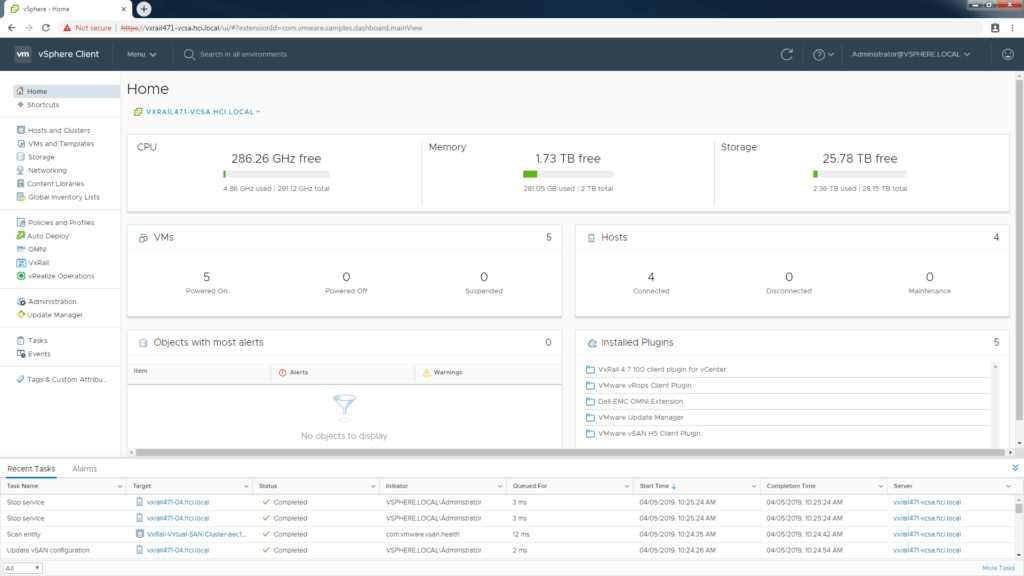
Once passed, host is added automatically.

new hosts added automatically to VxRail SmartFabric cluster

Watch quick Ned! Ports are configured.
hosts connected to VxRail SmartFabric are automatically configured

Hands free with VxRail SmartFabric services.

vSphere automation for VxRail SmartFabric

How to deploy the SmartFabric OMNI plugin in VMware vSphere Step 3

Step 1: Enable SmartFabric Services on the ToR Switch

Step 2: Deploy VxRail Cluster incl. ToR with VxRail Manager

Step 3: Deploy the SmartFabric OMNI plugin in VMware vSphere

EXTRA STEP Added Feb. 2020. See Below in yellow.

Next Blog : Step 4: Virtualization engineer controls Day 2 Ops for the Full Stack

Installing the SmartFabric OMNI plugin

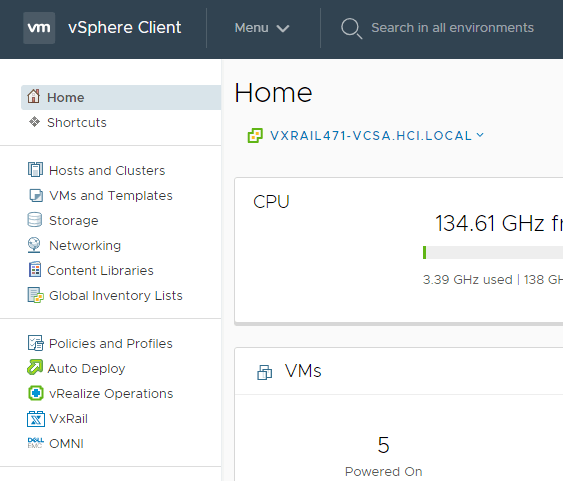
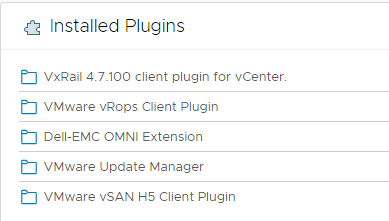
At this point we have already run the first two steps to get SmartFabric installed, our Switches have SmartFabric services enabled and the VxRail Manager Gui deployment has automatically configured the switch and disabled the CLI. Now we will add the Open Manage Network Integration or SmartFabric OMNI plugin to vSphere, giving the virtualization engineer full visibility and control of the dedicated HCI switch fabric.

Download the OMNI plugin VM

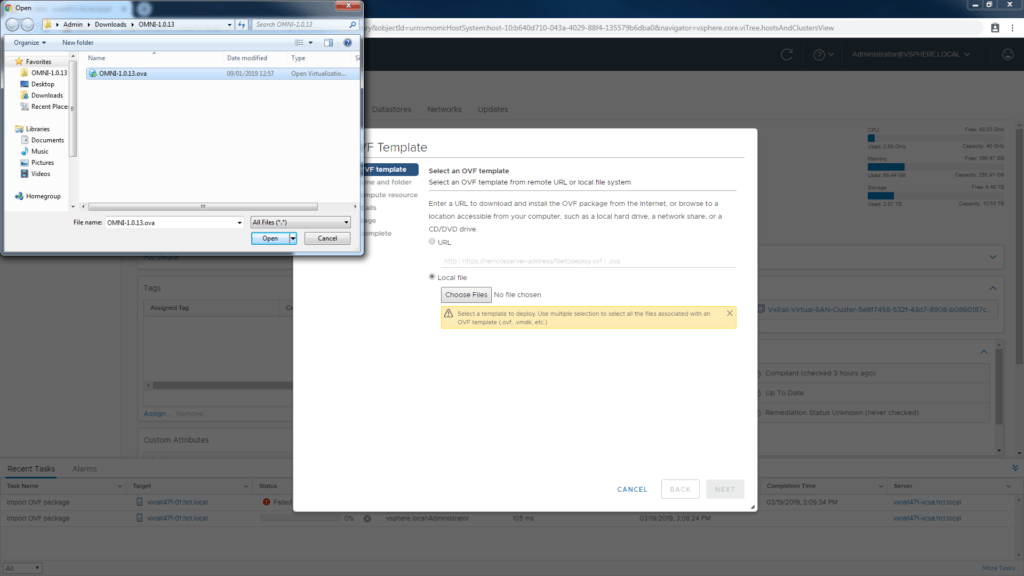
We begin by deploying the OMNI VM ova, which is available from VMware Solution Exchange here. It seems to bounce you now to the Dell Support site where you can get the latest version here. As of June 2019 the latest version is 1.1.18.

Deploy the OVA

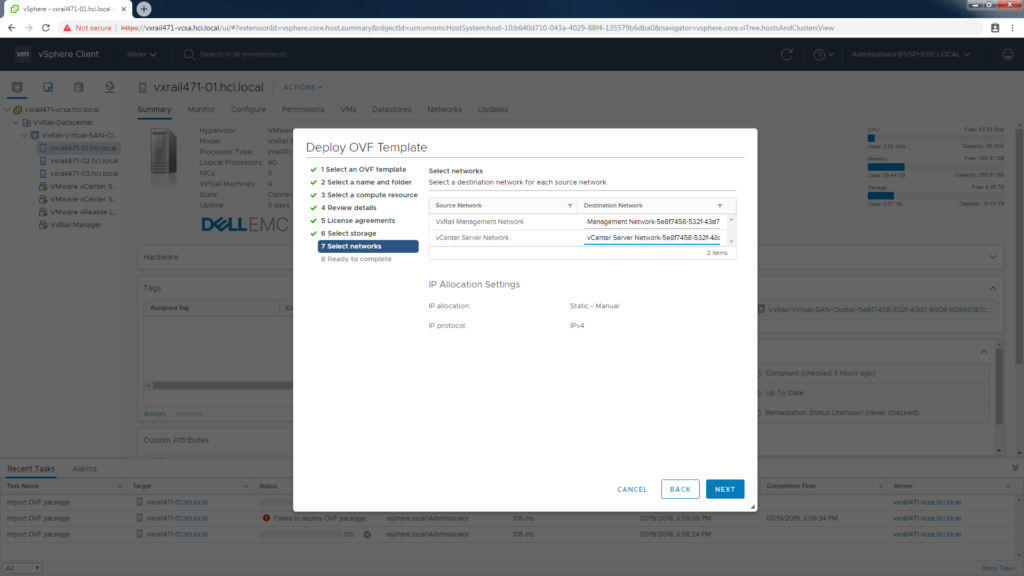
These steps are straightforward. Isn’t great that we can do the OVA deployment thru the HTML5 interface? Be sure to match up the source and destination networks correctly at Step 7 in the process. Later on we will configure an ipv4 address on vCenter network and enable ipv6 on the MGMT network.

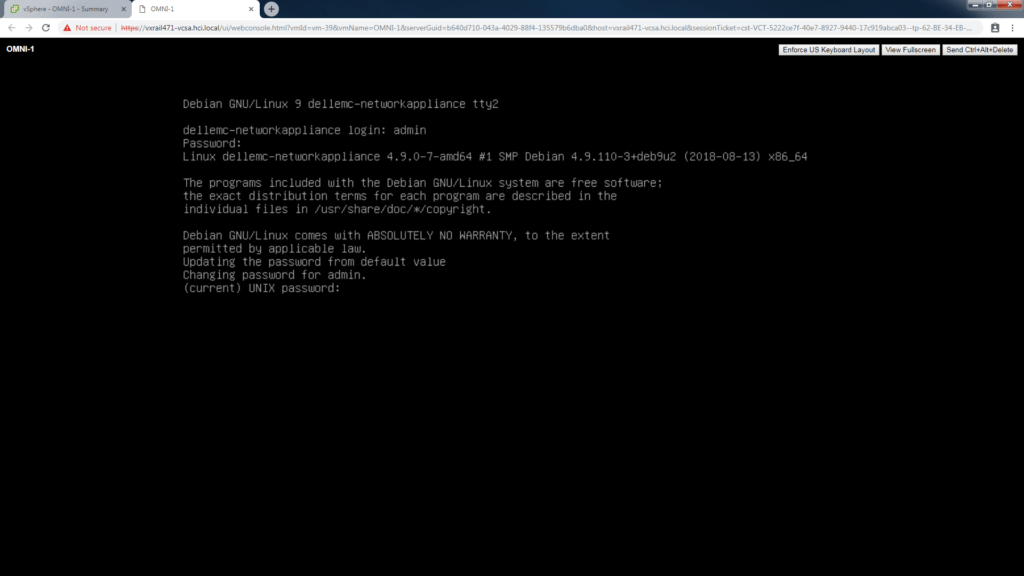
Power on the VM and connect to a console on the OMNI vm. You need to establish a password here for the admin user. The default username and default password is setup as admin / admin.

Configure the OMNI appliance

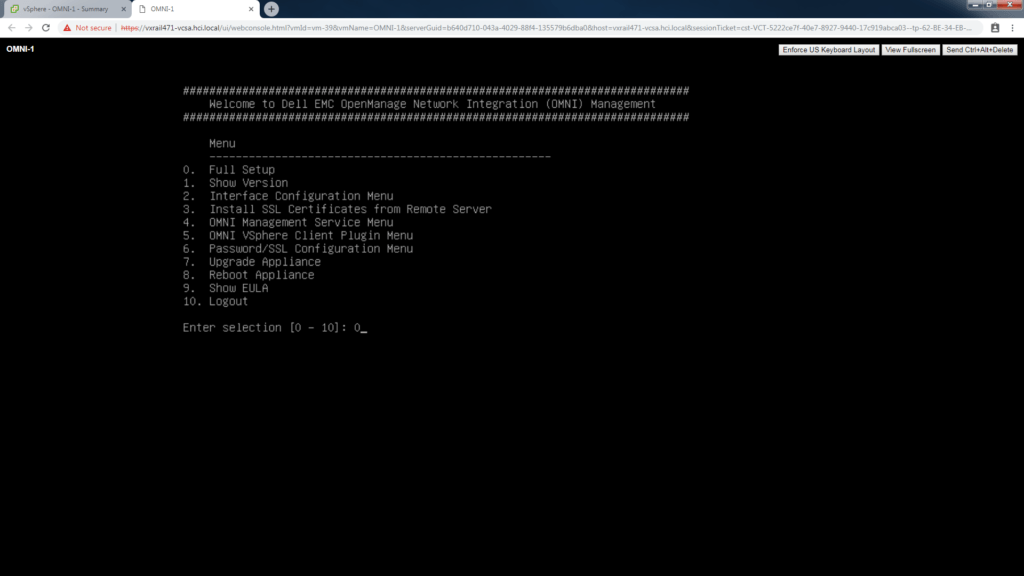
Since this is a first run deployment, we are going to select option “0. Full Setup” at the Menu. As you can see you can re-run and do other admin tasks later if required from this interface.

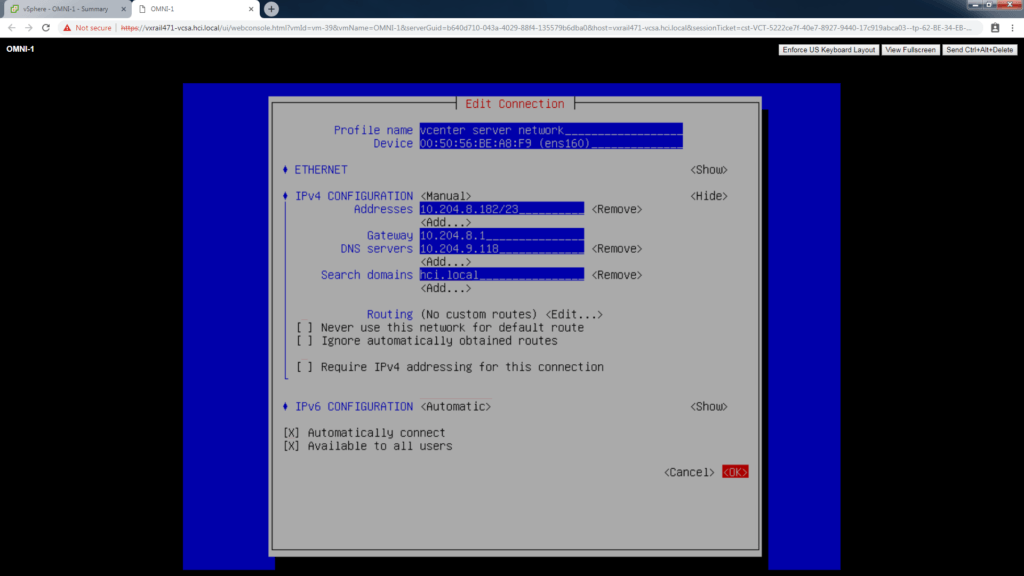
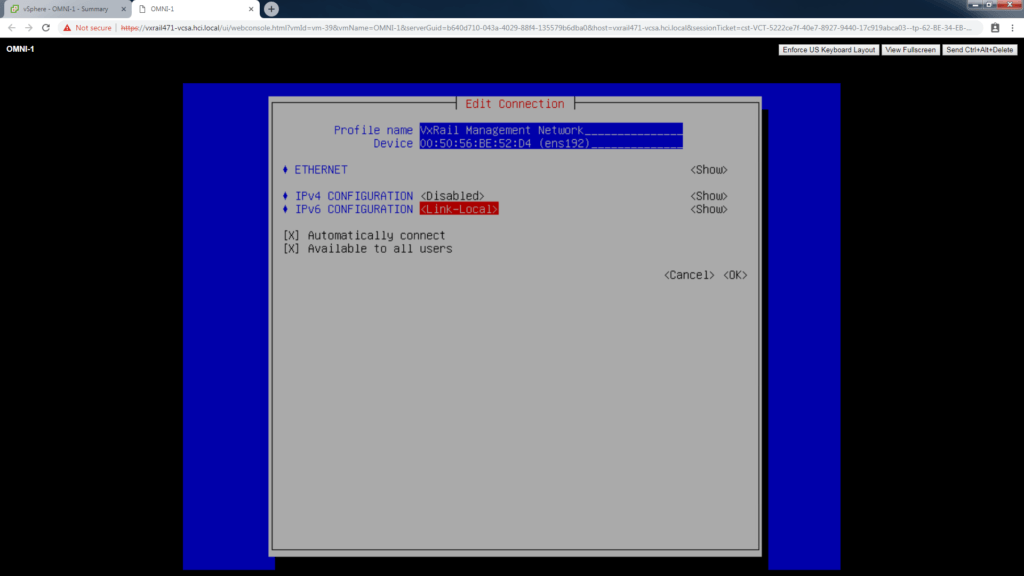
Before we active the first connection, we will setup the Profile name “vCenter Server Network” and assign a valid ipv4 address for the OMNI VM here.

The second connection is for ipv6 discovery on the VxRail Management network, no ipv4 address needed here, set to disabled.

Set IPv6 Config to “Link-Local”.

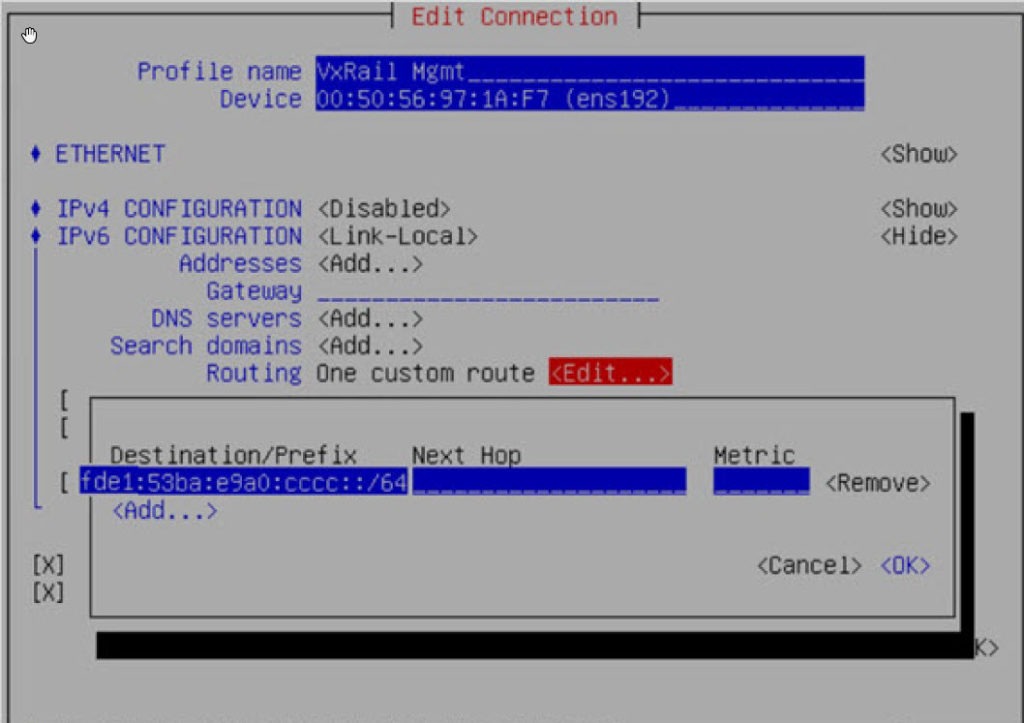
EXTRA STEP Added Feb. 2020.

Navigate to Routing and select Edit. Select Add.

For “Destination/Prefix” enter “fde1:53ba:e9a0:cccc::/64”.

Leave “Next Hop” empty, Leave”Metric” default of 0. Click OK

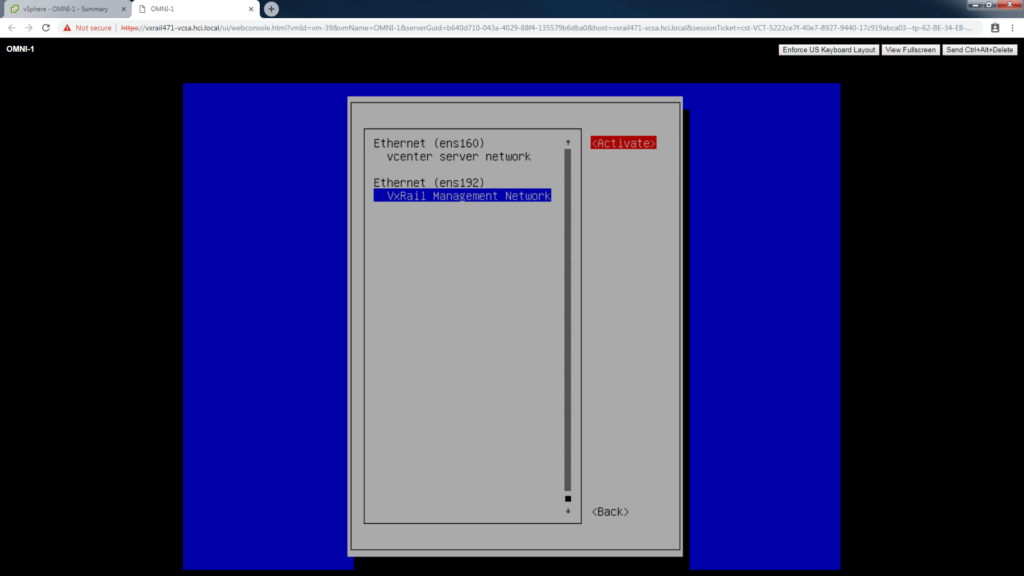
Be sure to activate both networks on the last screen.

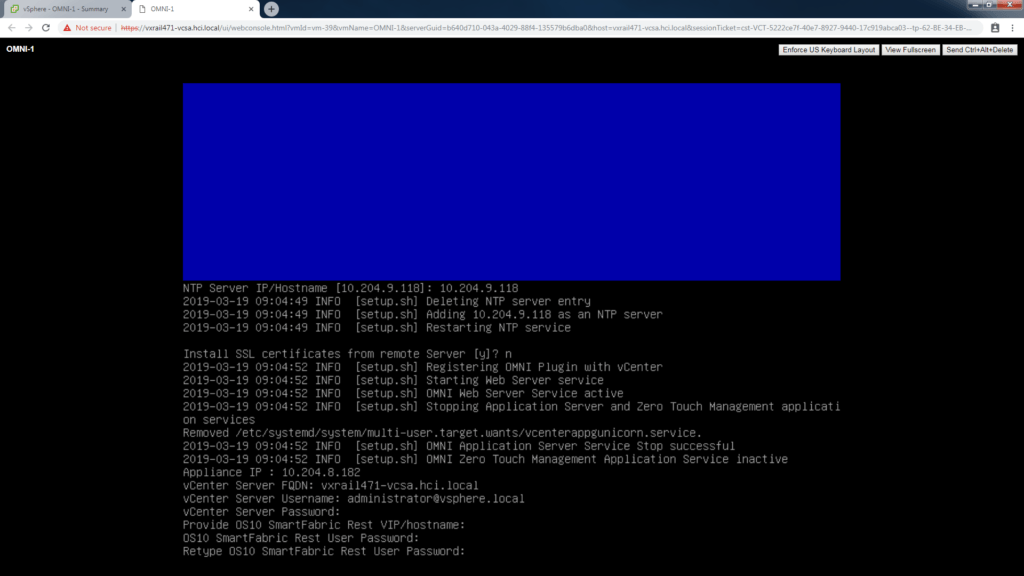
You will be prompted at the CLI again for NTP, SSL Cert, the appliance ip address, FQDN for VCSA, VC Username and Password, and finally the OMNI ip for REST and REST username and password.

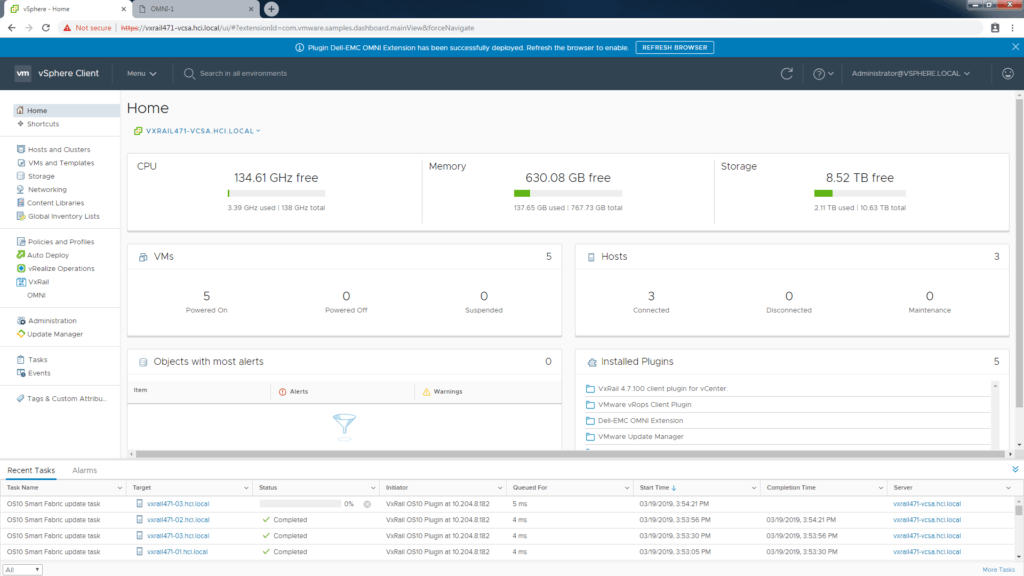
Log in and out of vSphere and the OMNI plugin will appear.

How to deploy SmartFabric for VxRail Step 2

Step 1: Enable SmartFabric Services on the ToR Switch

Step 2: Deploy SmartFabric VxRail Cluster incl. ToR with VxRail Manager

      • Connect VxRail nodes to deploy SmartFabric enabled Switches
      • Power on first 4 VxRail nodes
      • Deploy SmartFabric VxRail thru the VxRail Manager GUI
      • Sit Back and Relax while VxRail Manager fully automates Bring Up of the entire Hyperconverged Stack (Compute, Storage AND the Network!)

Next Blog: Step 3: Deploy the OMNI plugin in VMware vSphere

Step 4: Virtualization engineer controls Day 2 Ops for the Full Stack

Beginning the VxRail GUI deployment

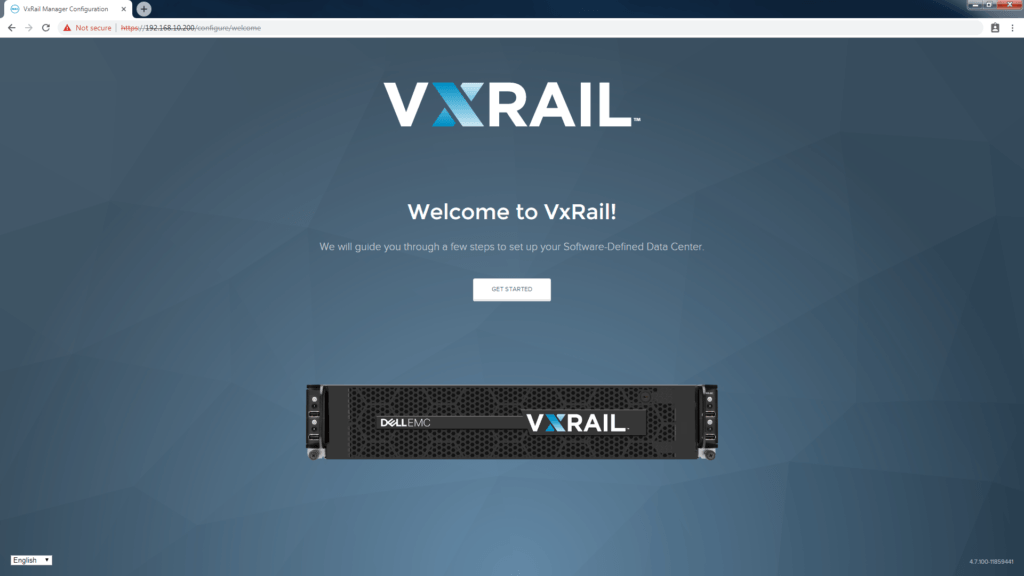
Connect the VxRail nodes to deploy SmartFabric enabled switches. Power on the nodes. Connect the laptop to the first port (port 1 only!) in the SFS switch. This is the “jump port” and will allow access to the default ip address [https://192.168.10.200] of the VxRail Manager VM. The VxRail Manager VM is already deployed in the appliances in factory.

VxRail Manager GUI install
The Vxrail Manager GUI interface used to deploy a new cluster.

VxRail will deploy SmartFabric now

Since VxRail version 4.7.100 there is now the ability for the GUI driven VxRail Manager install to detect Dell EMC SmartFabric enabled switches. This automates configuration of the switches during the full stack deployment.

deploy SmartFabric
Here we can see that VxRail Manager has detected a Smart Fabric is available to configure thru VLAN 3939 the discovery VLAN for nodes and switches.

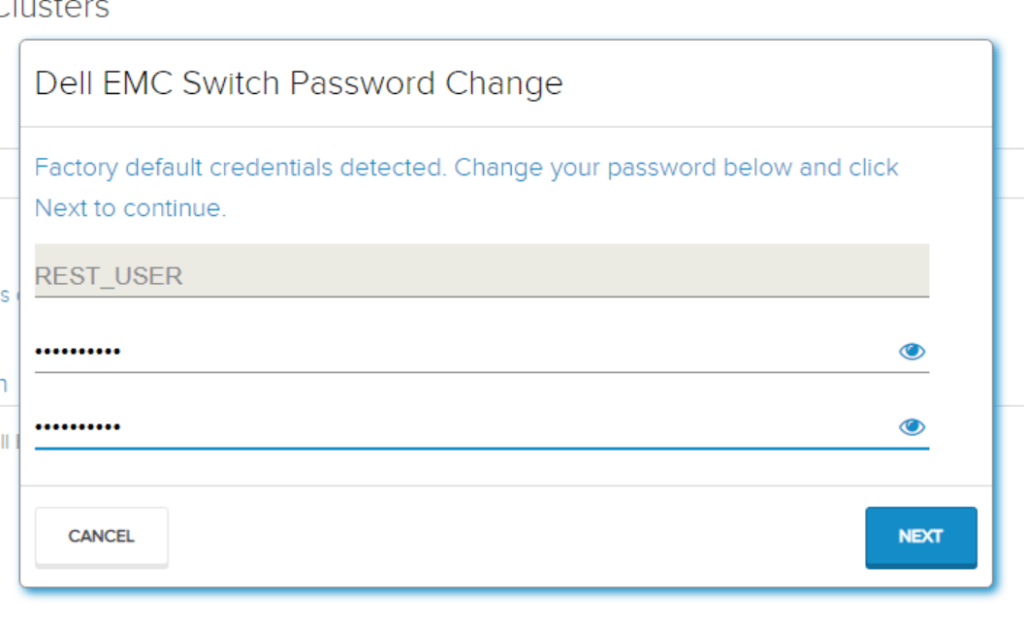
Setup the REST user to deploy SmartFabric

When the installer selects to deploy SmartFabric switches the next step will be to configure the Rest User account on the SFS enabled switch. If its a first run, a new password will be created. If you are setting up a second VxRail cluster into an existing SmartFabric, then the current password will be requested. The Rest User account will be documented in the Pre-Install Checklist by the installer.

Setting REST User password
The REST user account needs a password set.

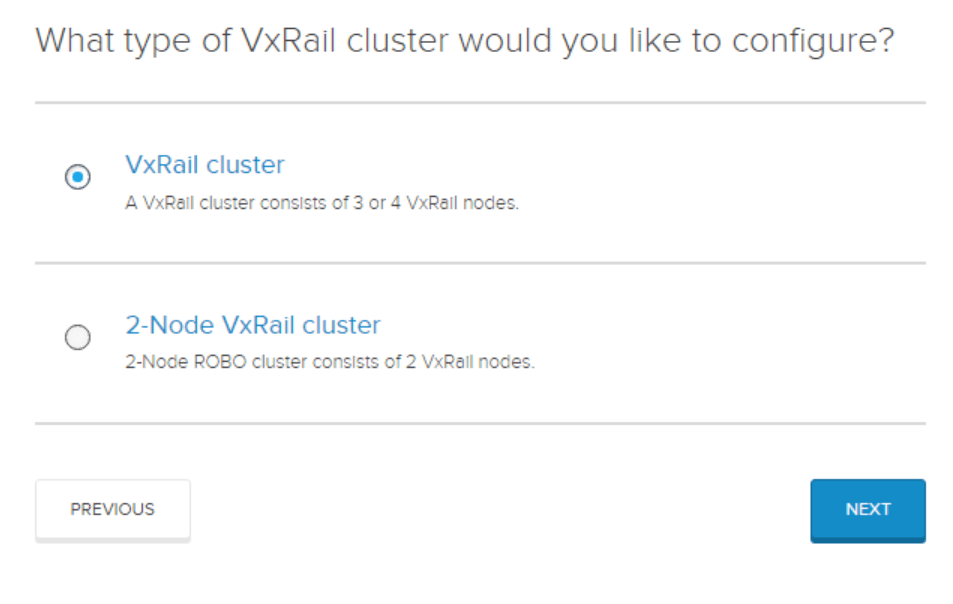
New option to choose 2-Node cluster

The ability to deploy 2-node clusters is now an option with VxRail 4.7 versions. The GUI install gives you a choice for 2-Node here. For all other VxRail deployments the default option is selected.

New 2 node VxRail option during GUI install
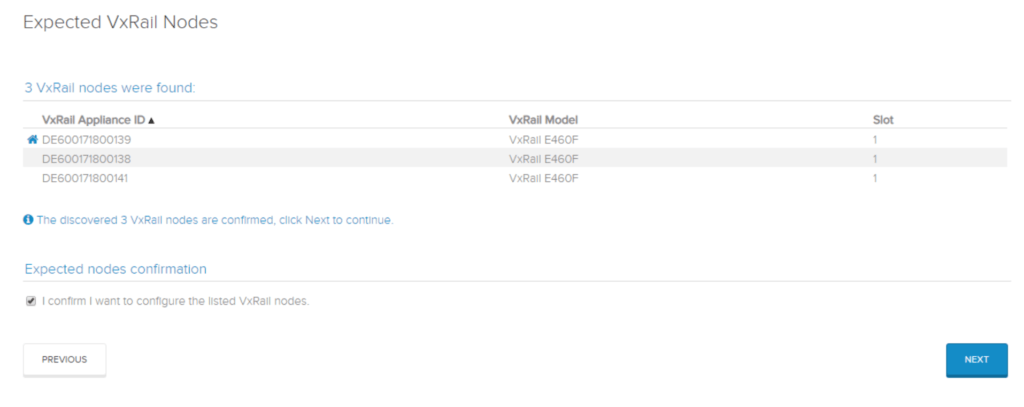
You need at least 3 or 4 nodes to start the Smart Fabric node setup.

The initial cluster deployment needs to be 3 or 4 nodes. Normally the node with lowest serial number wins the VxRail Manager election process. This is signified by the small “house” icon. If you don’t see all the powered on nodes, try a reboot of the missing node and wait. It should be detected by ipv6 multicast using the loudmouth service on the discovery VLAN 3939.

VxRail node discovery

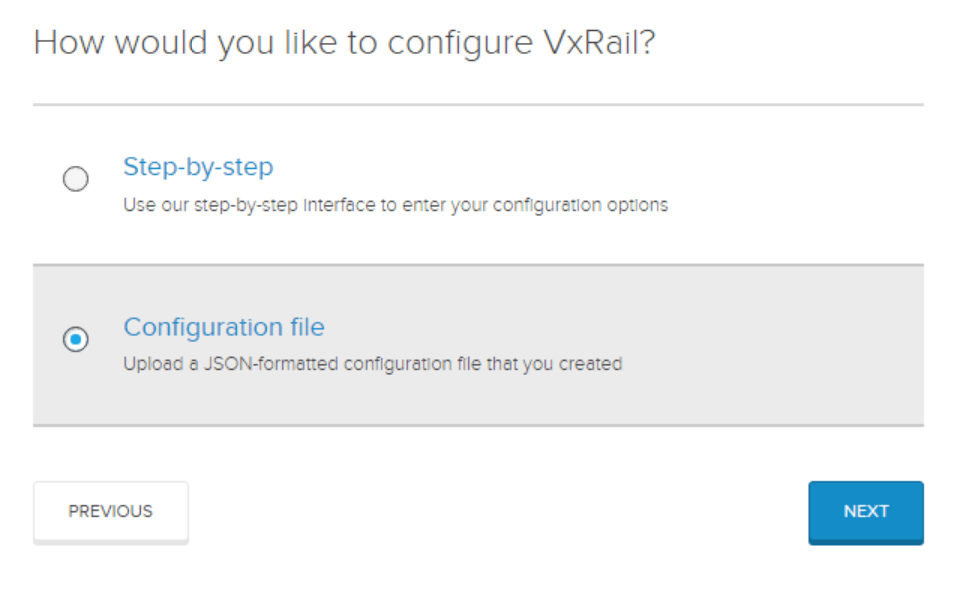
Automate the build with JSON

Remember we use the Pre-Install checklist is used to capture all the required information to make a VxRail deployment in a customer Datacenter go perfectly. It can also be used to generate a JSON file to help eliminate human error during the GUI setup.

using JSON file
Use the JSON file – its way quicker!
Here we have used the JSON file to populate all the fields in the GUI install of VxRail. You only need to verify that everything is correct and provide the passwords.

New external MGMT VLAN option

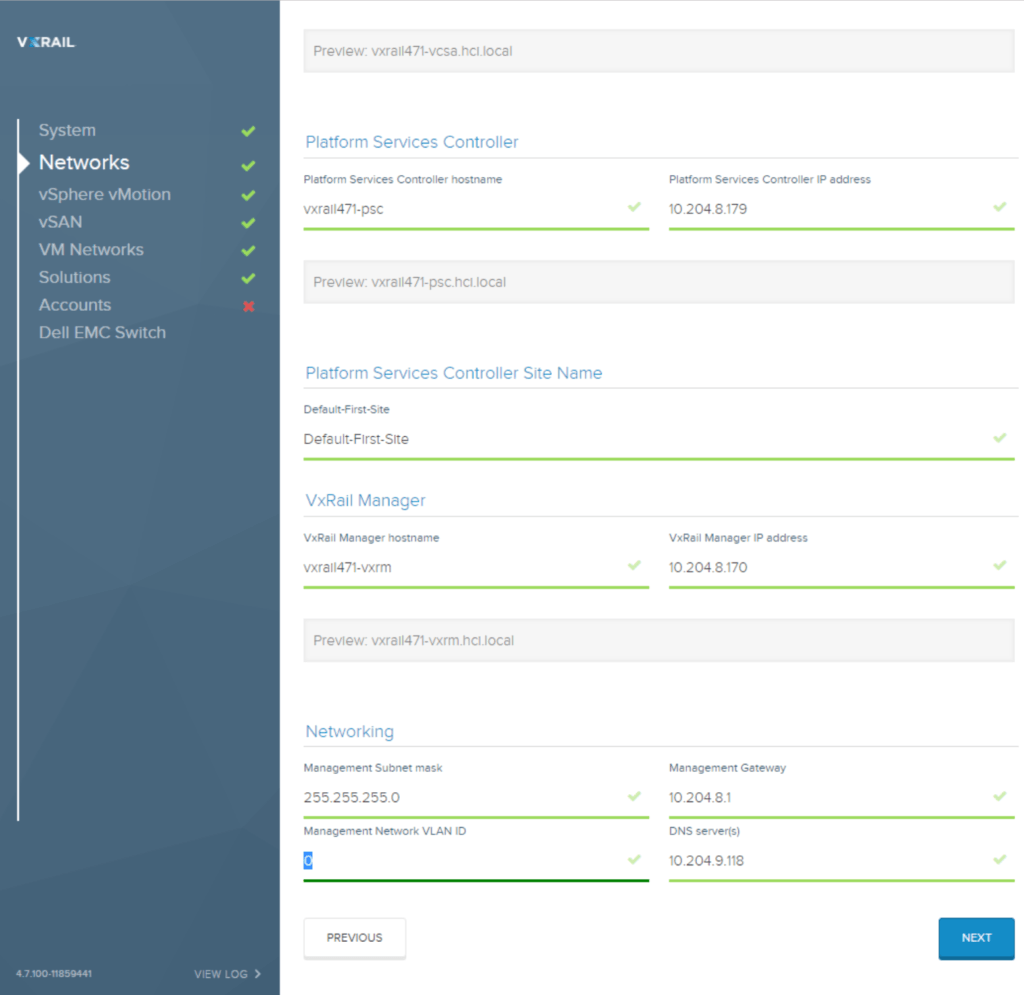
There is a new option during the VxRail 4.7 version of the install that asks for a Management VLAN ID. The default is 0 to allow for Native VLAN to be used, or you can specify a different public management VLAN here. It should be different to the internal management VLAN used to separate the cluster build. The Internal Management VLAN was the -m option set in Step 1. This is very easy with SmartFabric now, as the VxRail Manager will make the necessary port configuration changes on the SFS enabled switches.

Now you can specify a external Management VLAN during GUI install rather than Native VLAN.

VxRail Manager automates the Switch configuration

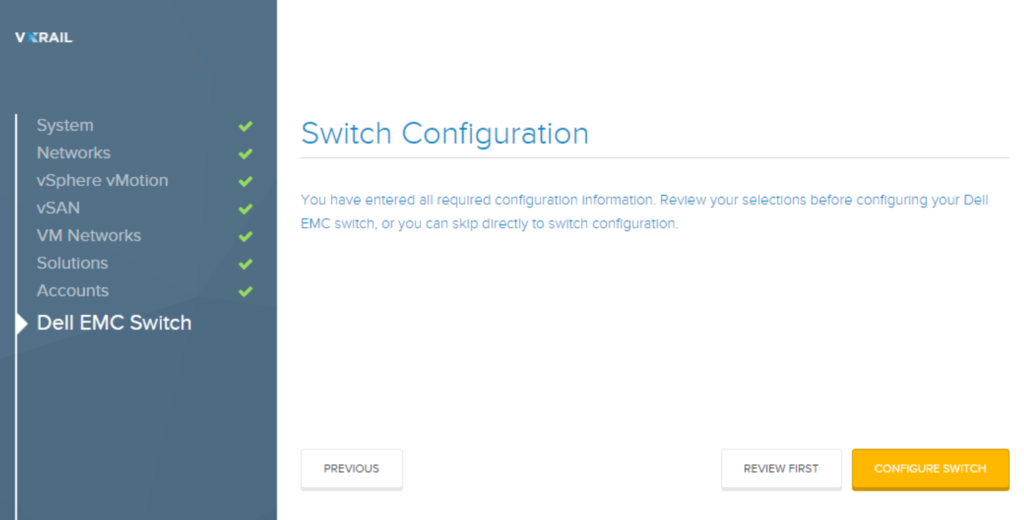
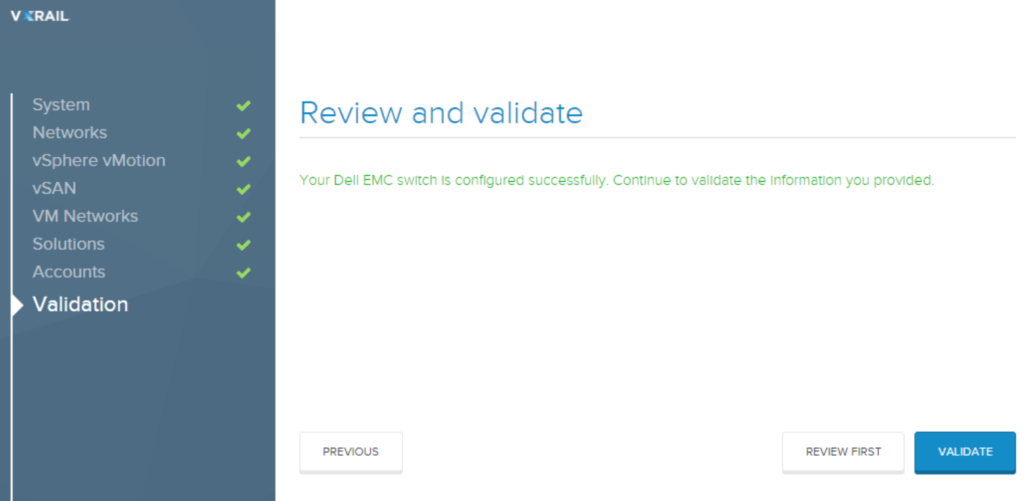
There is a new task at the end of the GUI install and just before validation. SmartFabric services will now configure all the required VLANS that were specified, including Management, vMotion, vSAN and VM traffic.

SmartFabric switch automation
SmartFabric is smart! See it does the Network Admin tasks now!
switch fully configured.
Switch fully configured.

Validation eliminates human error

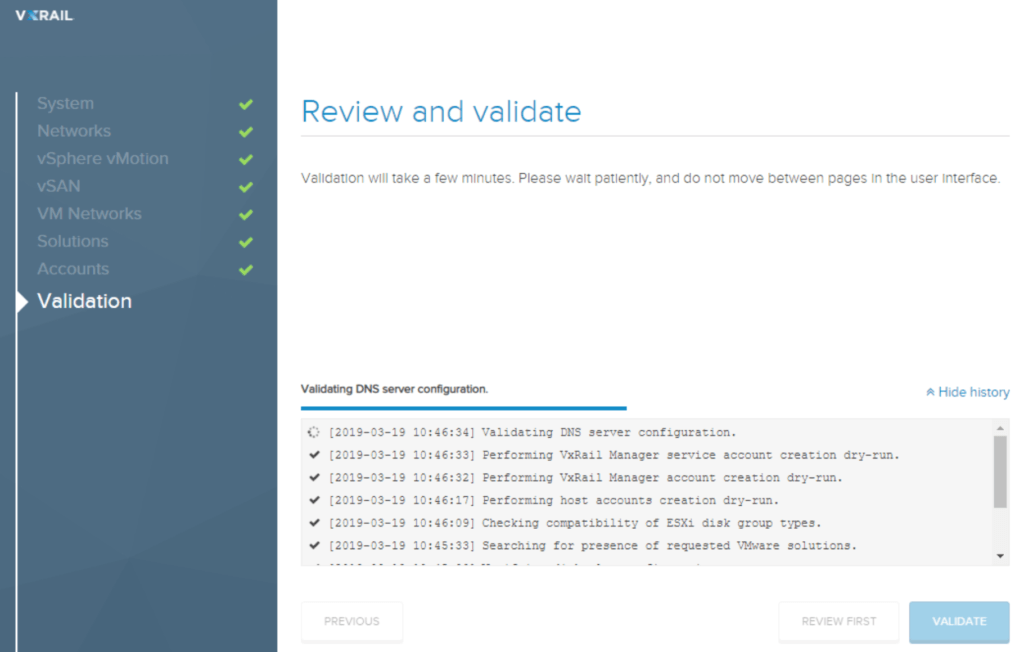
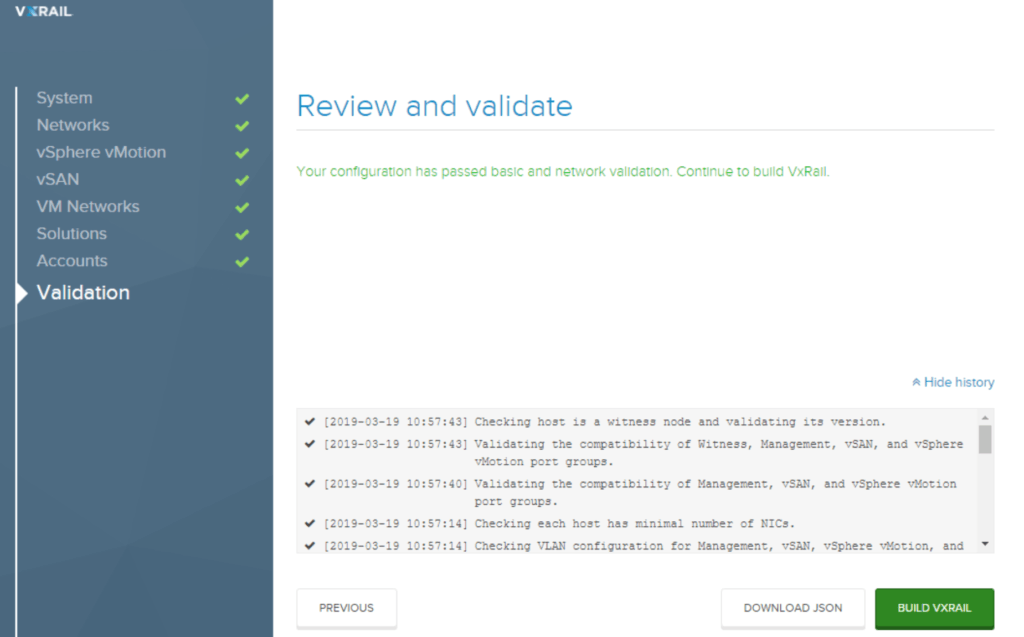
Trust but verify. Even with the SmartFabric automation, VxRail Manager still performs the important task of validating the install. Validation must pass before the actual deployment begins. This will capture anything amiss such as missing DNS entries, IP address conflicts , missing NTP. Basically anything that could prevent the build from completing successfully.

Validation
Trust but Verify = Validate!

Once validation has passed there is an opportunity to download a copy of the JSON file (useful if Step-By-Step was selected).

validation passed
Validation successful.

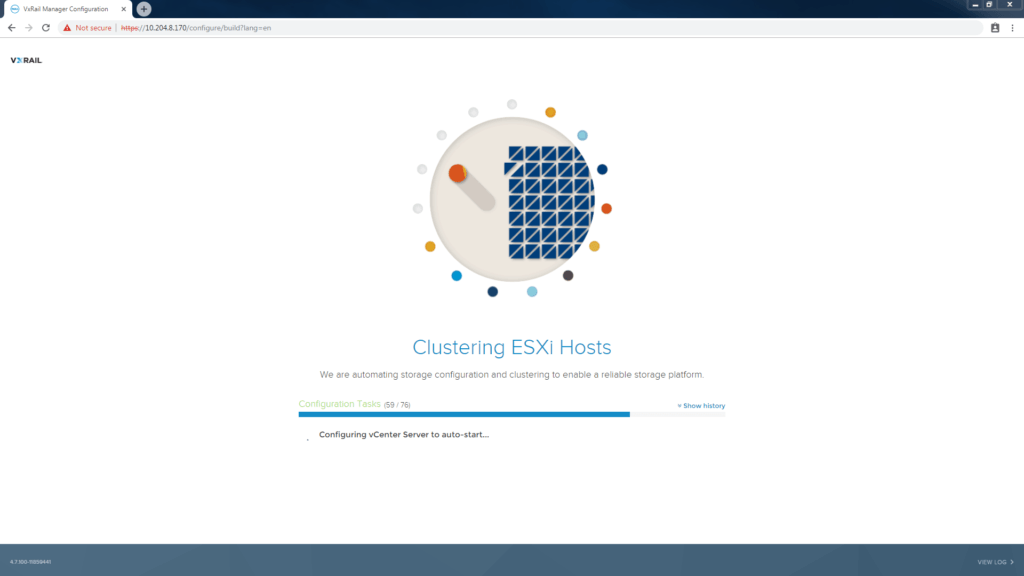
It is now time to kick-off the build. This is a fully automated process. There is zero value in manually setting up VSAN. By automating the process Dell EMC can be certain that every customer install of VxRail clusters are fully aligned to best practice. No snowflakes!

fully automated vSAN deployment
Go get a coffee – VxRail Manager will take care of the rest!
deploy SmartFabric
Hooray! The VxRail vSAN cluster is complete. Time to setup the OMNI plugin for day 2 operations of the SmartFabric.

How to enable SmartFabric for VxRail Step 1

I decided to document the steps I used to enable SmartFabric Services on VxRail.  These are partly notes for myself and Customer Solution Centre engineers that will likely need to showcase this capability very soon.  The demand for this solution is very high and the customers I have met are impressed by what is now possible (wait until you see the roadmap!). 

Note: This is not a guide for end user customers because a lot of what I write about is handled thru our automated deployment appliance; VxRail. A note of thanks to Allan Scott from New York CSC that helped with the first SFS deployment and documentation.

Step 1: Enable SmartFabric Services on the ToR Switch

  • Cabling the ToR Switches
  • Installing/Upgrading OS10 on Dell EMC Switch
  • Enable the VxRail Personality on OS10
  • Ready for Part2 – Deploying VxRail with Smart Fabric Services

Next Blog: Step 2: Deploy VxRail Cluster incl. ToR with VxRail Manager

Step 3: Deploy the SmartFabric OMNI plugin in VMware vSphere

Step 4: Virtualization engineer controls Day 2 Ops for the Full Stack


Getting Started :


How to enable SmartFabric Services on the ToRs

SmartFabric is supported on the 4100 series from Dell EMC. Current models are 10G – S4112 F/T, S4128 F/T or S4148 F/T  (25G coming soon). Sales can order these switches to be delivered from factory with OS10 and licenses already applied.

If you need the latest version of OS10 – get it here: force10networks.com , request login thru support page and download 10.4.1.x. Put OS10 .bin file and licence .xml file in a USB drive – insert USB drive into switch.

Cabling the TORs

First cable up ports 29 and 30 – 100GB cables for ISL (VLT).

Next cable up ports 25 and 26 – 100GB cables for Uplink.

Plug laptop into port 1 on switch.

Connect new VxRail appliances in any other port starting at port 2.

Installing or Upgrading OS10 on switch:

This is an optional step. The switches can be ordered and configured in factory, and so should arrive ready to begin at Step 2.

Connect the laptop to the serial port on one of the switches and start putty. Putty settings are 115200, 8, stop, none, none. I used a USB serial port so my COM port was COM3.

Powerup the serial connected switch – and break into ONIE mode by hitting ESC during bootup.

Choose “onie-discovery-stop” from the menu.

At prompt type: fdisk -l

USB Thumbdrive should be /dev/sdb1

mkdir /mnt/usb

mount -t vfat /dev/sdb1 /mnt/usb

Install OS10:

cd /mnt/usb

onie-nos-install /mnt/usb/XXXXXXXXXX.bin

Check IOS10 Version & Install License:

show version

show license status (skip next step if already installed)

license install usb://xxxxxxxx-NOSEnterprise-License.xml

Configure mgmt interface if required:

conf

int mgmt 1/1/1

no ip address dhcp

ip address 10.204.86.250/24

no shut

exit

management route 10.204.86.0/24 managementethernet

exit

Repeat these steps for the second ToR switch.

Optional step. Configure 40GB uplinks:

My showcase lab is using 40GB uplinks rather than 100GB so I needed to change the profile of the uplinks before applying the VxRail SFS personality. You can skip this step if you are using 100GB links.

OS10(config)# switch-port-profile 1/1 profile-2

Warning: Switch port profile will be applied only after a save and reload. All management port configurations will be retained but all other configurations will be wiped out after the reload.

OS10(config)# exit

OS10# write memory

OS10# reload

Enable the VxRail personality:

The SFS personality script is included in OS10. Once applied to each ToR switch, the switches will reboot with SmartFabric Mode enabled and you are now ready to perform a VxRail deployment from the VxRail Manager.

system bash

sudo sfs_enable_vxrail_personality.py -d 20 -a-m 2002

‘-d 20’ is a unique Domain ID that you assign to each cluster

‘-m 2002’ is a non-routed vlan used to do the initial build, local to the ToR switches only (Internal management network)

‘-a’ indicates that the port-channel on the upstream switches is configured with LACP

VxRail personality profile script options :


Domain -d <id> Required numeric value unique to data center (1 to 254) applied to ToR switch configuration settings Default: 1
Uplink -u <port,port> Override default 100Gb uplink ports Default: ports 25& 26
ISL -I <port,port> Override default 100Gb ISL ports Default: ports 29 & 30
Uplink tagging -t Whether external management VLAN is tagged or untagged when passed through uplinks. Default: untagged
Uplink LACP -a Whether LACP is active on uplink port channel (dynamic) or not (static). Default: static
Uplink breakout -b <2X50GE, 4X25GE, 4X10GE> Breakout 100Gb uplinks. Used to support connectivity to upstream switches without 100Gb ports
Management VLAN -m <VLAN> VxRail Cluster Build Network VLAN.
Default: 1

Validate Personality:

system bash

sudo sfs_validate_vxrail_personality.py

Links to useful guides that helped us document this build:

VxRail Fabric Automation SmartFabric Services User Guide

Dell EMC OpenManage Network Integration for VMware vCenter

How to Install Dell Networking FTOS on Dell Open Networking (ON) Switches


SmartFabric is Smart for VxRail HCI

My guide to enable SmartFabric on Dell EMC switches is here.

No time to read? Listen to an interview with Barry Coombs from ComputerWorld UK on SmartFabric.

Now with SmartFabric for @VxRail, Ned can still own the core, and leave the #HCI network problems to the Virtualization team. Click To Tweet

Is networking in HCI complex?

Back in October I asked the question, is HCI networking easy? I stand by my assertion that it is already pretty simple once you understand the converged design for HCI does not require separate physical fabrics. Once you setup your required VLANS and appropriate MTU and multicast for IPv6 you are 90% of the way done.  So if it’s so easy already, then why am I so excited about SmartFabric for VxRail appliances? Start up a conversation with Ned the network engineer about the automated deployment and simplified life-cycle management capabilities of SmartFabrics and you will get back a blank dull stare. “That’s just a python script” Ned the Network Admin will say, “Take your fancy sales patter down to the Virtualization guys, we don’t want your kind round here!”

Ned the NetAdmin says “You’ll never take my switches!”

It’s not easy to impress a NetAdmin

Ned has a point I suppose. The Network Admins job is to move packets reliably from one part of the network to the other, monitor the network for any problems, and to design and build future networks.  The last thing Ned needs is dealing with end users complaining about network problems caused by poorly designed applications (its never the networks fault!). This is actually the main selling point FOR the use of Smart Fabrics. Let me explain why.

Before you understand why SmartFabric for VxRail, you have to first understand the reason for choosing VxRail appliances in the first place.  I have written a few Blogs on this already here and here . In short it’s an engineered solution for vSAN that comes from Dell EMC fully validated and tested and automatically deployed and updated throughout its life-cycle.

VxRail appliances don’t require a Storage expert or Server guru and it even saves the Virtualization admin from having to spend countless hours reading design and deploy documentation. After deployment is done, day 2 simplified operations begins. As a result maintenance and updates and upgrades are made easy through a single bundle file that covers the entire stack (not just the software on top of somebody else’ hypervisor – and includes the hardware too.

Can SmartFabric simplify HCI?

The last part of the HCI architecture that needed simplification was the network, so Dell EMC has had its sites on Ned’s cubicle for a while now. If we are going to provide a fully automated deployment experience for our customers, it only makes sense to include the Top of Rack switches that are being used by VxRail appliances.  After all why would the network admin want to be responsible for those HCI host ports anyways? If something goes wrong in the vSAN stack, Ned doesn’t want to be dragged in to a War Room to defend last weekend’s network changes. Ned knows the changes the network team made at the weekend were to the core only.

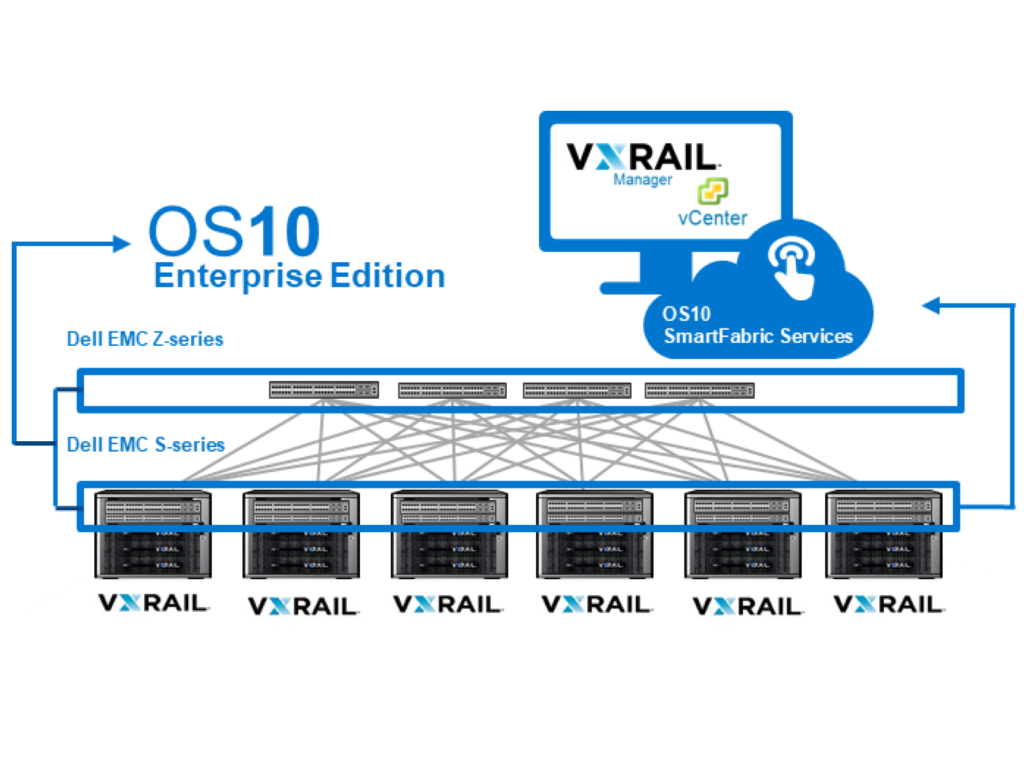
Now with Smart Fabric for VxRail, Ned can still own the core, and leave the HCI network problems to the Virtualization team.  SmartFabric will fully configure a redundant TOR fabric for VxRail, and continue to maintain the network for the life-cycle of the HCI solution. When it’s time to patch the HCI network, SmartFabric will provide a bundle file, and perform a non-disruptive rolling upgrade to the network TORs leaving Ned free to watch old episodes of Futurama. If the HCI team needs to expand their existing VxRail cluster by adding a new node, then SmartFabric will fully automate the changes to the TOR switch, no need for Ned to ever get involved.

Is BYO Networking still an Option?

One of the advantages for VxRail customers has been the fact that it is BYON (Bring Your Own Networking). This means that Dell EMC does not force you to take a switch from their portfolio into your datacenter. For some customers, this would be non-negotiable.  They may have standardized on a specific brand and prefer to stay that way, no matter what they run at the Storage or Virtualization layer.  VxRail networking is compatible with any modern low latent switch and the introduction of VxRail SmartFabric does NOT mean that the BYON option is no longer a choice. Hopefully the automation that comes with SmartFabric for VxRail will entice some customers to converge the entire HCI stack and give Ned some peace of mind.

Here is a great Blog on vSAN and Network Switch choices from @LostSignal on this Blog: https://blogs.vmware.com/virtualblocks/2019/03/21/designing-vsan-networks-2019-update/

Update! This week I will be meeting Hasan Mansur at the Limerick Customer Solution Center who writes a great Dell EMC networking blog at https://hasanmansur.com/ . Hasan has written two great articles there about SmartFabric Services. Please check it out Part 1 here and Part 2 here.

Is HCI networking easy?

Even though hyper-converged solutions have been  one of the hottest trends in the Datacenter since virtualization, you will still meet traditional architects that are seeing this technology for the first time.  Many times the customer will come to the conversation with just the virtualization lead,  sometimes they will bring the Storage or Compute team, but often they will forget to tell the Networking team any of their plans (no wonder the network engineer can be so grumpy).  This can prove problematic for a networking team that is not familiar with a few of the basic HCI requirements. Continue reading “Is HCI networking easy?”

error

Enjoy this blog? Please spread the word :)